

Fit Pregnancy, Healing Diastasis Recti, C-Section Wokouts, & Your Body After Baby
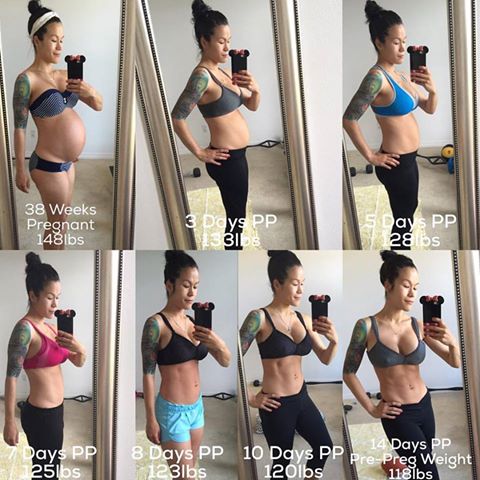
I wanted to stay fit throughout my pregnancy not only for myself, but because I owed it to my growing baby. So, I worked out for 5 days a week for an hour with 30 minutes of focus being on cardio and the other 30 minutes being on lifting weights. By keeping up this routine, my muscles stayed intact and as soon as I delivered, muscle memory took over and my body remembered exactly how it used to look like. Amazing how our bodies work, right?
Most of you already know that I used my own prenatal workout program to stay fit throughout my pregnancy which you can view here. However, I want to share with you a few important things that helped me along the way to getting my body back.
Here are some of my key tips:

-
- Breastfeed. If you are able, definitely breastfeed. Some women say that breastfeeding made them hold onto extra pounds, but for me it completely burned everything off. A lot of times when you are unable to lose weight while breastfeeding, it is always because you are eating too much or your diet is not clean. If you exclusively breastfeed, you could burn up to 500 calories per day! Need help with breastfeeding? Check out my free ultimate breastfeeding guide!
- Workout 5 days per week for 30 minutes. 30 minutes a day is all that it takes for the average person to maintain a healthy weight, but most people will not even do that. I did not grab this number out of thin air either-this is the national recommendation for physical activity for adults! Weights and cardio go hand in hand, but if you must do one, do cardio so that you can reap the cardiovascular health benefits while burning extra calories. I am personally doing my Strong Body Guide workout plan which has helped snap me back into shape quicker than ever.
- Wear a postpartum girdle. I strapped my Belly Bandit Postpartum Girdle on right after delivering both of my kiddos and it not only shrunk my tummy to a size smaller than pre-pregnancy, but it also got rid of my hips and love handles, too. See why I wore my girdle for the second time around. Use code SIA15 for 15% off ALL Belly Bandit goodies.
- Drink water. Water makes the world go round! When it comes to losing the baby weight, it’s no different. Aim for at least half of your body weight in ounces of water and drink a glass prior to each snack and meal. You will not only look better, but you will feel the difference, too. Here’s a free 30 day water challenge to help get you there!
- Take a multi-vitamin & fish oil. A good multi-vitamin can keep your metabolism healthy and maintain your energy levels so you will actually feel like working out. I also take a fish oil pill daily to help promote fat loss and boost my metabolism. I am usingMRM supplements because they are safe for pregnant and breastfeeding mommas! Feel free to try them out with my discount code SIA at checkout.
- Eat lean protein at every meal. It is not secret that protein keeps you fuller for a longer period of time so why not aim to eat it at each meal?
- No-no foods: refined breads, pastas, candy, sodas, and sugar. Seems like a lot of no-no’s right? If you need help or a plan to get you on the road to healthier eating, check out my Eat Clean Get Lean 4 week meal plan! It is super easy to follow, the recipes taste great (toddler approved!), and comes with weekly grocery lists.
- Fill your half your plate with fresh veggies. Aim to eat veggies of all colors to reap the antioxidant benefits. Also, vegetables are super low in calories which allows you to eat until your heart’s content. So fill em up!
- Find your motivation and never give up. Possibly the most important tip of all. If you do not find what motivates you to keep going, you won’t go anywhere. Don’t give up and keep a positive attitude.
- Go for a stroller walk after dinner. Every night after dinner, my husband and I like to take the kids out for a stroller walk. It is such a nice way to wind down before bedtime and we also get to bond and talk. It does not feel like a workout, but it is just a little something extra to keep you on track.
I have had so many ladies ask me about Diastasis Recti. While I personally did not experience this, I have worked with many clients who have.
First of, what is it like to have DA? Think of your ab muscles being held together by a zipper. When you have Diastasis Recti the zipper splits in the middle and the two sides are separated.
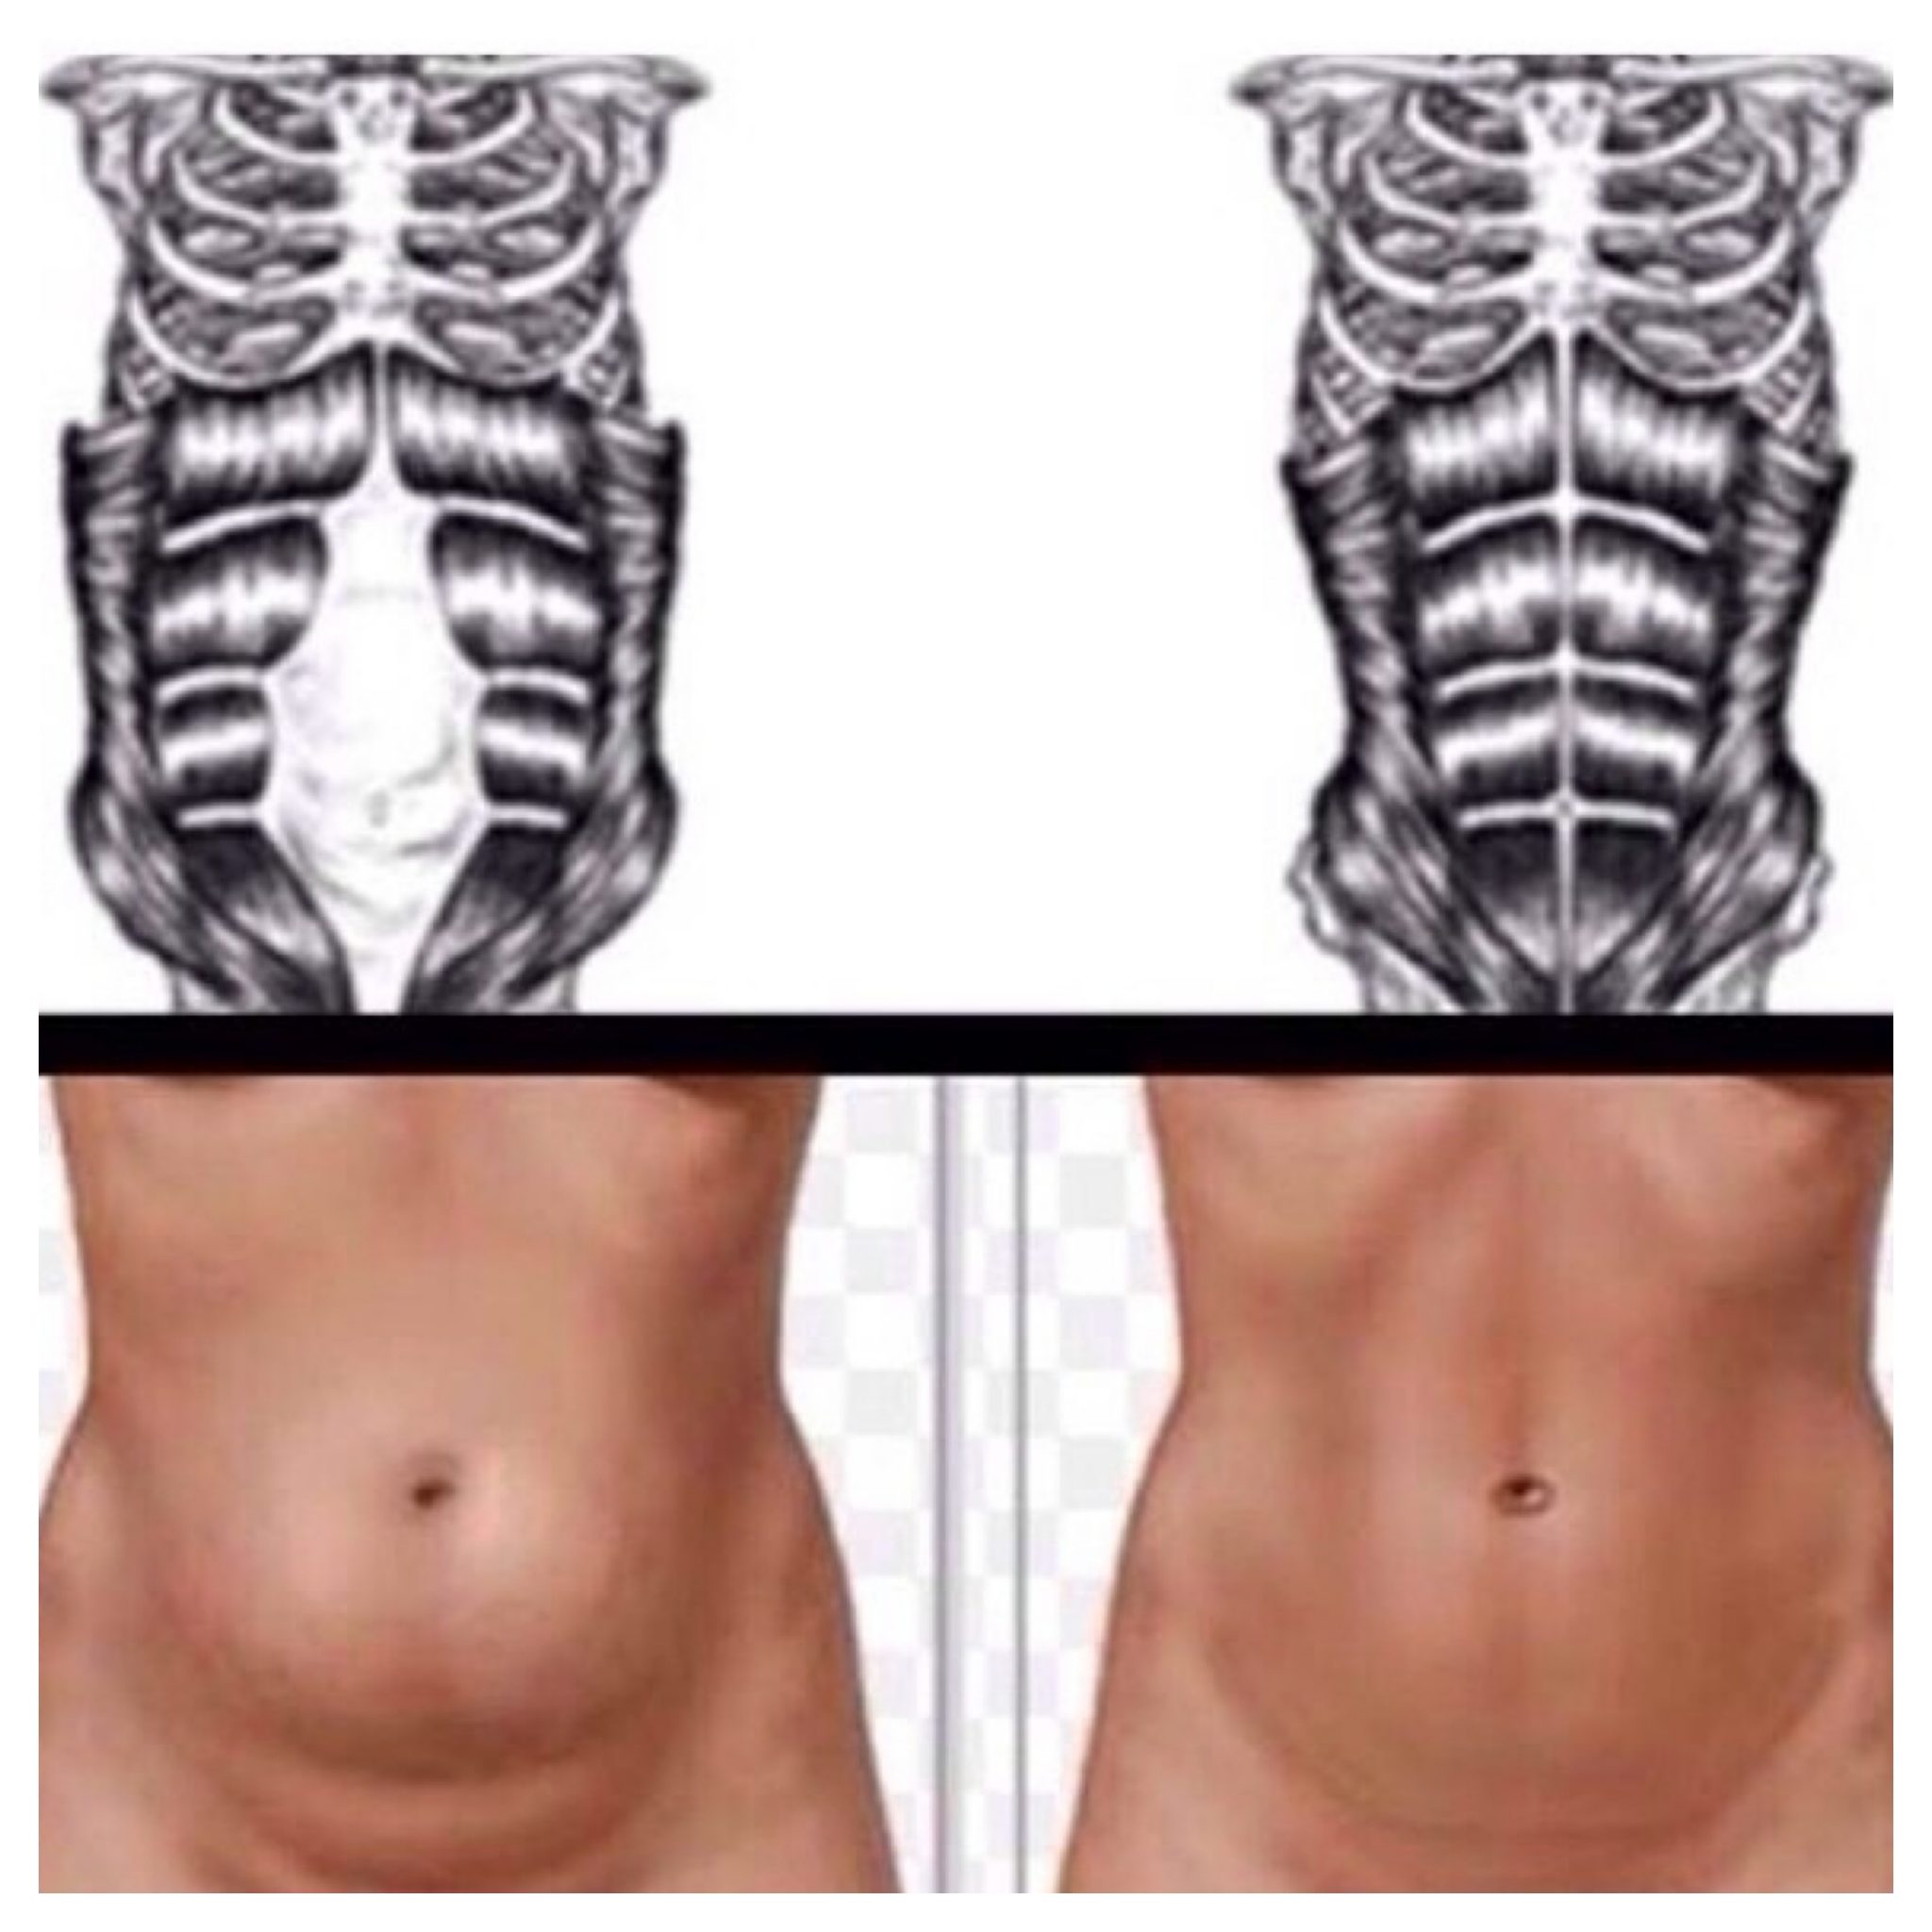
What are the signs of DA?
- A doming or buldging right around the belly button.
- A gap of two finger widths or more.
Please keep in mind that the gap may run anywhere down your linea alba or abdominal midline.
Who’s prone to DA?
- Overweight individuals carrying most of their weight in their abdomen.
- Those who perform exercises incorrectly or with bad posture.
- Women who are pregnant.
- Women who gain more than the recommended amount of weight during pregnancy.
- Women with multiple pregnancies or whose pregnancies are spaced closer together.
- Women who are pregnant with more than one fetus at once (twins, triplets, etc).
- Women over the age of 35.
How do I know if I have DA?

This simple self-test will help you determine if you have diastasis recti:
- Lie on your back with your knees bent upward, as if you are in the starting position for a crunch exercise.
- Place your fingers right above your belly button.
- Raise your head and shoulders off floor as if you are performing a crunch exercise.
- If you can feel a gap or see a buldging, then you could have a diastasis.
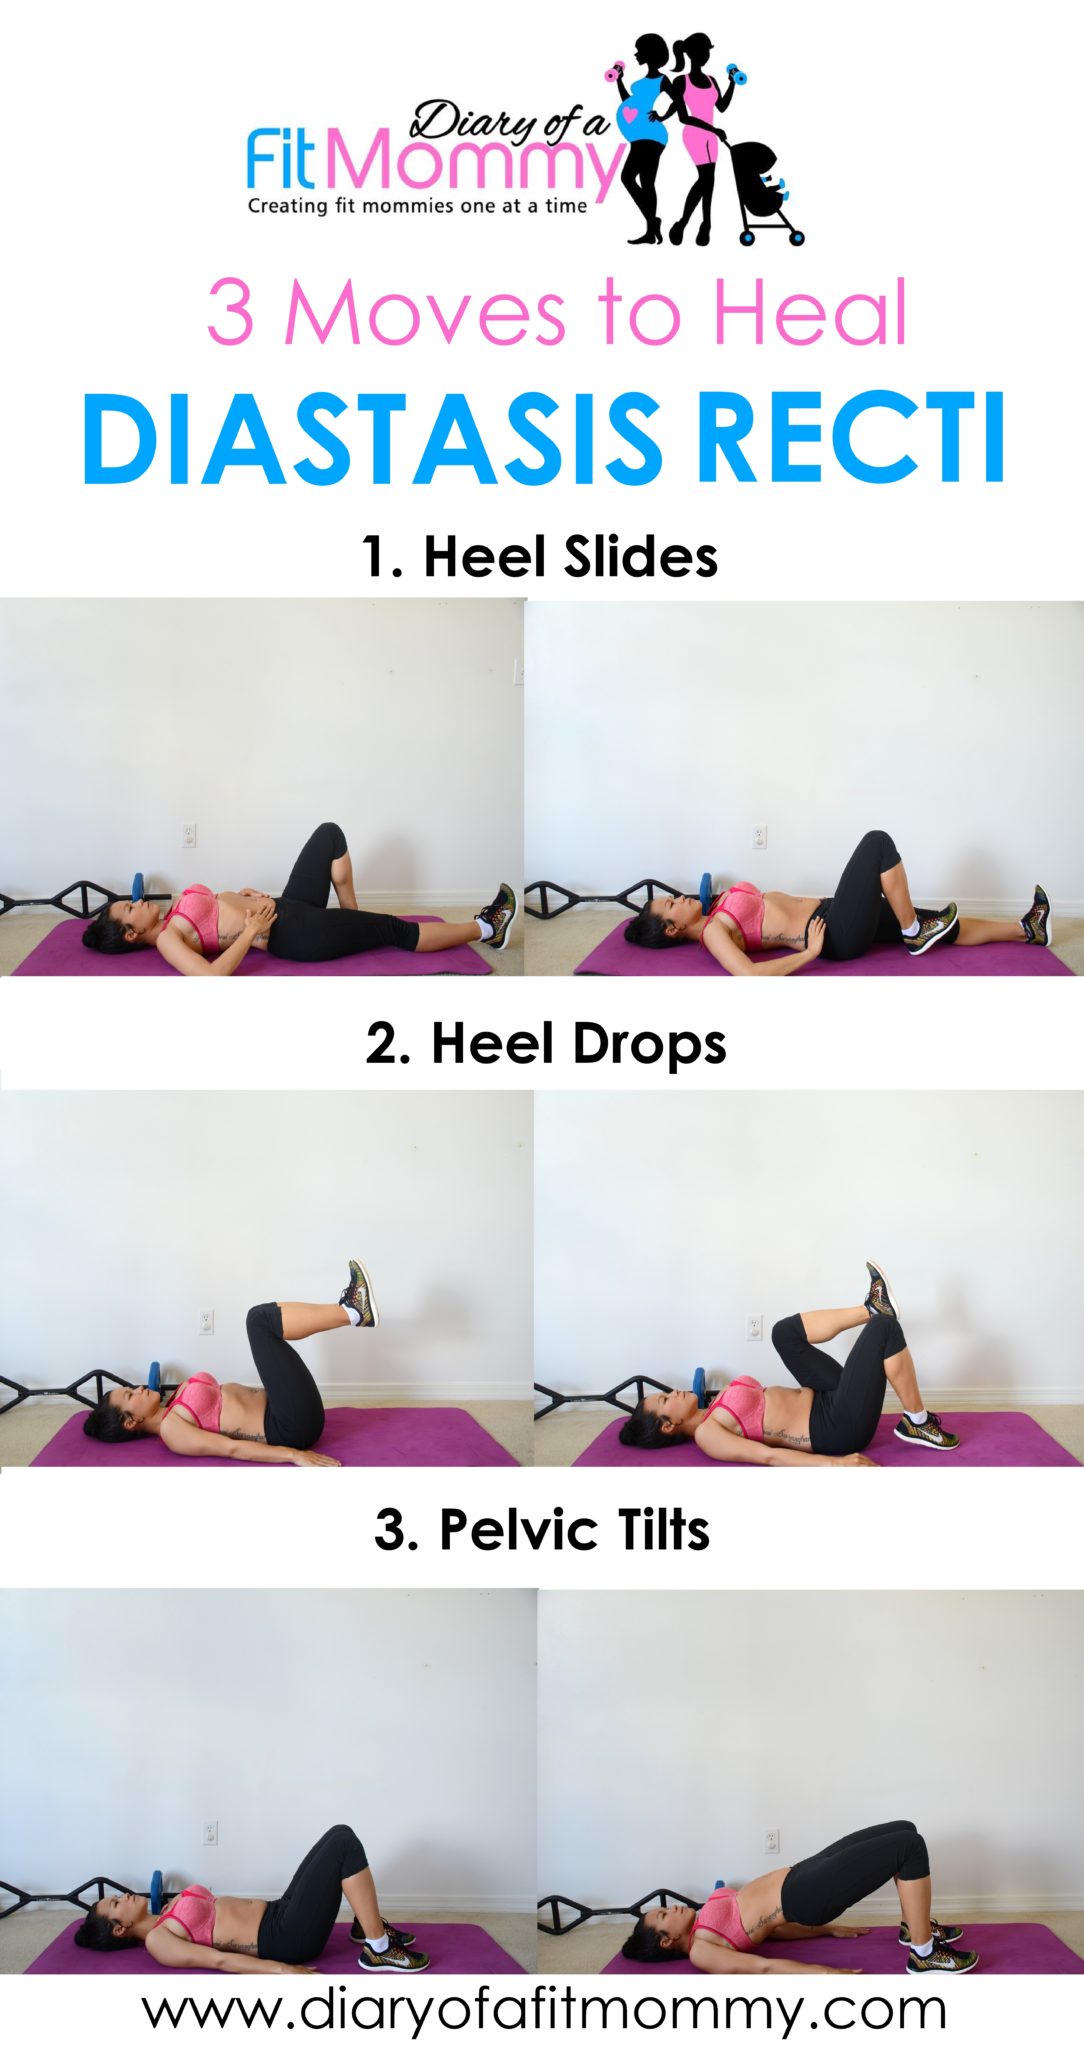
Exercises to Heal Diastasis Recti
Heel Drops


Lie on your back and lift the knees over the hips. It’s very important to make sure the knees do not come any close to the chest. Use those hip flexors to stabilize! Place your hands on your tummy or at your sides, wherever it’s comfortable
Drop on foot down to the floor and tap your toes. Immediately lift the leg up again as the other leg comes down and taps. Use quick exhales to help you. Keep your back to the mat at all times. Modification: Come to your elbows
Heel Slides


Place your finger tips just inside your pelvic bones. Maintain your neutral spine. Activate the muscles under your finger tips by pretending to zip up a tight pair of jeans. Your pelvis should maintain this same position as you straighten one leg, return to start, and repeat on the opposite side. Repeat 10 times maintaining the same position.
Single Leg Deadlift

Keeping that knee slightly bent, perform a stiff-legged deadlift by bending at the hip, extending your free leg behind you for balance. Continue lowering the kettlebell until you are parallel to the ground, and then return to the upright position.
Side Plank
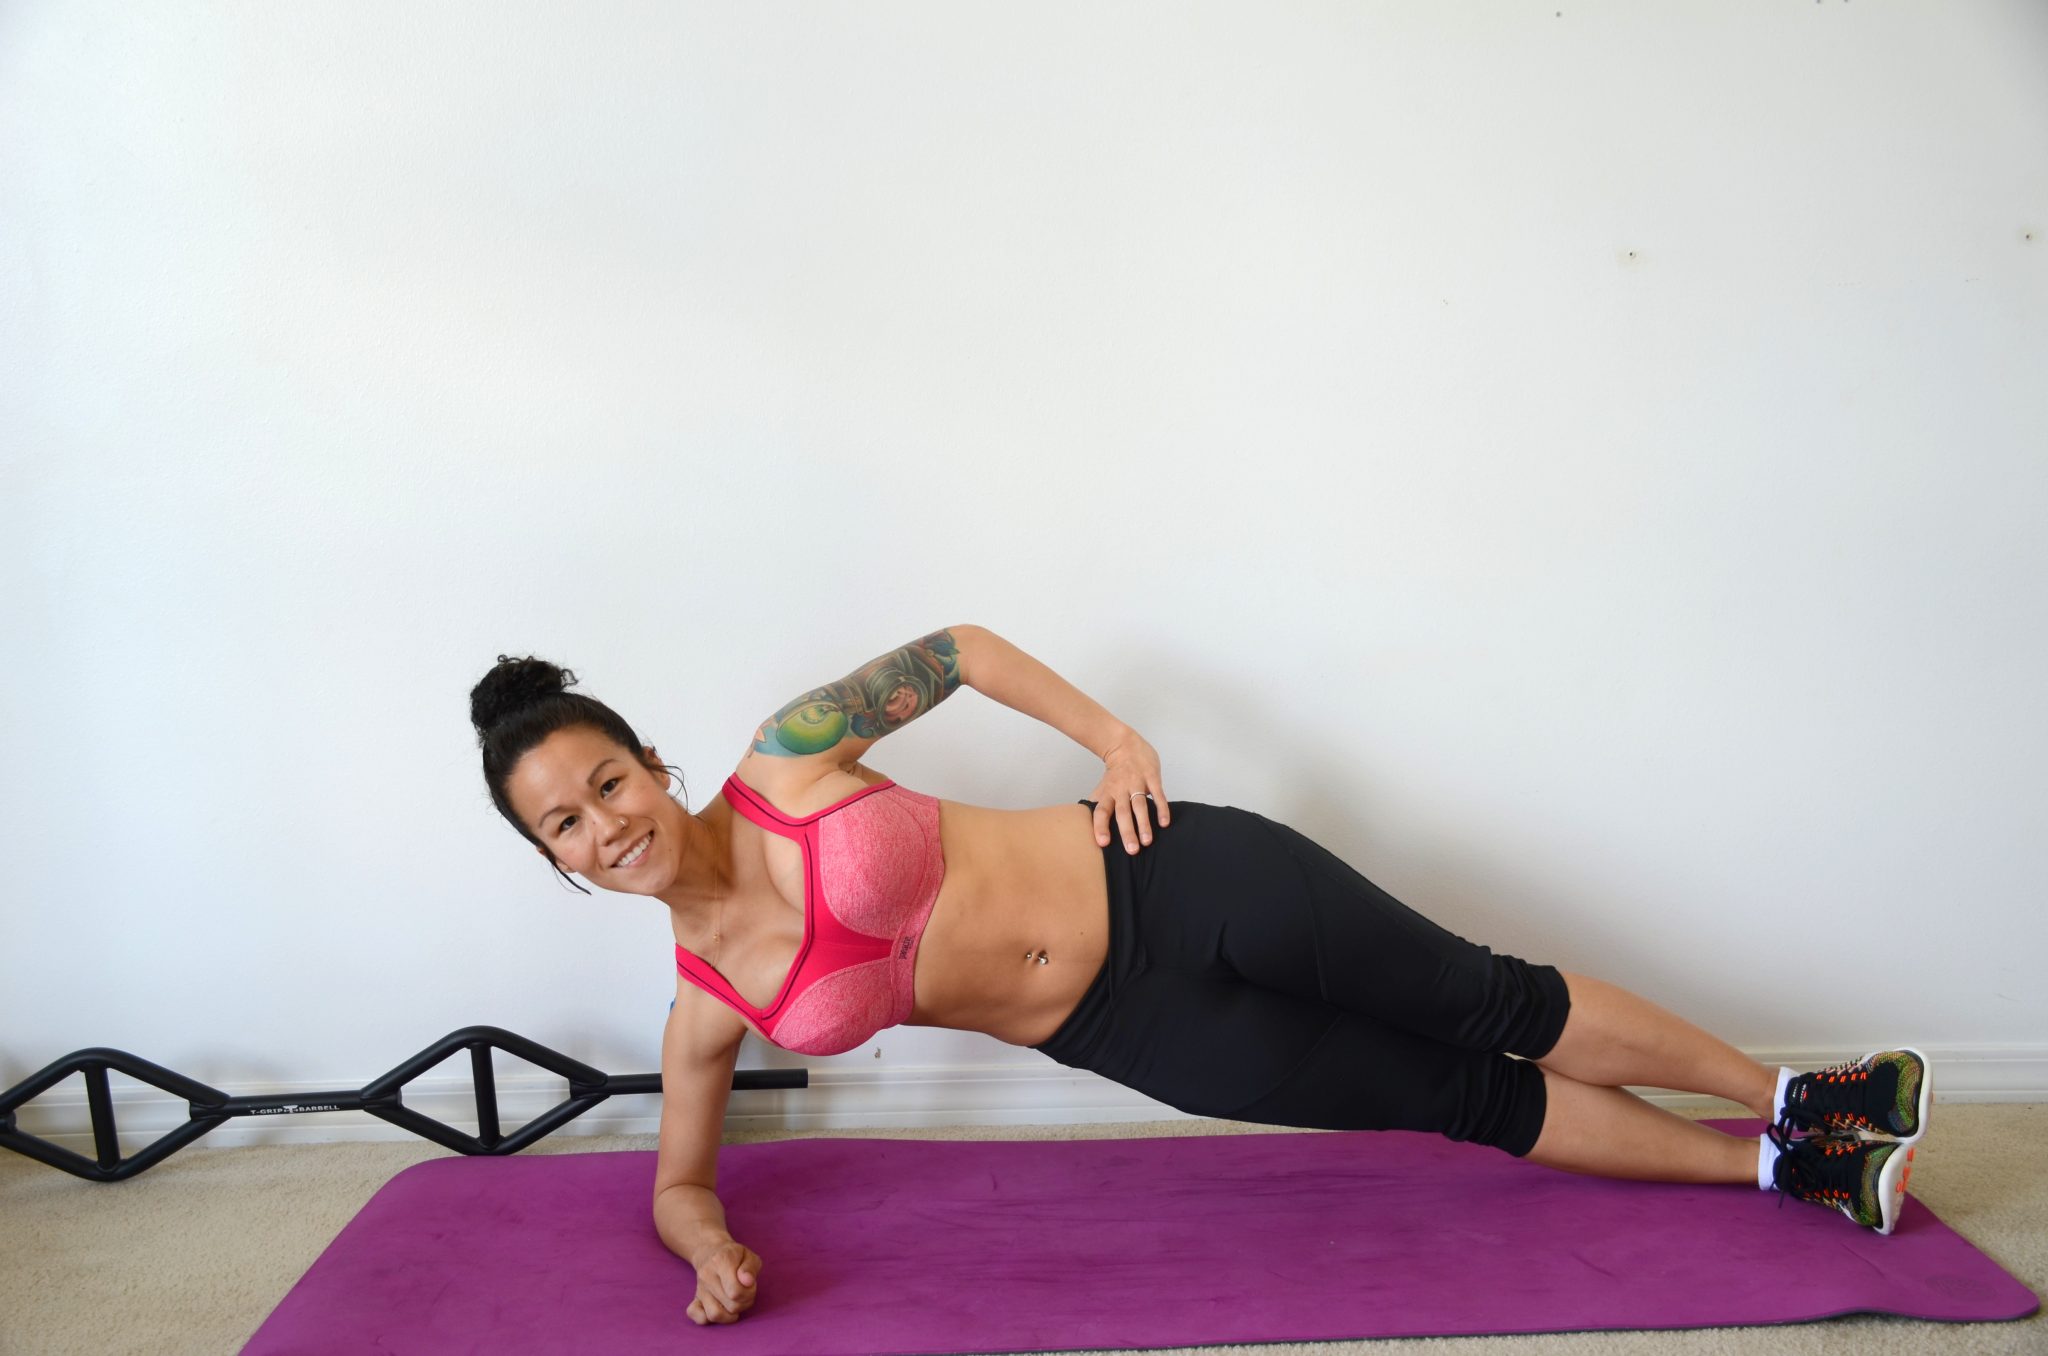
Lie on side on mat. Place forearm on mat under shoulder perpendicular to body. Place upper leg directly on top of lower leg and straighten knees and hips. Raise body upward by straightening waist so body is ridged. Hold position. Repeat with opposite side.
Abdominal Breathing


Lay on your back, knees bent, with the arch of your back pressed against the ground (you want a flat spine). Place your hand on your belly and take a deep breath, trying to expand your abdominal muscles to push your hand up and away from the floor. As you exhaled, contract your abdominal muscles and pull your belly button towards your spine. This “pulling your belly button towards the ground” action is the foundation for all of the other exercises to follow. You can do this simple exercise in repetitions of ten several times throughout the day until you feel that you have a good grasp on the technique.
Pelvic Tilts


Lay on your back with your knees bent. This time curl your hips towards your ribcage while engaging your abs and pressing your lower back into the ground.
Bodyweight Squats/Wall Sits

The Diastasis Recti Workout Plan
Day 1:
3 Rounds:
- Wall sit x 30 seconds
- Pelvic Tilts x 15
- Single Leg Deadlifts x 10 per leg
- Side plank x 10 seconds per side
- Heel Slides x 10 per heel
- Heel Drops x 10 per heel
- Bodyweight Squats x 10
Day 2:
Brisk walking – 20 minutes
Abdominal Breathing – 5 minutes
Day 3:
3 Rounds:
- Wall sit x 45 seconds
- Pelvic Tilts x 20
- Single Leg Deadlifts x 20 per leg
- Side plank x 20 seconds per side
- Heel Slides x 20 per heel
- Heel Drops x 20 per heel
- Bodyweight Squats x 20
Day 4:
Brisk walking – 30 minutes
Abdominal Breathing – 10 minutes
Day 5:
3 Rounds:
- Wall sit x 60 seconds
- Pelvic Tilts x 30
- Single Leg Deadlifts x 30 per leg
- Side plank x 30 seconds per side
- Heel Slides x 30 per heel
- Heel Drops x 30 per heel
- Bodyweight Squats x 30
Day 6:
Brisk walking – 20 minutes
Abdominal Breathing – 5 minutes
Day 7:
REST
Moves to Avoid for Diastasis Recti

Any moves that cause the abs to bulge away from the body (put your hand on your stomach while doing a crunch to feel it for yourself) can worsen your DA by putting extra pressure on those weak muscles causing them to split even further.
Here are some common “no-no” moves for avoiding them attempting to treat and heal Diastassi Recti. Once your diastasis is healed, these exercises can be added back into your routine, but it is important to avoid them while rebuilding your foundational.
Moves to avoid when healing DA are:
- crunches
- some quadruped exercises
- frontal planks
- sit ups
- oblique twists
- Russian twists
- push ups
Wearing an Abdominal Binder or Girdle to Heal Diastasis Recti
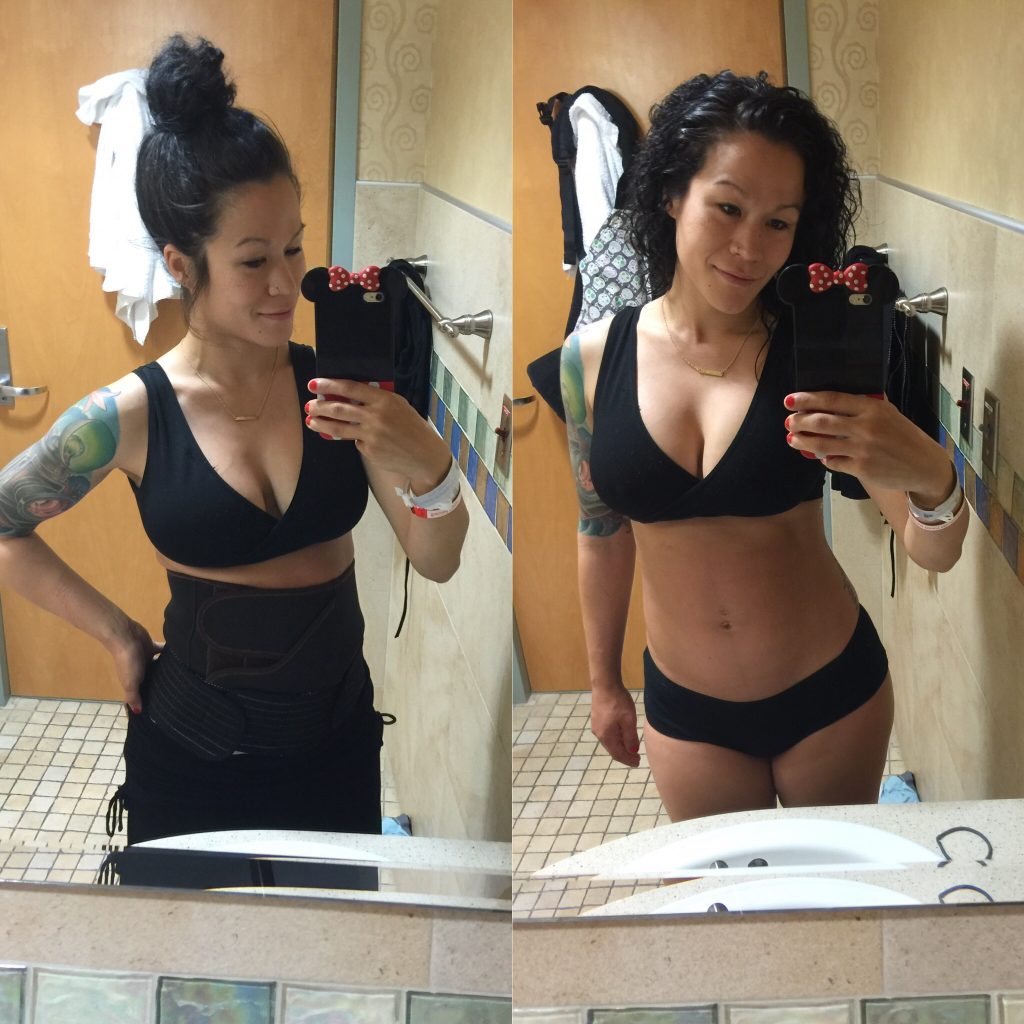
My favorite postpartum girdle is the B.F.F. from Belly Bandit. The reason for wearing one of these magical things is the main fact that it helps to shrink your belly after giving birth. No, I am serious! You wear it immediately after giving birth (I strapped mine on at the hospital within two hours) and it helps to shrink your uterus back down to its original size-sometimes even smaller! However, it is NOT a waist trainer so DO NOT WORRY. It is much gentler and doctors actually recommend them. So what can it do for DA, exactly? It acts as a binder to help hold your abdomen together as it heals and retracts back together. In some cases, postpartum girdles have completely healed Diastasis Recti in some ladies! Oh and for C-section mommies, the girdle is a wonderful idea because it helps to hold your incision together. The most common complaint after women have a c-section is that they feel as if their insides are gonna fall out. Yeah, you will feel snug as a bug with this!
Consider and Correct Your Body Alignment
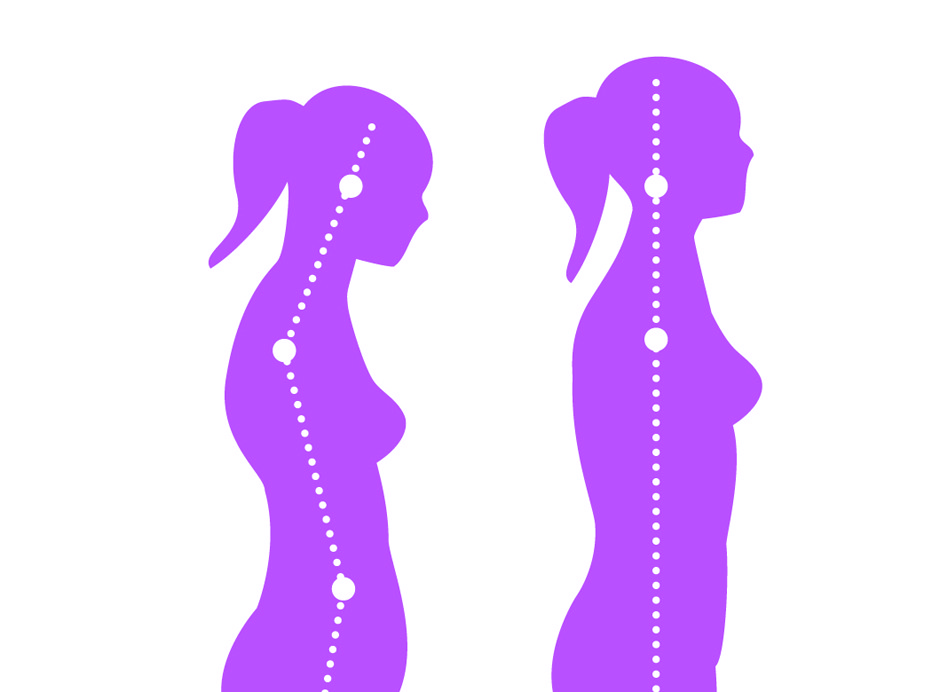
Your posture is everything, people. This is honestly the main way to prevent DA from every happening. Be careful with how you get out of bed in the morning. Instead of sitting straight up, try rolling to your side. When working out, be sure to use good form and to not do the moves carelessly. Speaking of working out, avoid any abdominal exercises that will put extra pressure on your abs as this is a one-way ticket to getting DA. When carrying your kids, be very careful with how you do it. Same goes with lifting heavy objects-use your legs and not your core to lift! Good posture is essential for core activation – if your posture is slumped your core abdominal muscles won’t work as well. Sitting tall with your chest lifted, spine tall and normal inward curve in your low back is the best position for core activation.
Preventing Diastasis Recti During Pregnancy
I recently wrote a super detailed blog post on how to prevent DA from occuring during pregnancy. Most cases of DR actually happens during pregnancy, but goes unnoticed until after you give birth and you are left with this nice, pretty tummy pooch. You can read my blog post here on preventing DA during pregnancy.
Now, for my C-section mamas..
So you had a cesarean section, now what do you do for exercise? Whether it was planned or an emergency cesarean, it’s time to rehab those core muscles. But first, there are a few things you should know about your C Section.
The external bikini scar is horizontal, but the inside incision of the abdominal wall is vertical. Trust me you wouldn’t want it any other way. The good news is that if you had a diastasis rectus (split of the abdominal wall) or a hernia, it was repaired during the surgery. Just remember that the scar is layers deep. Your internal organs were also moved around and exposed to air. It takes a few weeks for things to find their position again. In the meantime, gas pains and little twinges are normal.
Physiological healing time for any body part is about 6-8 weeks so first give yourself some time to heal. Once you get your doctor’s approval, you may ease into some rehabilitating exercises to help strengthen those cut muscles.
Here are some exercises to avoid until you are completely healed up:
- Crunches, sit-ups, leg raises, and front planks
- Running, jumping, step ups
- Heavy overhead presses
- Heavily weighted exercises
- Anything with direct downward pressure on the pelvic floor, such as a barbell back squat.
Here are some great moves for healing your C-Section tummy:
Diaphragmatic Breathing
Lay on your back with knees bent. Take deep breaths expanding your ribcage. When you breathe out, make sure you exhale completely which will facilitate a light contraction of your abdominal wall. As you improve straighten your legs until you are completely flat on your back. Repeat 10 times. 2 times per day.
Forward Bend
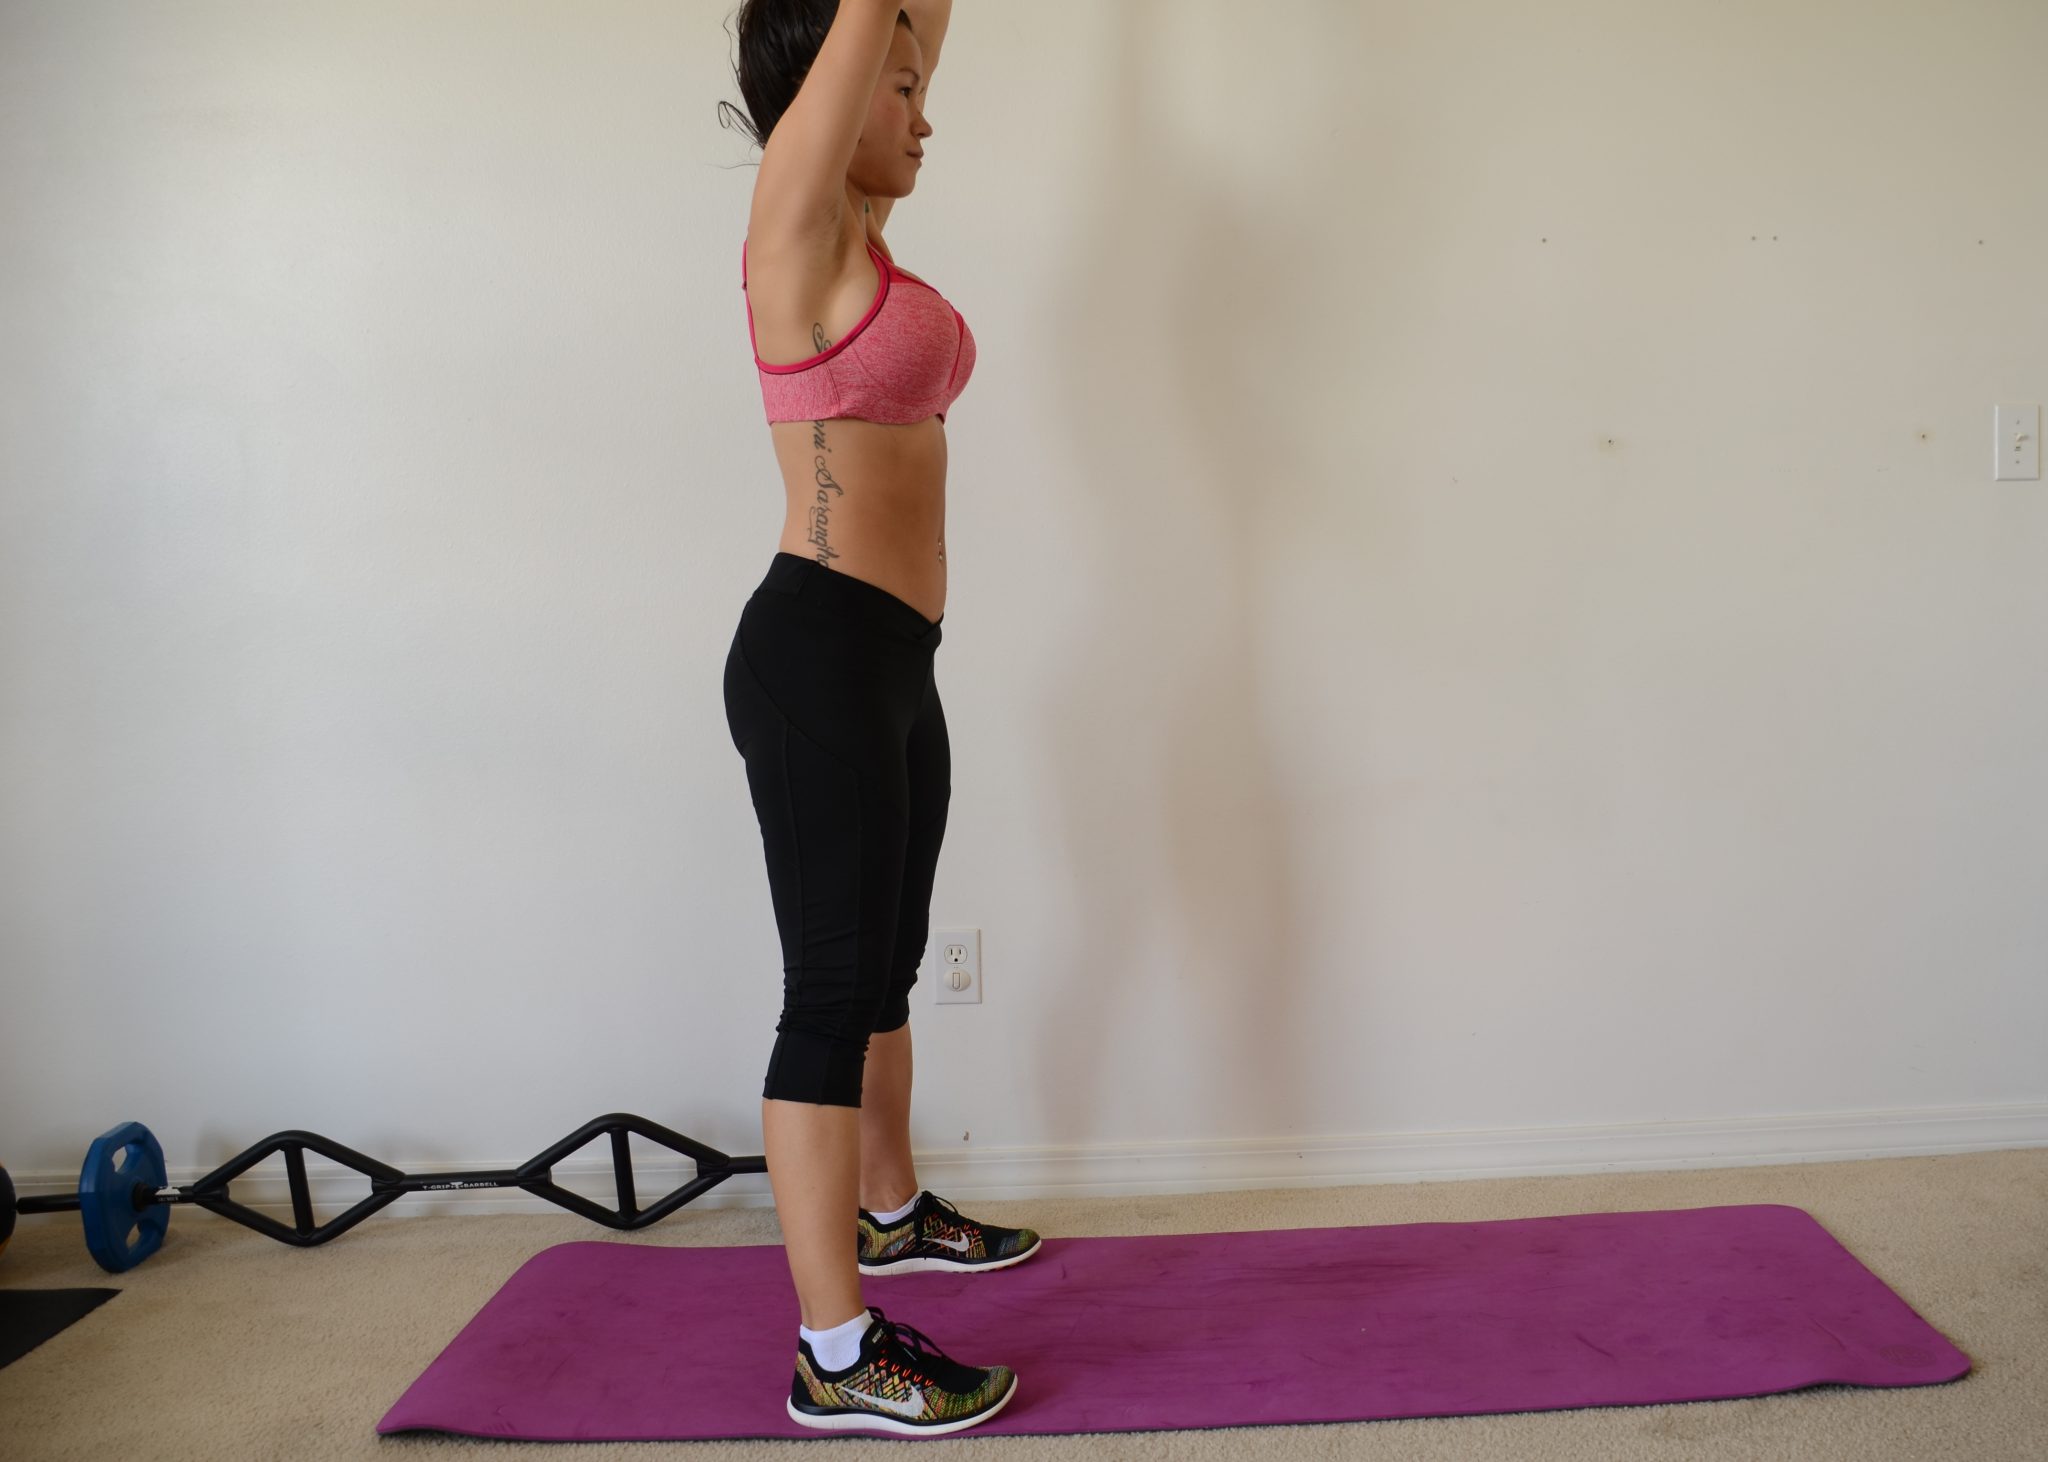

Stand with your feet 3 to 4 feet apart and your hands on your hips. Extend your arms over your head and bend forward at a 90-degree angle, keeping your back flat. Return to starting position. Do 4 to 8 repetitions.
Modified Cobra

Lie on your stomach with your palms flat next to your shoulders. Your elbows should be tucked into your rib cage. Lift your head and neck off the floor, but not so much that it strains your lower back. Suck in your navel as if you were trying to lift your pelvis off the floor. Return to starting position. Do 4 to 8 repetitions.
Pelvic Tilt
Lay on your back with knees bent. Pull your belly button to your spine to tilt your tailbone up while flattening your back. Relax down. Repeat 10 times.
Bird Dog

From hands and knees, activate your core muscles and raise one arm and the opposite leg. You can look down at your baby, maintaining neutral posture while you alternate sides. Repeat 10 times. Add a rattle or toy to your hand and really make your baby giggle while toning at the same time.
Cat/Cow Pose
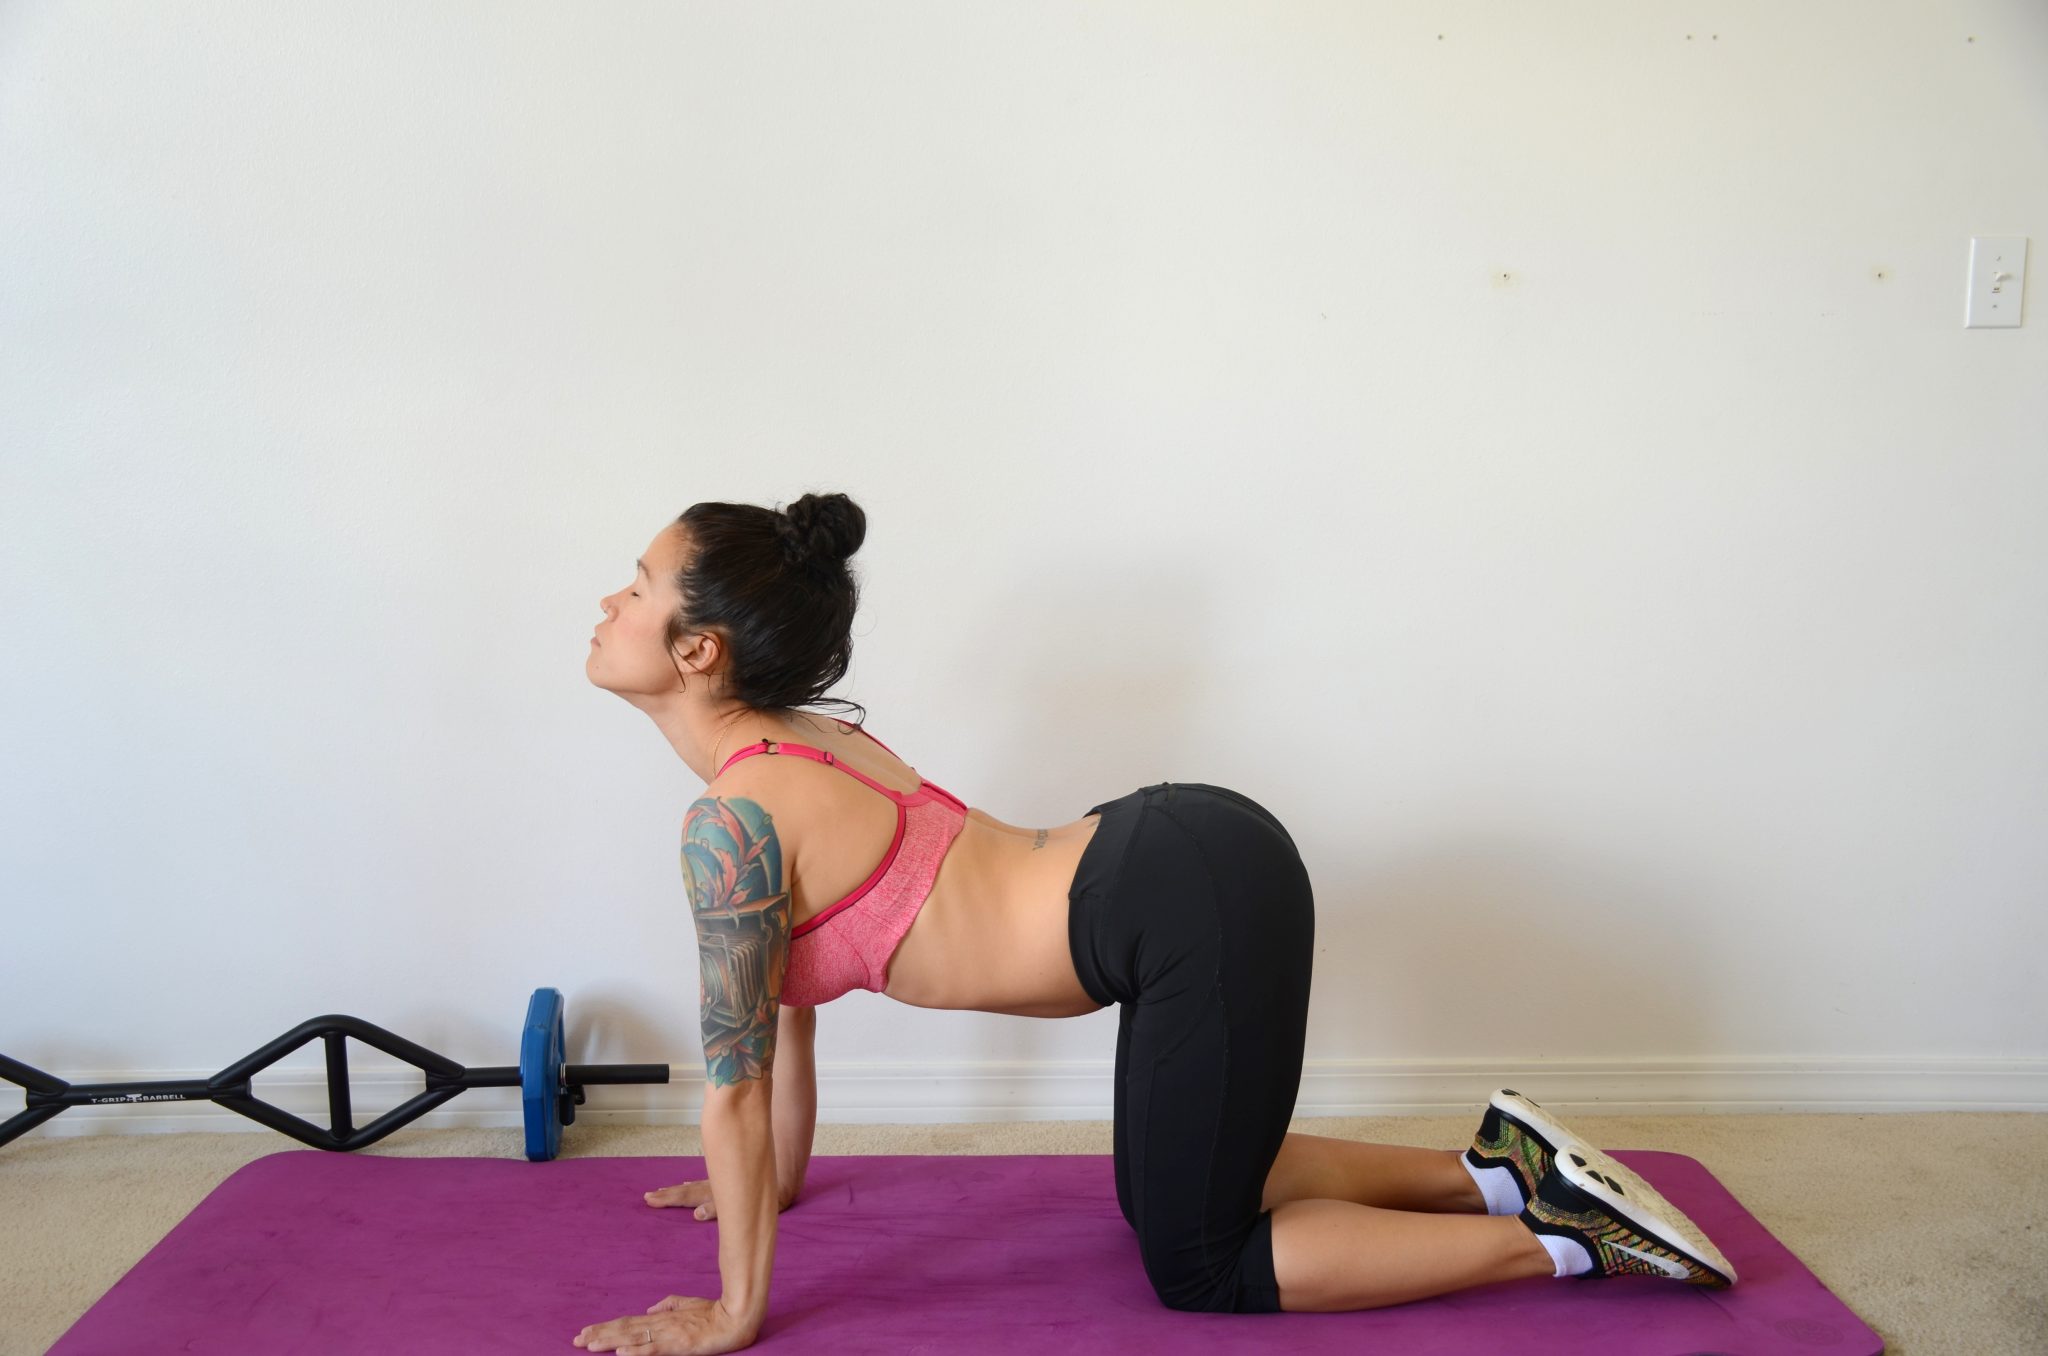
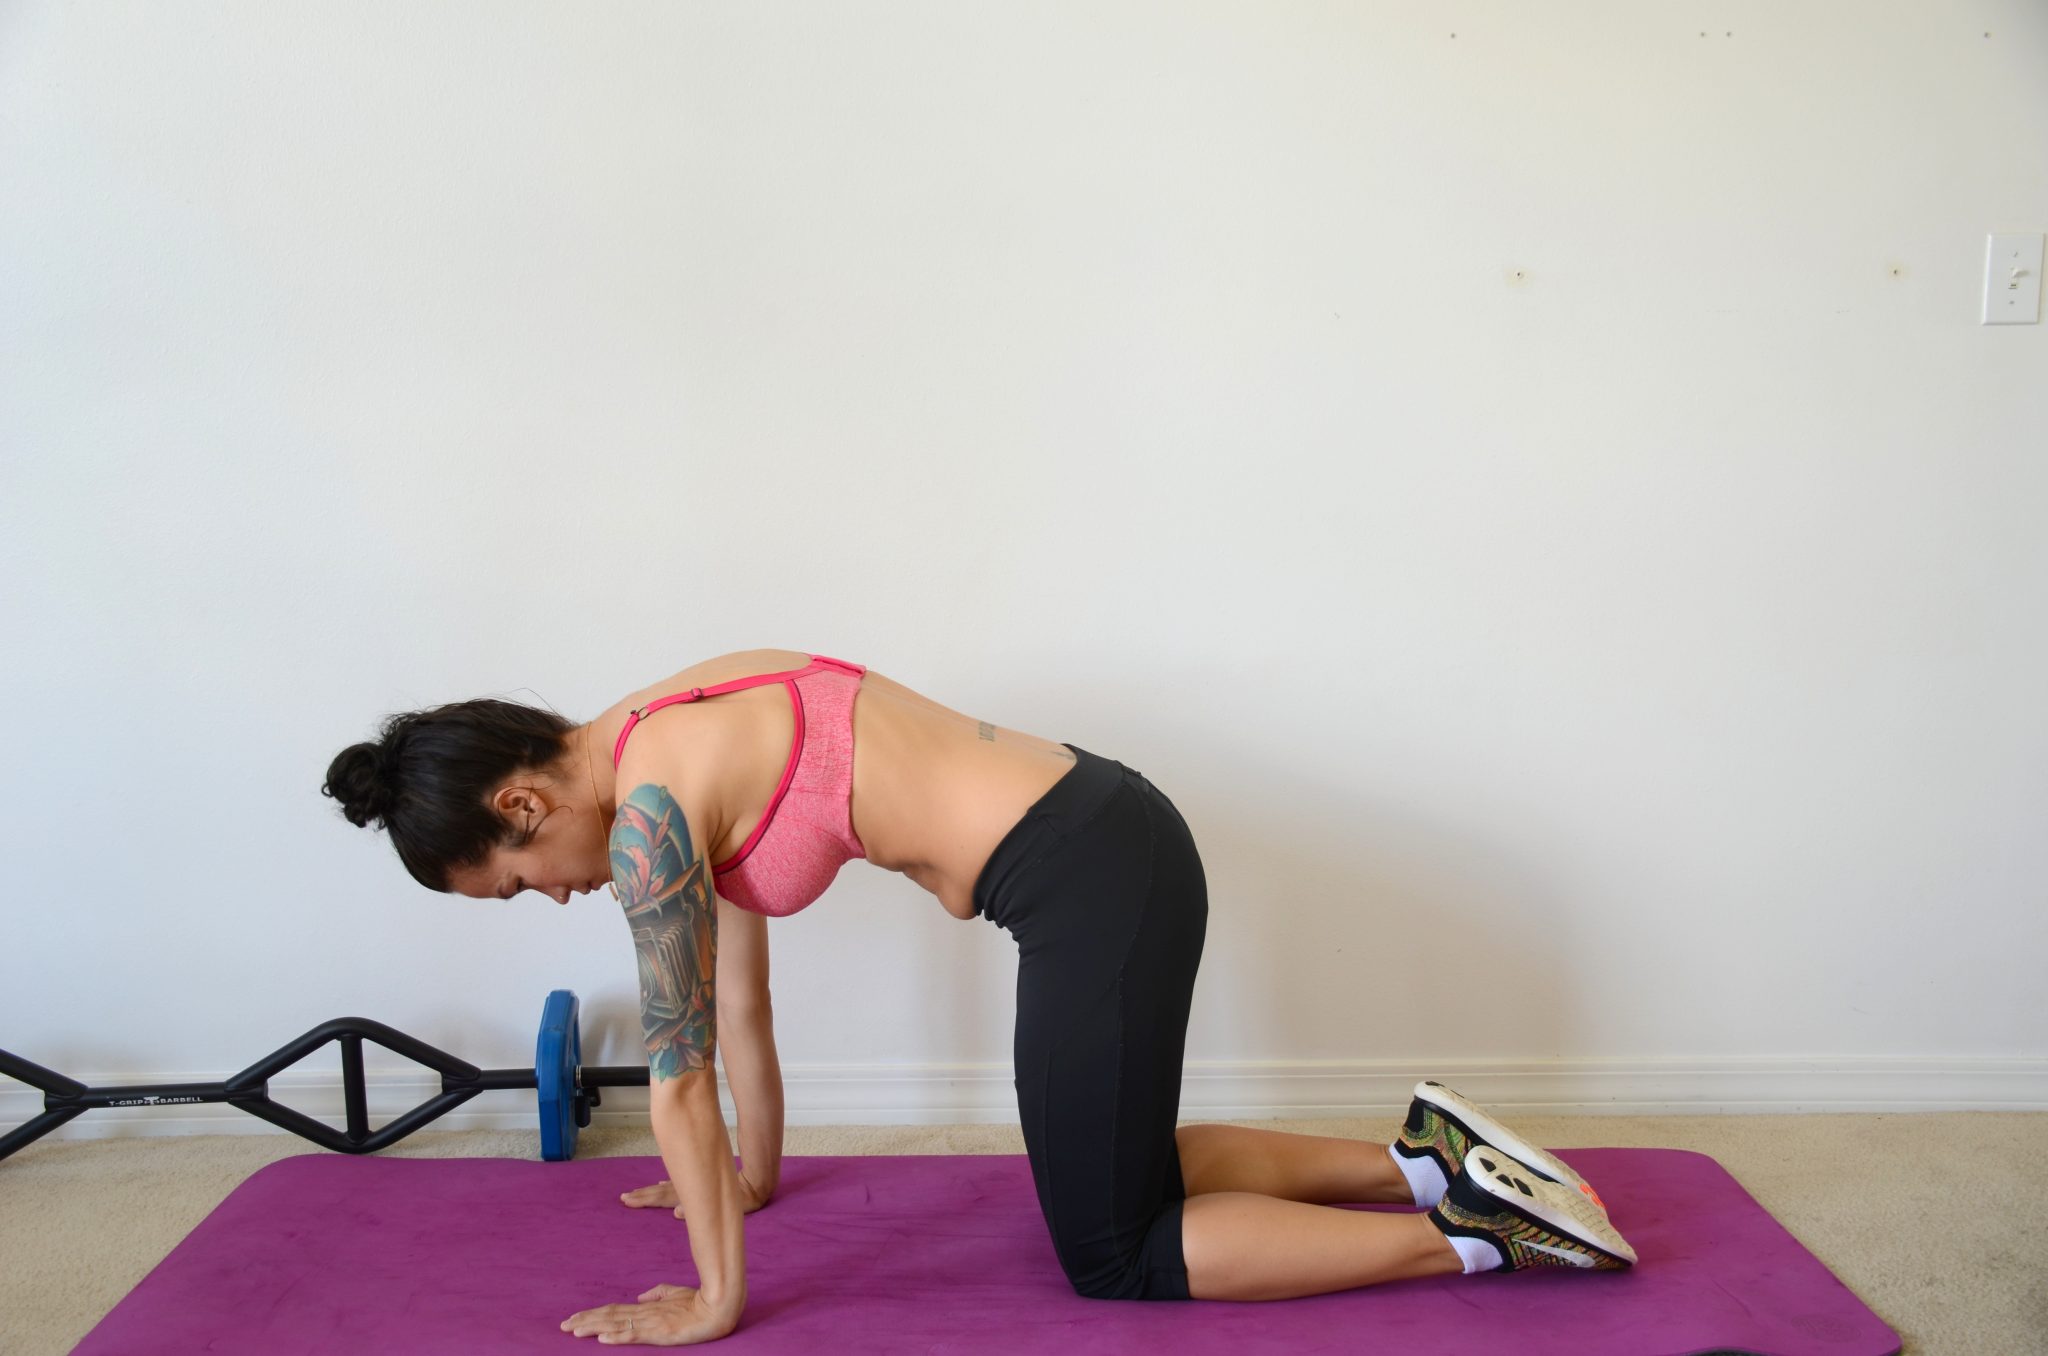
This yoga move is a great way to get your core activated. On your hands and knees, pull your belly button to your spine to round your back while exhaling. Sag your back as you raise your head on inhale. Coordinate the motion with your breath as you repeat 10 times
Heel Slides

Place your finger tips just inside your pelvic bones. Maintain your neutral spine. Activate the muscles under your finger tips by pretending to zip up a tight pair of jeans. Your pelvis should maintain this same position as you straighten one leg, return to start, and repeat on the opposite side. Repeat 10 times maintaining the same position.
Kiss the Baby
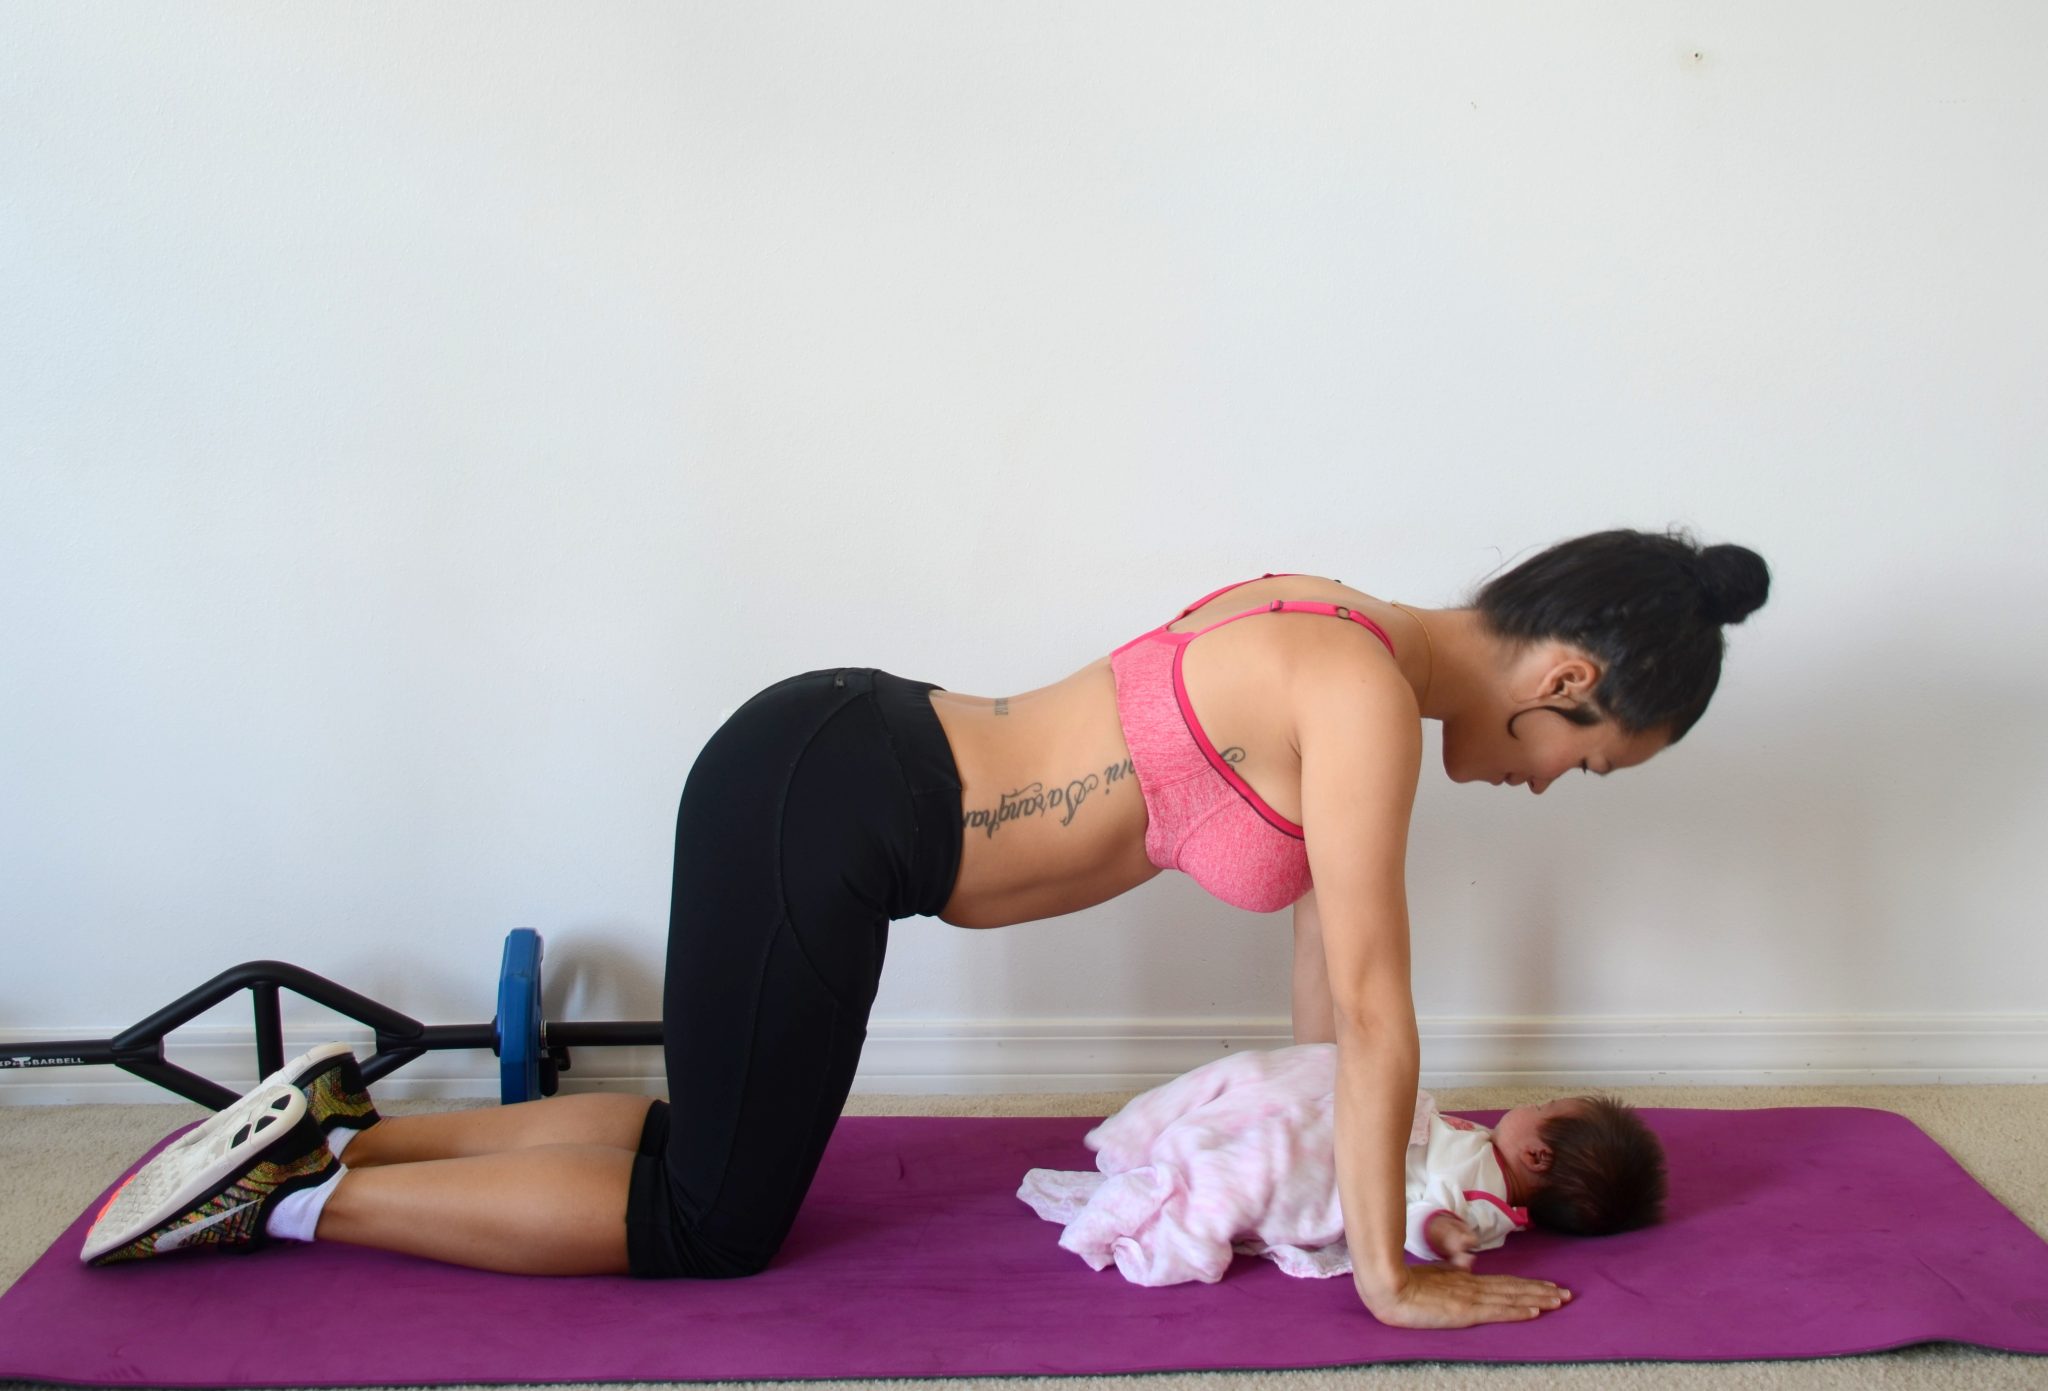

From your hands and knees, bend your elbows to kiss your baby. Babies love to watch you go up and down. Repeat at least 10 times. This exercise progresses to knee push ups or the plank maneuver.
Modified Side Plank

Lie on your side and prop yourself up on your elbow. Extend the forearm straight ahead from the elbow, palm down. Bend the bottom leg about 90 degrees so the foot goes behind you; the top leg extends out. Rest the hip on the mat. (Beginners: Slide a pillow or yoga block underneath the hip to help with range of motion.)
Squeeze the bottom oblique and lift the hip from the floor. Try moving only a few inches up and down instead of returning the hip to the floor. After six to eight reps, tap the floor again. Try not to crunch the supporting shoulder!
Heel Drops
Lie on your back and lift the knees over the hips. It’s very important to make sure the knees do not come any close to the chest. Use those hip flexors to stabilize! Place your hands on your tummy or at your sides, wherever it’s comfortable
Drop on foot down to the floor and tap your toes. Immediately lift the leg up again as the other leg comes down and taps. Use quick exhales to help you. Keep your back to the mat at all times. Modification: Come to your elbows
Your trainer and friend,


