

Greyson’s Super Mario Theme 5th Birthday Party
Greyson turned 5 two weeks ago. I know, this blog is super late, but I guess I needed the time to process this big milestone. I cannot believe it! How does time go by in a blink of an eye yet when we are younger it felt as though it couldn’t pass fast enough? The world may know.
This year, Greyson wanted a Super Mario themed birthday party. We had purchased a Super Nintendo and NES several months back to introduce him to old school games we grew up on and he instantly became a fan.
Here are some of the themes we have done in the past:
- First birthday: Mickey Mouse
- Second birthday: Thomas and Friends
- Third birthday: Cars
- Fourth birthday: Spiderman
As I started planning for his party, I found that a Super Mario theme was the hardest to do.. typically because most kids nowadays have no idea who Mario even was. But for us, the 90s generation, we hold pixelated Mario, Luigi, Peach, and Yoshi close to our hearts forever.
Here is how I pulled off the best Mario Party ever!
The Decorations:
One of the main spots I had set up for pure Mario flair was this little corner near the drink/dessert table. I had purchased a large stand up Mario to go along with the “brick blocks”, mushrooms, and stars.
I covered one large box using this brick inspired bulletin paper. I drew two eyes on gold foil star balloons which was super simple.
To make the mushrooms, I used thin poster board for the base, paper circles for the dots, and red circular foil balloons.

For the main background, I used a sky blue wrapping paper and layered on effects. I simply stuck on these easy wall decals of Mario, a mushroom, and some bricks and coins.
To make the scene a little more 3D, I took yellow dessert plates and glued cut out letters for my son’s name (tried my best Mario font) and taped them onto the background. I admit it took many times per letter to get it right and that was frustrating!
On the dessert table, I had two piranha plants that I made by hand! I was so proud of these little bits. To make them, I used:
- red paper fans
- a wooden skewer stick
- a small round floral styrofoam piece
- green spray pain
- white cardstock
How to:
- I spray painted the styrofoam and stick green.
- Cut sides and top from mini-paper fan.
- I then cut small circles and tear drop shaped pieces from the card stock to complete the mouth and the speckles on the flower.
- I inserted the skewer, sharp part down, into the styrofoam and proceeded to cut out leave shaped pieces from the cardstock in which I painted those green and later attached.
- They stood well on their own!

One of the most time consuming. but cute touches to the party were the Boo cups that I made. I hand drew each little face and paired it with a mustache straw.

I ordered these cute Mario and Luigi party hats and they were a big hit! I also had little Mario kart “medals” for the kids to wear.

The Food:
For the party, I made all of the food myself. Catering is the easiest option, but cooking is my passion.
One of the cutest foods that I made was this Super Mario Fire Power Plant veggie platter. I used:
- grape tomatoes
- baby carrots
- broccoli
- cucumber
- yellow bell peppers
- black olives (for the eyes)
- homemade ranch (sour cream and ranch seasoning)
I assembled the plant as shown. Everyone loved it!

The next Mario food I made were the Piranha plant fruit kabobs using strawberries and green grapes. To hold them, I used a large, round floral styrofoam piece.
Also, the background on this image below was made using these wall decals. It was an easy, painless way to transform my dining room into Mario zone.

For the kids meals, I used a star shaped cookie cutter and made peanut butter and jelly stars. They were gone pretty fast!
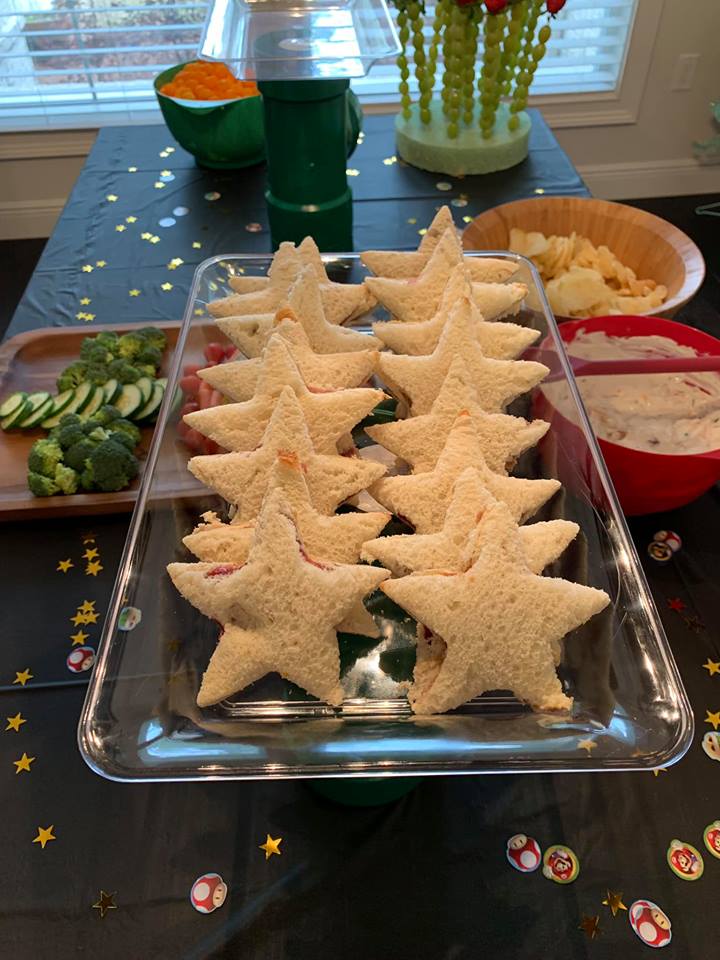
To hold up the sandwiches, I spray painted large pipes from Lowes with the same green I used on the DIY piranha plants. They were a fun touch to add!

For the adult meals, I made the easiest and yummiest Italian sliders. They were all gone before I could have one, but I heard they were incredible and a few asked for the recipe so here it is!
Ingredients
1 package Hawaiian Sweet Rolls 12 rolls total
2 tbsp butter
1 tsp Italian seasoning separated
1 tsp dried parsley
24 slices thin sliced smoked deli ham
1 package (5 ounces) salami
1 package (5 ounces) pepperoni
8 slices Provolone cheese
Marinara Sauce for dipping; optional
Instructions
Preheat the oven to 350 degrees F.
Slice the Sweet Rolls in half to separate the top of the rolls from the bottom. Place the bottom half in the prepared pan.
In a small bowl, combine butter with Italian seasoning and dried parsley. Set aside to soften.
Fold 1 piece of ham into a square the size of one of the rolls and place on top of the roll. Repeat for 11 more pieces of ham.
Evenly top the ham with the salami, pepperoni, 12 remaining slices of ham, and Provolone cheese. Place the top of the rolls over everything.
Melt the butter and seasonings that you mixed earlier. Whisk together.
Gently brush a little of the mixture over each roll top. Cover the sandwiches with foil and bake for 10 minutes.
Remove the foil and bake for an additional 10 minutes.
If desired serve with warmed marinara and enjoy immediately.

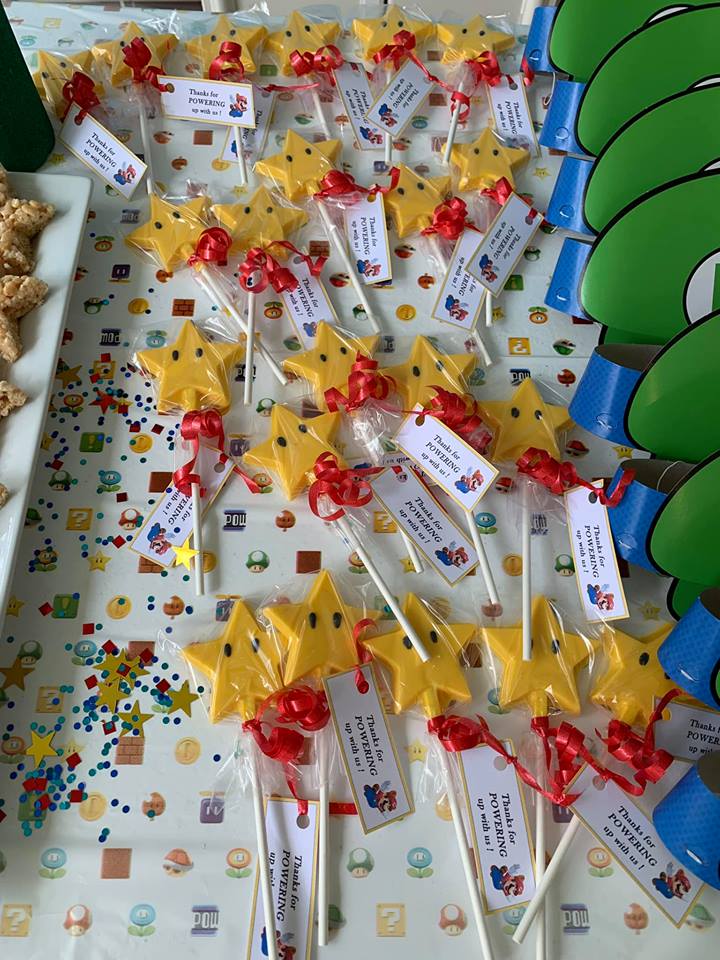
For some dessert, I made little rice crispy stars (using the star shaped cookie cutter set I linked to earlier) and used chocolate chips as the eyes. Easy peasy.

I had each guest also take home a milk chocolate star pop with a sweet message.
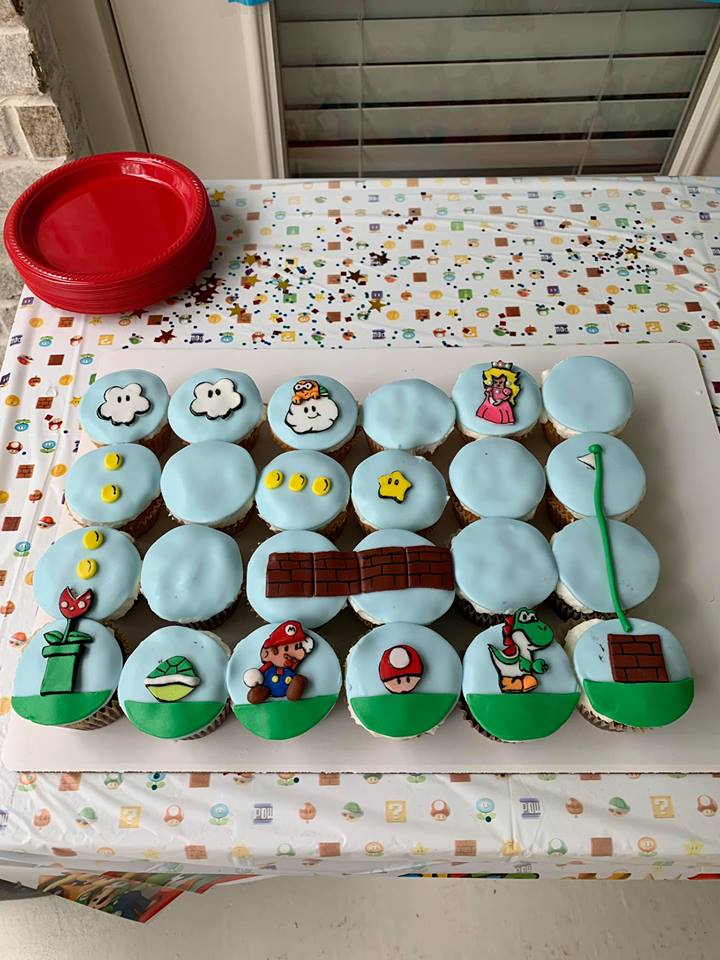
Now onto the cake! I had the same lady who has made our cake’s since Greyson was 1 year old to do ours again this year. We opted for 24 Mario cupcakes that, when placed together, made a scene from the original game.
All in all, this was such a fun theme to do. We had an absolutely fun time!


Your trainer and friend,


