Blog

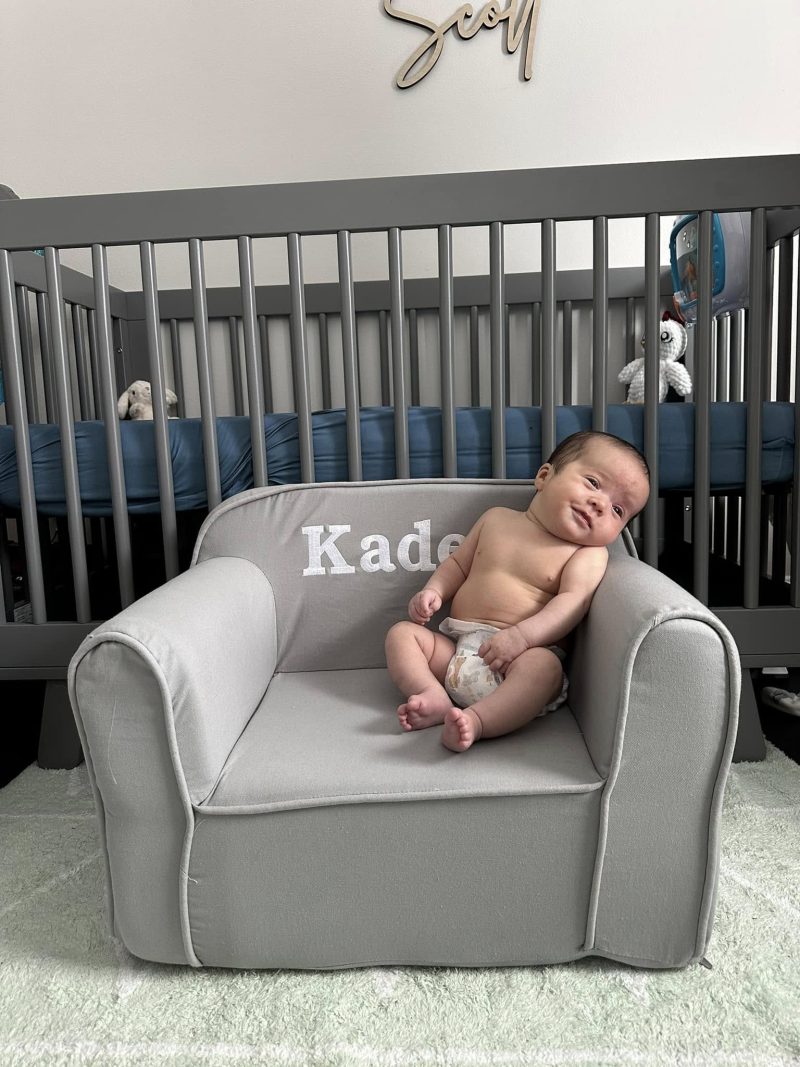
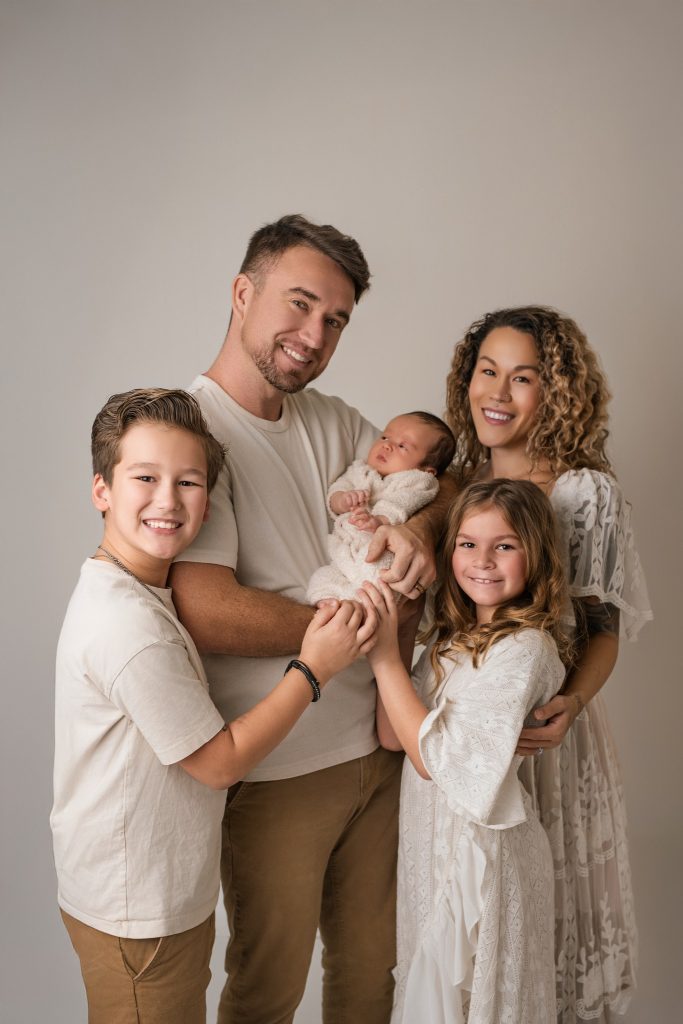
Kaden is now 3 months old and not quite a newborn anymore. Sad face. The newborn stage is so busy, consuming, exhausting, exciting, and exhilarating isnt it? There are so many products I could NOT live without for the third time around, but here are a few that really stuck out to me this time.

Boobcube

If you are a breastfeeding mama, you are going to love Boobcube! Boobcube is a clever way of storing and freezing your breastmilk without using plastic bags that will eventually end up in a landfill. Not only is it ecofriendly, it is also friendly to your wallet as you wont have to purchase milk storage bags any longer with Boobcube. Plus, did you know that chemicals from the plastic milk storage bags can leech into your milk? I had no idea, either! When you are no longer breastfeeding, I can see this being great for freezing smoothie cubes and even more uses so your Boobcube lives on!

I highly recommend the First Drop Kit as seen below. Use code SIA10 for 10% off your order.

What’s Included:

  • The Canteen – Our BPA-free storage jar allows you to safely collect up to 8 oz. of breast milk, sans plastic. 1 count.
  • The Tray – Complete with 3 pre-measured portion sizes;  0.5, 1.0 and 2.0z, the Tray allows you to freeze milk in increments that work best for your baby, so that none goes to waste. 2 count.
  • The Pouch – Our durable pinch-seal storage bag lets you transport milk on-the-go and easily thaw just-right servings for your most discerning milk connoisseur.  1 count.

Key features:

  • 100% food grade silicone
  • Free of: BPAs, phthalates, PVC, and lead
  • Reusable + Sustainable
  • Dishwasher, Microwave, Sterilizer and Freezer Safe

NozeBot

Let’s face it-snot happens.

FridaBaby Tub

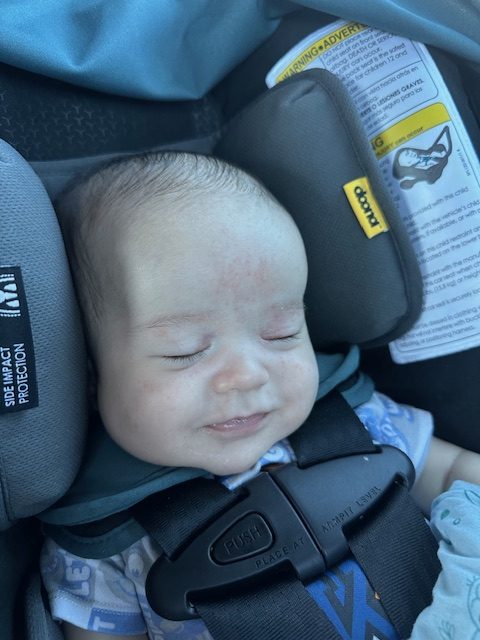
Doona Stroller and Carseat

Have you ever wished your stroller and carseat were just one big thing? Well, it is with the Doona! Although heavier than most carseats, I love the fact that the stroller is connected to it and never comes apart. The convenience aspect has won us over and we will definitely use it again with our next baby. As I mentioned it is heavy, but since its connected, you wont be carrying it much thanks to its easy 1 second transformation from carseat to stroller. The Doona is simply genius.

NinniCo Pacifier

If your baby has a lip and tongue tie like mine, the NinnoCo pacifier could help with that! It mimics the breast and helps the baby use motions that assist with breastfeeding-think of it like a workout paci that reinforces a proper latch. While it may be difficult to use at first, keep trying and your baby is sure to get the hang of it. Another thing I like about it is that its quite entertaining to watch them use it since its see through silicone for the base! Use code SIAC10 for 10% off your Ninni pacifier.

Halo Bassinest

While trying to find the perfect bedside bassinet, there were so many options ranging from the Snoo and Cadlewise being a break your bank option all the way down to some cheap ones that just did not seem safe enough. I chose the Halo Bassinest that swivels conveniently at my bedside and I could not love it more. It does have options to play light music, light, and vibrations to help soothe your baby to sleep which is also a bonus! The price was also fair, in my opinion. We will definitely save this bassinet for the next baby!

Hatch Rest

Our Hatch Rest has been our nightlight/sound machine of choice since our baby was born. I had a Hatch Restore that I used in my room for the last few years that I absolutely loved so the baby/nursery version was a no brainer. I like the fact that it is app controlled and recommends different settings for different age timeframes. For example, for newborn, it had recommended that we use the red color + heartbeat sound to mimic the womb. I like the fact you can save your sound/color combos to easily turn them on and it has a clock so I can keep up with baby feeding times, etc.

Kyte Baby Sleep Bag Swaddler

I am team swaddle your baby all the way! I cannot imagine NOT swaddling my babies. This time around, I discovered Kyte Baby and not only do they offer the cutest, softest onesies, they offer the best swaddles, too. The swaddle/sleep bags are easy to use thanks to velcro and helps baby sleep better through the night. The bottom unzips conveniently so that you can change baby’s diaper without having to unswaddle or wake them up during the night. At the very bottom, there is an elastic band that allows you to tie it off so baby does not move his or her legs-allowing the ultimate rest.

Version 1.0.0

I cannot believe how fast our little Kaden is growing up. He is about three months old so I am clearly behind writing these monthly blogs on time but I think a part of me is in denial with how fast this is going. Or maybe at the end of each month is how I am supposed to write them? AH. Who knows. I wake up 2-3 times a night still with little one so sleep is not the best. I am one tired but super happy mama!

Kaden started REALLY smiling this month and we even feel like we caught a couple of giggles here and there. He started tracking us around the room more and becoming more aware of us. We took him to the pet store and he loved the fishies. He loves looking at lights and studying various objects.

We go on a lot of family walks though he cries through most of them. We had to get his tongue and lip tie lasered this past month which was so hard. He seems to be breastfeeding a little better but we are still a world’s away from what it should be, but thats ok. Everynight we take a bath and settle down with cuddles and he will lay with his daddy while mama pumps his milk.

He STILL has the newborn scrunch when we pick him up out of the carseat after sleeping, which is cool!! I know it wont last though because he is growing so fast at over 13lbs this month. He still has his cute heart shaped stork bites-I wonder how long they will stay? Scotty had those too when he was a baby. He is pretty much his little clone!

I finally decided to put the newborn clothing away and he started in 0-3 month clothes. Actually he does wear some brands in a size 3-6 months! Our favorite clothing brands for him are Kyte Baby, Caden Lane, and Bums and Roses.

Kaden is absolutely in love with his brother and sister. Greyson even got to wear him for the first time at a Walmart trip and did a great job. Everly is like a little second mama to Kaden and tends to him everytime he cries. Its a joy seeing them interact with him and the age gap has been nothing but amazing to us all.

Kaden got to go to one of Evie’s dance competitions for the very first time. He was a bit frightened by the loud noises and strange faces, but he did really well. I even had him a custom onesie made for the last competition next month to support his sister! I cannot wait to share it.

Time is going so fast and its hard to want to blink because I dont want to miss a thing. I am thankful that my husband stays home with me so he does not get to miss anything either! He also helps with homeschooling our older kiddos and with Kaden when I need to work. We are so thankful!

I am so late writing this-what a wild ride it has been. The first month of Kaden’s life was super busy. We came home the day after Christmas as a family and celebrated a day late with my older kiddos and mother in law. While my labor and delivery did not go the way I wanted to (head would not drop into position so c-section it was mixed with baby having hypoglycemia and not eating well which resulted in an extra day’s stay), I was happy to finally have us all home and together.

The first month we learned he had tortecollis which is a slight head tilt so we started physical therapy. We also discovered a tongue tie and lip tie which explained our breastfeeding issues. We started seeing a lactation consultant and he also began seeing a chiropractor weekly. I am telling you, we have been BUSY with this little man. But we have been so happy. For the first month, he slept great. The kids loved getting used to their new little brother. We have enjoyed walks and going out and about with little man.

We enjoyed Kaden’s FIRST snow day EVER in January-our first too for Florida! It was beyond the coolest day ever-no pun intended.

We also took Kaden to get his first passport so we could travel the world with him.

We had our newborn shoot and home style newborn shoot so we could capture his tinyness.

That pretty much sums up our first month! Of course, adding in the sleepless nights lol. Little man tends to wake up every 2 hours so I stay pumping. Something we noticed is that he LOVES Christmas lights.. We are so thankful for our little Christmas Eve baby!

Its been 3 weeks since I have given birth and I am down to just ten pounds left of my pregnancy aka baby weight to lose. I have been tweaking my metabolism in order to get the most out of my diet so that I can get over this weightloss plateau. After all, the last few pounds are always the hardest to lose!

To lose the weight, I have been using my Lumen device-a device I have used for the last 3 years now that has proven to be so effective. Lumen measures your metabolism in real time with a single breath and in under a minute at that and its great for those who are doing intermittent fasting. If you are fasting it can track your fasting state so you know if and when your body is burning fat in order to find out if your fasting is effective. It is so good, in fact, that it has become a gold standard for metabolism measurement according to one study. But its not just for fasting-it is for everyone.

So is this new technology? Ehhh not quite! Before Lumen, the only way to measure your metabolism was in a hospital or clinic with a costly and time-consuming test known as RER (through the breath) so this is a breakthrough. The amount of oxygen you breathe in, and CO2 you exhale, can contain a lot of information about how you process food. A high co2 means you are burning more carbs while a low co2 level means you are burning primarily fats which is how Lumen is able to measure. But with Lumen, it makes measuring so much easier ad cheaper to do.

Each time you breathe into it, the device analyzes your breath, giving you a score on a scale of 1 to 5 to tell you whether your body is running on energy from your fat stores (the ideal “fat burning” 1 or 2 state), the carbohydrates you’ve consumed (a 4 or 5), or a combination of both (a 3). It follows with a recommended meal plan of approximately how many carb, fat, and protein servings you should be eating, with the ultimate goal of making your metabolism more efficient. Upon waking up, your body should typically be at a 1 or 2. But if you wake up at a 4 or a 5 score, it might mean your body is having issues trying to digest food from the night before.

It is almost like having a nutritionist in the back of your pocket because Lumen provides you with personalized suggestions on when and what to eat to fuel your workout, based on your metabolism. Lumen supports fat burn and improves your metabolic flexibility, which is your body’s ability to efficiently switch between using carbs and fats as a fuel source.

Some benefits of the Lumen device are:

  • Natural weightloss – Lumen helps improve your metabolic flexibility which allows you to lose weight in a sustainable way.
  • Less snacking – Lumen helps you improve your body’s ability to burn fat which decreases your hunger levels and makes your body less dependent on snacking.
  • Energy and mood boost – Increase your energy levels by developing a high functioning metabolism.
  • Improved overall health – Improving metabolic flexibility has a preventive effect against obesity, diabetes, and other metabolic diseases.
  • Enhanced weight maintenance – Developing a flexible metabolism allows your body to maintain a healthy weight by optimizing the body’s ability to burn fat.
  • Consistent blood sugar levels – Optimize your body’s ability to burn carbs and avoid blood sugar spikes by improving your metabolic flexibility.

Lumen has honestly become a part of my daily routine as I measure in the morning, after eating, after working out, and before bedtime. I love learning more and more about my body and how it processes food so I must admit that this thing is addictive-in a good way! I love knowing how and what I should be eating day to day and this helps with that. But it does not tell you what to eat exactly because they want to offer their users freedom to choose. THAT is amazing. Instead, each day it recommends whether or not you eat low, medium, or high carb based off of your results.

There are 7 times when you will actually measure using Lumen:

  • When you wakeup/before breakfast. The Morning Fasted measurement is taken by tapping the ‘Take a breath’ button in the morning.
  • Before and after eating. The Meal measurements which can be accessed from the purple floating button as the “before and after eating” option are useful to understand how your food is impacting your body. See what works for your metabolism or what foods to avoid.
  • Before and after a workout. Workout measurements which can be taken via the floating button menu and after adding a workout . Take your breath before a workout to understand if you need to fuel up or not. Measure afterwards to see if you shifted back to fat burn with our new post-workout insights.
  • Post fasting. Post-fasting measurements which are available through the floating button menu. Take a measurement when your fasting window is over to measure the impact on your metabolism.
  • Before bedtime. Before sleeping measurements which you take using the floating button menu before you go to bed. This is a good indicator of what your results will be like in the morning.
  • Random check ins. Check-in measurements which you can use to check your metabolism anytime throughout the day and tag your measurement afterwards to keep track of special events or personal goals you might have.
  • Boost measurements. Boost measurements which are available on Boost days that occur after completing a 4-day streak of waking up in fat burn. These measurements show how well your body shifts into carb-burn on high carb days.

Some time (about 2 weeks) after using the Lumen app, you will get your personal Lumen flex score. This number represents how flexible your metabolism is and will update each week based on your progress. Lumen’s goal is metabolic flexibility-how capable a person’s body is at switching between fuel sources at appropriate times. This is important because most people do not use fat properly because of the comsumption of too many carbs leading to the inability to lose the weight you are wanting to. Essentially, Lumen hacks our metabolism to enable use to better use fats and carbs in our diets for metabolic efficiency.

The Lumen app offers some great insights for nutrition such as personalized meal recommendations, real-time metabolic insights, and sustainable tailored eating plans which is why it feels as if you have a nutritionist wherever you go! I was able to learn what goes into a properly balanced meal. I absolutely adore all of the education within the app.

Not only that, you can actually see if you have enough energy before a workout or if you need to fuel up. Then you can breathe afterward to see the impact of the workout on your body since it allows you to measure multiple times per day. The Lumen app truly hits on every aspect of fitness to give you the best results possible. I honestly think it is a great form of motivation in my own life-I love knowing how my metabolism is working at all times!

I feel that Lumen is perfect for anyone who is on a fitness mission. Whether you are on a special diet or want to keep track of what you are burning, this small device is certainly a huge motivator. Or even if you just had a baby!

The Lumen device is available at Lumen.me, and if you use code fitmommy, you will get 10% off your order!

The device comes equipped with a travel case, charging dock, USB-C Cable, and Premium Customer Support. Users can download the app for free on the Apple App Store and on Google Play.

This image has an empty alt attribute; its file name is IMG_6953-rotated.jpg

He is finally here. My sweet Christmas Eve baby boy who is absolutely perfect in every way. When we first learned about our January 5 due date, my husband joked about us having a Christmas baby. I, for one, was super against it. I did not want him to have to share his birthday with a national holiday, afraid it would be overshadowed. But nevertheless, babies will come when they want. My doctor gave us the option to induce early as my blood pressure was high and I was suffering from polyhydraminos or excess amniotic fluid. We chose to go in on December 22 with hopes of having a December 23 baby. But he came into this world in holly jolly style, of course at 3:46am via C-section on December 24.

When I was admitted the evening of the 22nd, they set me up and did all the routine things. I was in high spirits and I just KNEW my baby would be here super soon. I kept thinking about how easy the second time around was so surely the third time would be even easier, right? Ha. My doctor did mention that the third babies were always stubborn.

They gave me Cytotec around 10pm which started some cramping. I had a cervical check which did not show a whole lot-maybe 1.5 cm. Around 5-6 am, I got an epidural to prep myself. Around 8, pitocin began. I was READY TO GO! Things went pretty slowly though as far as dilation and then the doctor broke my water around lunch time. I began laboring for the rest of the day but started feeling some uncomfortable pains despite having an epidural. I had a catheter in so I had an immense amount of pressure down in my bladder area-it felt as if my urethra was on fire. I am not kidding. It felt as if I had to pee, but the tubes were “peeing” for me. It did not make sense. And of course I had the traditional bearing down feeling like I had to go poop. I stayed like this for hours. Finally around midnight, I was about fully dilated so we were going to get to pushing. I pushed for 2 to 2 1/2 hours with no luck-my baby was still so far up high that he was not coming down where he needed to be and he was also sunny side up. It was also thought that he was just too big for my pelvis. I realized quickly what had to be done, but I decided to push just a little longer since the last thing I wanted was to be cut open.

When I realized a c-section was the only way, they prepped me and wheeled me back. The medications made me extremely sick and I kept gagging and throwing up. Then my body began to shake on the table. The surgery maybe took 30 minutes or so-I think. I will never forget feeling that internal tugging. I guess because I had a c-section with an epidural and not a spinal, I could feel the pain. The cutting did not hurt but the tugs-whoa-I will never forget those. They allowed my husband to come in after the cutting began, right before they pulled our son out. When they removed him, I will never forget my husband saying how beautiful he was and how he looked like me.I will never forget hearing his first cries. I had the drape pulled up so I could not see anything in front of me, so I must have been super tuned in with my ears.I remember I heard the faintest, sweetest little baby cry-the sweetest sound I have ever heard. I could not wait to see him. My baby was born! It felt like forever before I could see him and they placed him right at my side. The nurse brought my baby to me swaddled up and placed him by my face for a photo then wheeled him away to the nursery to clean him all up. It was not until after I got back to my room where I truly got to experience my little man. 8 pounds and 7 ounces was his weight and he was 21 and 1/4 inches long.

Recovery was tough. I cannot understand how anyone would say that a c-section is the easy way out. I mean, I wish I had never had to have one. The first 4 days were brutal but I would say around the 5th day, I started feeling more like myself. Nobody ever told me how painful the first poop is after the surgery and also how laughing and coughing hurts like hell. But he was worth every cut and every stitch.

The moment that Everly and Greyson got to meet Kaden was the sweetest and I am so thankful my husband caught it on video. I remember them walking in with my mother in law and running straight to the bed. They were in AWE and love. Greyson was taken back with such emotion while Everly jumped into little mama mode rather quickly. They had asked for a sibling for so long and I am so thrilled we got to give them one.

This birth was not the most ideal, but this is how my sweet Christmas Eve baby was born and I am ok with that. With my next pregnancy, I would love to try to VBAC but perhaps a scheduled C-section would be the way to go. I heard those are less chaotic and less painful. Nevertheless, I am just thankful. I am grateful that our IVF journey was a successful one and I am so proud of our little embryo that could.

This is my last week of pregnancy with baby number three as we were told that we would be inducing at 38 weeks due to high blood pressure and amniotic fluid volume. I have never been induced before so I am a little nervous about what to expect but we are all so excited to meet him. I am so grateful my kids to get to be here for his birth. That is the most important thing to me! My mother in law is coming down and we are going to have the best Christmas ever. As I reflect on this pregnancy, it was certainly the most uncomfortable one due to all the rib pain. I also gained more with this baby than any other but I did not have any issues with my first two. Well, cheers to meeting baby K!

How far along? 38 weeks

Baby size: Watermelon

Total weight gain: 36lbs – 164lbs total weight. Weight has remained steady the last three weeks-I have not been as hungry.

Maternity clothes? Yes! For the most part. Its hard to wear normal jackets now that its winter lol.

Stretch marks? None that I can see but I never got them before.

Sleep: I am having night sweats and I am unsure why. My body hurts when I toss and turn.

Workouts: Going steady and well!

Diet: Not eating as much as I usually do nor am I craving much.

Best moment this week: Going to Christmas in Candyland with my babies and prepping for their baby brother to be here

Miss anything? Being comfortable LOL.

Food cravings: Oranges and cereal – light stuff- same as last week.

Anything making you queasy or sick? No but I have been feeling a tad bit nauseated this week.

Gender: a BOY! 🙂

Labour signs: Contractions are starting to feel more painful.

Symptoms: Heartburn is still awful.

Belly button in or out? In! It never popped out the last 2 times.

Wedding rings on or off: On

Notes

I found out I was pregnant at just 3 weeks of pregnancy after we did our frozen embryo transfer. If you haven’t followed my IVF journey, check out my frozen embryo transfer blog and my egg retrieval blog. Long story short, my husband was infertile due to the structure of his reproductive system-his vas deferens were missing so IVF was the only way and it worked the first try!

I have not been pregnant in 8 years almost so it is wild that I am doing it all over again and hope to do it only fourth and final time in another two-three years. Wish us luck and love! I will be doing these pregnancy progression bump updates weekly so you can “grow” with me along with a bump photo + questions about my pregnancy.

I am less than a month away from my due date with my third baby. I have to admit that this is the most tired I have been out of all of my pregnancies. Making freezer meals before baby arrives this time around was a no-brainer since I did the whole freezer meal thing with my little girl when I was pregnant the last time. Having meals ready to go really was a gamechanger when getting aquainted with your new baby and truly helps to take some of the stress off. I have included a grocery list and all the recipes to help make all the meals. I did all my shopping at Walmart and spent about $250 which is a little said considering 8 years ago when I created 15 freezer meals meals before my daughter arrived, I spent just $150… Inflation, sigh.

There are 4 simple steps to batch freezer meal making:

  1. Select your meals and jot down recipes.
  2. Gather your supplies to make the meals.
  3. Create a grocery shopping list andgo shopping.
  4. Pick a day and cook away!

Here is my freezer meal list this time around:

  1. Sausage Egg and Cheese Breakfast Burritos
  2. Bacon Egg and Cheese Breakfast Pockets
  3. Breakfast Sandwiches
  4. Beef Bean and Cheese Burritos
  5. Cheesy Jalapeno Popper Chicken Taquitos
  6. Tuscan Chicken Bake
  7. Cheesy Taco Rice Bake
  8. Crack Chicken Casserole
  9. Hawaiian Sweet Roll Sliders
  10. Beef and Cheese Ravioli
  11. Pizza Casserole
  12. Broccoli Cheese Chicken and Rice Casserole
  13. Dump and Bake Meatball Casserole

If you followed my freezer meal blog from 2016, you will notice some repeat recipes carried through to this list. That is because they frozen VERY well and tasted SO good! However, most of this list are new recipes and I am just as eager to try them as you are! These recipes are super hearty and for a good reason-right after you have your baby, you will be HUNGRY. You will need all the fuel you can get to fuel your sleepless nights and busy days. And if you are breastfeeding, you are going to need these calories even more. I cannot wait to hear which meals you liked best.

Supplies

First things first, you will want to make sure you have the proper supplies to prep these meals. I have created a quick list below that you can use when you go shopping:

  • Sharpie markers
  • Zip lock bags (gallon size)
  • Wax paper
  • Aluminum foil
  • Aluminum pans

Grocery List

BREADS/GRAINS 

  • 2 packs large tortillas – burrito size, at least 32 total     
  • 1 pack medium/small taco size tortillas (20 count)   
  • 12 English muffins   
  • 1 box bowtie pasta   
  • 1 box Instant Brown rice   
  • 1 box shell pasta   
  • One pack Hawaiian Rolls   
  • 2 cans refrigerated buttermilk biscuits   
  • 1 box Long grain white rice   
  • 1 box rotini  pasta 

MEATS 

  • 2lb ground breakfast sausage 
  • 2 packs of bacon  
  • 12 sausage patties  (pre shaped) 
  • 4lb ground beef   
  • 6 chicken breasts   
  • 4lb chicken tenderloins   
  • 1 package deli ham   
  • 1 small pack of sliced pepperoni or your favorite toppings   

PRODUCE 

  • 5 jalapenos 
  • 2 bulbs of Garlic cloves   
  • 1 yellow onion 
  • 1 bell pepper 
  • 1 lime 
  • 1 bunch Cilantro 
  • 1 bunch parsley    
  • 1 head broccoli   

DAIRY & EGGS 

  • 5 packs of 16oz shredded cheddar 
  • 1 pack of12 slices cheddar cheese   
  • 1 package of 12 slices swiss cheese   
  • 2 16oz packs mozzarella cheese shredded 
  • 4 (8oz) packages cream cheese   
  • 1 container of Parmesan cheese, shredded   
  • 2 small containers sour cream 
  • 1 package Butter   
  • 1 carton whole Milk   
  • 3 cartons of 12 count eggs 

FROZEN 

  • 2 packs puff pastry 
  • 24 ounces cheese ravioli 2 (12-ounce) bags, fresh or frozen   
  • 1 pound frozen meatballs    

CANNED & JARRED GOODS 

  • 1 large can refried beans   
  • 8 oz jar sun fried tomatoes  
  •  1 (15 oz) can tomato sauce   
  • 32 ounces marinara sauce   
  • 1 24-ounce jar marinara sauce   
  • 1 15 oz jar pizza sauce   
  • 1 can cream of chicken soup   

SEASONINGS & CONDIMENTS 

  • Garlic powder 
  • Basil 
  • Chili Powder 
  • Oregano 
  • Thyme 
  • Cumin 
  • 1 (1-ounce) package Ranch Seasoning Mix 
  • Salt and pepper 
  • Dijon mustard 
  • Worcestershire sauce 
  • Mayo 
  • Honey 
  • Dried onion 
  • Poppy seeds 
  • Italian seasoning 
  • Onion powder 
  • Red pepper flakes 

Recipes

Jalapeno Popper Chicken Taquitos

Ingredients

  • 1 pack medium/small taco size tortillas (20 count)   
  • 3-5 jalapenos, seeded and diced
  • 2 packs cream cheese
  • 3 chicken breasts, cooked and shredded
  • 1 package shredded cheddar
  • Cumin
  • Salt and pepper

Directions

  1. Preheat oven to 350 degrees.
  2. In a mixing bowl, add all ingredients except for tortillas and stir well.
  3. Lay out a tortilla and add 2-3 spoonfuls of mixture and then roll up into a taquito.
  4. Lay on a baking sheet and bake taquitos for 10 minutes.
  5. Let cool and wrap in parchment paper and/or foil and place into a gallon ziplock bag. Store away in freezer.

Bubble Up Pizza Casserole

Ingredients

  • 2 cans refrigerated buttermilk biscuits
  • 1- 15 oz jar pizza sauce
  • 2 tsp Italian seasoning
  • ½ tsp garlic powder
  • 2 cups shredded mozzarella cheese
  • 4 oz sliced pepperoni and your favorite toppings

Directions

  1. Cut each buttermilk biscuit into quarters using a sharp knife or pizza cutter.
  2. Line the bottom of the baking dish evenly with the biscuit pieces.
  3. Spread the pizza sauce over the biscuit pieces using a small spatula or spoon.
  4. Add the Italian seasoning and garlic powder evenly over the pizza sauce.
  5. Sprinkle the mozzarella cheese evenly on top.
  6. Top the cheese with pepperoni slices and freeze.
  7. To cook, bake for 25-30 minutes until the cheese is melted and slightly brown, and the dough is cooked through. Add your favorite pizza toppings and make it your own!

Chicken Broccoli and Rice Casserole

Ingredients

  • 2 Tablespoons butter
  • 2lb skinless chicken breasts or tenderloins
  • 1 teaspoon Italian Seasoning
  • Salt/Pepper, to taste
  • 1 Tablespoon olive oil
  • 1 1/4 cups white long grain rice, uncooked
  • 2 cups fresh broccoli florets, uncooked
  • 10.5 oz. Condensed Cream of Chicken Soup
  • ½ cup milk
  • ½ cup sour cream
  • 2 cups shredded cheddar cheese, separated

Directions

  1. Cut chicken into bite-sized pieces and season with Italian seasoning and desired amount of salt and pepper.
  2. Heat butter in a large pot over medium heat until melted. Add the chicken and cook until golden brown on all sides, about 5 minutes. Remove and set aside.
  3. Add the chicken broth, olive oil, and rice to the pot and bring to a boil, then reduce heat to a simmer.
  4. Cover tightly and cook for 6 minutes.
  5. Add the broccoli and replace the cover. Cook for 9 more minutes, or until no liquid remains in the pot and the rice is cooked through.
  6. Turn off the heat and leave the cover on. Let the rice stand for 10 minutes, do not stir. Any rice on the bottom of the pot will release.
  7. Add the cooked chicken, cream of chicken soup, milk, sour cream, optional seasonings, and half of the cheddar cheese to the pot of rice.
  8. Add to a lightly greased 9 x 13 casserole dish and top with remaining cheese and freeze.
  9. To cook, bake at 350 degrees until heated through.

Dump and Bake Meatball Casserole

Ingredients

  • 1 pound frozen meatballs (beef, turkey, or chicken)
  • 2 cups cooked pasta (such as penne, bowtie, or rotini)
  • 1 (24-ounce) jar marinara sauce
  • 1 teaspoon Italian seasoning
  • 1/2 teaspoon garlic powder
  • 1/2 teaspoon onion powder
  • 1/4 teaspoon red pepper flakes (optional, for a little heat)
  • Salt and pepper to taste
  • 2 cups shredded mozzarella cheese
  • Fresh parsley, chopped (for garnish, optional)

Directions

  1. Spray a casserole dish with cooking spray or butter.
  2. In the prepared baking dish, combine the frozen meatballs, pasta, marinara sauce, Italian seasoning, garlic powder, onion powder, red pepper flakes (if using), salt, and pepper. Stir everything together until well combined.
  3. Sprinkle the shredded mozzarella cheese evenly over the top.
  4. Freeze and enjoy later.

Hawaiian Sweet Roll Sliders

Ingredients

  • 1 dozen Hawaiian sweet buns
  • 12 slices deli ham
  • 6 cheese slices (Swiss, cheddar, or marble)
  • 1/2 cup butter, melted
  • 1 Tbsp. mayonnaise
  • 1 Tbsp. Dijon mustard
  • 1/2 Tbsp. Worcestershire
  • 1 Tbsp. poppy seeds
  • 1 Tbsp. honey
  • 1/2 Tbsp. dried onion

Directions

  1. Place the buns on a flat surface and slice the buns all together.
  2. Put the bottom part of the buns in a 9×13 aluminum baking tray.
  3. Layer ham and cheese on top of the buns, then place the top layer of buns over the cheese.
  4. Mix up the dressing by combining the melted butter, mayonnaise, Dijon mustard, Worcestershire sauce, poppy seeds, honey, and dried onion in a small bowl. Spread the dressing mixture over the top of the buns.
  5. Cover the tray with two layers of aluminum foil and store in the freezer until you’re ready to eat.

Crack Chicken Casserole

Ingredients

  • 1 (8-ounce) block cream cheese – softened
  • 1 cup sour cream
  • 1 (1-ounce) package Ranch Seasoning Mix
  • ½ teaspoon salt
  • ½ teaspoon Ground black pepper
  • 2 pounds chicken breast or tenderloins – cut into 1-inch pieces
  • 8 ounces shell pasta
  • 6 slices bacon – cooked until crisp and chopped
  • 1 cup sharp cheddar cheese – freshly shredded

Directions

  1. Spray a large oven-safe skillet or baking dish with non-stick cooking spray. Set aside.
  2. Beat the cream cheese in a large bowl until easily spreadable, then add the sour cream, ranch dressing mix, salt, and pepper and continue to mix until fully combined.
  3. Add the chicken to the cream cheese mixture and mix until coated. Transfer the chicken to the prepared oven-safe casserole dish and bake for 20 minutes.
  4. In the meantime, boil the pasta in a large pot of salted water according to package instructions. Drain and set aside.
  5. Remove the chicken from the oven and stir gently. Fold in the pasta and cooked bacon, then add half of the shredded cheese and stir until melted. Sprinkle the remaining cheese over the top. Freeze at this step.
  6. To cook, cook frozen at 350 degrees until cooked through.

Freezer Ravioli Bake

Ingredients

  • 24 ounces cheese ravioli 2 (12-ounce) bags, fresh or frozen
  • 1 pound lean ground beef
  • 2 cloves minced garlic
  • 1 tsp Italian seasoning
  • 1 tsp onion powder
  • 32 ounces marinara sauce
  • 2 cups mozzarella cheese divided
  • 1/2 cup grated parmesan cheese
  • 1 tbsp chopped fresh parsley optional

Directions

  1. Grease or spray with cooking spray a 9 x 13 or similar size foil pan or freezer safe ceramic baker.
  2. In a large skillet over medium-high heat, brown ground beef, breaking into crumbles with spoon. Drain fat as needed. To the beef, add the garlic, Italian seasoning, onion powder and marinara sauce.. Stir to combine. Reduce heat to medium and continue to cook 5 minutes until heated thru and flavors are blended.
  3. Spread 1/3 of meat mixture in the bottom of prepared pan. Top with 1/2 of the raviolis, laying out in a single layer. Top with another 1/3 of the meat mixture and one-half each of the mozzarella and parmesan cheeses. Repeat the layers of ravioli, then meat sauce, ending with the cheeses and parsley.
  4. Cover pan with foil, sealing edges then wrap completely in plastic wrap. Freeze for up to 3 months.

Sausage Egg and Cheese Breakfast Burritos

Ingredients:

  • 12 eggs, scrambled
  • 1lb. ground sausage
  • 1 package shredded cheddar cheese
  • Veggies you fancy: onions, spinach, mushrooms, tomatoes, bell peppers (etc-optional)
  • 1 pack large tortillas

Instructions:

  1. Lay each tortilla on wax paper and top with either sausage or bacon, eggs, and veggies of choice.
  2. Spoon 2 tbsp. shredded cheddar cheese on top.
  3. Fold burrito and wrap in wax paper and then tin foil.
  4. Place into gallon bags and freeze.
  5. To cook, microwave for 2-3 minutes.

Cheesy Taco Rice Bake

Ingredients

  • 1 cup uncooked brown rice
  • 1 yellow onion, chopped
  • 3 cloves garlic, minced
  • 20 oz lean ground beef
  • Green pepper,chopped
  • 1-2 tsp fresh lime juice
  • 2 T Chili Powder
  • 1 tsp Oregano
  • ½ tsp Thyme
  • 2 tsp cumin
  • 1/3 cup Cilantro, chopped
  • 1 cup Shredded Cheddar Cheese
  • 1 (15 oz) can tomato sauce

Instructions

  1. Preheat oven to 350. Spray a 9X13 baking dish with EVOO, set aside.
  2. Boil brown rice in water on stovetop. Set aside
  3. In a 12” pan, spray with EVOO or cooking spray, add onion, garlic, and green pepper & sauté over medium-high heat for 1 minute.
  4. Add ground beef, breaking it up as it browns. Cook for about 5 minutes & add peppers. Cook for 3-4 minutes, or until meat is no longer pink.
  5. Add lime juice and seasonings. Stir to combine. Adjust seasonings to taste.
  6. Remove from heat – add rice, tomato sauce, & 1/4 cup of cheese to the skillet and stir to mix well.
  7. Pour mixture into baking dish. Top with remaining Cheddar, cover, and freeze.
  8. To cook while frozen, cover with foil & bake for 40 minutes.
  9. Remove foil & bake an additional 10 minutes or until cheese is melted & edges are bubbling. Remove from oven & let cool for 10 minutes.

Tuscan Chicken Pasta

Ingredients

  • 1 (16oz) box of bowtie or rotini pasta
  • 4 tablespoons butter
  • 4 cloves garlic, finely minced or pressed through a garlic press
  • ½ tablespoon dried basil
  • 8 ounces cream cheese, softened and cut into 8 pieces
  • 8-ounce jar sun-dried tomatoes, rinsed, drained and chopped
  • 2 cups milk
  • 6 ounces Parmesan cheese, grated (about 2 cups)
  • ½ teaspoon ground black pepper
  • ½ teaspoon salt, more to taste, if needed
  • 1 cup of chicken, cooked and cubed

Instructions

  1. In a medium pot or skillet, melt the butter over medium heat. Add the garlic and cook for about 2 minutes, stirring the whole time. Stir in the dried basil. Add the cream cheese, stirring with a whisk until the mixture is smooth. It will look curdled at first, but with constant whisking for 2-3 minutes, it will become a smooth creamy paste. Stir in the sun-dried tomatoes.
  2. Over medium heat, add the milk and whisk quickly and constantly until it becomes into the sauce. Stir in the Parmesan cheese, pepper and salt. Cook over medium heat, stirring until the cheese is melted and the sauce is the desired consistency, 5-10 minutes. Serve over hot, cooked noodles. I put my chicken on top, or you can mix it in. You actually don’t even need chicken you don’t want it!
  3. When making them into freezer meals – put the noodles and sauce into two 9×9 foil tins. Wait until it cools down a little, place foil on top, and stick in the freezer.
  4. To cook when frozen: Bake at 350 degrees for 40 minutes or until heated through
  5. To cook when frozen but then thawed: Bake at 350 degrees for 30 minutes or until heated through.

Beef Bean and Cheese Burritos

Ingredients:

1 lb. ground beef
1 can refried beans
1 bag shredded cheddar cheese
1 medium onion
1 pack large tortillas
1 packet taco seasoning

Instructions:

  1. Brown beef in a skillet with onions and taco seasoning & drain well.
  2. Top each tortilla with 2 tbsp. ground beef, 2 tbsp. refried beans, and 2 tbsp. cheddar cheese.
  3. Top with onions and fold into a burrito.
  4. Wrap burrito in wax paper and then in tin foil. Place in gallon freezer bag.
  5. To cook, remove from foil and paper and wrap in paper towel. Microwave for 2-3 minutes.

Freezer Ready Breakfast Sandwiches

Ingredients

  • 12 large eggs
  • 2 TBS milk
  • Salt and pepper
  • 12 English muffins
  • Softened butter or light oil spread
  • 12 sausage patties
  • 12 slices of your favorite cheese

Directions

  1. Preheat oven to 325F. Grease a 9×13 pan with butter
  2. In a large bowl, whisk the eggs and milk, and then pour into the pan. Season generously with salt and pepper. Bake for 18-20 minutes or until the center is just set, being careful not to overcook or dry them out.
  3. While the eggs are baking, use a serrated knife to slice open the English muffins and spread both sides with a light layer of butter or your choice of spread.
  4. Use a metal spatula and cut eggs into 12 equal squares.
  5. Top the bottom halves of the muffins with an egg square, top with cheese, then top with desired amount of meat of choice.
  6. Top with the top halves of the muffins, and then tightly wrap each sandwich in wax paper, plastic wrap or foil. Use a sharpie to indicate what kind of sandwich each one is, and then place the sandwiches into large Ziploc bags and freeze.
  7. When ready to eat: Remove the wrapping from the frozen sandwiches and wrap loosely in a paper towel. Microwave on 40% power for 45 seconds to a minute until no longer frozen in the center (you can test this with your finger, but be careful, it could be hot!) Then microwave at 100% power for 15-30 seconds until cheese is melted and the bacon/sausage is heated all the way through.

Bacon Egg and Cheese Pockets

Ingredients:

  • Refrigerated puff pastry sheets
  • ¾ cup shredded cheese
  • ¾ cup chopped bacon (cooked)
  • 3 eggs scrambled (seasoned with salt and pepper, if desired)
  • 1 egg
  • splash of water

Directions:

  1. Preheat oven to 400℉. Cut puff pastry sheets in squares approximately 4″ x 5″ or 5″ x 5″
  2. Place the puff pastry squares on parchment paper on a baking sheet
  3. Evenly distribute the eggs, bacon, and cheese onto each puff pastry square. Don’t make them too full or they will be hard to seal shut and the ingredients will spill out while baking.Fold the puff pastry square in half in the shape of a triangle, pressing the sides together, then sealing the sides together with a fork.
  4. Make the egg wash by whisking 1 egg with a splash of water
  5. Brush the tops and sides with egg wash
  6. Bake for about 15 minutes or until golden brown
  7. Let the pockets cool and put them in an air-tight bag to freeze.
  8. To enjoy: Reheat in the microwave for about 1 minute and 30 seconds

And there you have it! Please let me know which meals you liked or did not like so I can share. I will be doing another freezer meals post with my next baby! Stay tuned.

This week may be my last week of pregnancy. I went into my doctor appointment and we had an ultrsasound. My amniotic fluid was a bit high and my blood pressure was high as well. Also, baby boy was measuring nearly 8lbs so my doctor said if we wanted, we could proceed. We are nervous and anxious as that cuts down on two weeks of time we could have cleaned and nested, but we are ready. We plan to do a lot this week and hope for the best next week.

How far along? 37 weeks

Baby size: Romaine Swiss chard

Total weight gain: 32lbs – 160lbs total weight. Weight has remained steady the last three weeks-I have not been as hungry.

Maternity clothes? Yes! For the most part. Its hard to wear normal jackets now that its winter lol.

Stretch marks? None that I can see but I never got them before.

Sleep: I am having night sweats and I am unsure why. My body hurts when I toss and turn.

Workouts: Going steady and well!

Diet: Not eating as much as I usually do nor am I craving much.

Best moment this week: Getting to see our baby on ultrasound and being told that we can induce soon! So we have been cleaning and prepping freezer meals like crazy.

Miss anything? Being comfortable LOL.

Food cravings: Oranges and cereal – light stuff- same as last week.

Anything making you queasy or sick? No but I have been feeling a tad bit nauseated this week.

Gender: a BOY! 🙂

Labour signs: Lots of contractions are happening! My hips feel so loose as if they are going to fall apart,

Symptoms: Heartburn has made a comeback. We were told this week that baby still has a ton of hair which makes sense.

Belly button in or out? In! It never popped out the last 2 times.

Wedding rings on or off: On

Notes

I found out I was pregnant at just 3 weeks of pregnancy after we did our frozen embryo transfer. If you haven’t followed my IVF journey, check out my frozen embryo transfer blog and my egg retrieval blog. Long story short, my husband was infertile due to the structure of his reproductive system-his vas deferens were missing so IVF was the only way and it worked the first try!

I have not been pregnant in 8 years almost so it is wild that I am doing it all over again and hope to do it only fourth and final time in another two-three years. Wish us luck and love! I will be doing these pregnancy progression bump updates weekly so you can “grow” with me along with a bump photo + questions about my pregnancy.

This week, we had a quick check up with the baby doc. He checked me and said I was at 1cm so nothing really going on but I did lose parts of my mucous plug. I had a great week with the kids as we did our annual Christmas minis and traveled to NOLA to ride The Polar Express. Other than that, it was a busy week of cleaning to prep for baby (my husband is a bit anxious) and tying up some loose ends. We dont have long to go! We will be buckling down, nesting, and getting ready the next few weeks.

How far along? 36 weeks

Baby size: Romaine Lettuce

Total weight gain: 32lbs – 160lbs total weight. Weight has remained steady the last two weeks-I have not been as hungry.

Maternity clothes? Yes! For the most part. Its hard to wear normal jackets now that its winter lol.

Stretch marks? None that I can see but I never got them before.

Sleep: I dont know if I am still adjusting to the time change from Hawaii but I am SO TIRED this week. I feel like I should be nesting but I am just way too sleepy.

Workouts: Going steady and well!

Diet: Not eating as much as I usually do nor am I craving much.

Best moment this week: Spending time with the kids and going to see the Polar Express in NOLA with them.

Miss anything? Being comfortable LOL.

Food cravings: Oranges and cereal – light stuff

Anything making you queasy or sick? No but I have been feeling a tad bit nauseated this week.

Gender: a BOY! 🙂

Labour signs: Lots of Braxton Hicks contractions and losing bits of my plug.

Symptoms: Heartburn has made a comeback. Lost a bit of my mucuous plug. Lots of discharge-TMI I know. Baby has been super active.

Belly button in or out? In! It never popped out the last 2 times.

Wedding rings on or off: On

Notes

I found out I was pregnant at just 3 weeks of pregnancy after we did our frozen embryo transfer. If you haven’t followed my IVF journey, check out my frozen embryo transfer blog and my egg retrieval blog. Long story short, my husband was infertile due to the structure of his reproductive system-his vas deferens were missing so IVF was the only way and it worked the first try!

I have not been pregnant in 8 years almost so it is wild that I am doing it all over again and hope to do it only fourth and final time in another two-three years. Wish us luck and love! I will be doing these pregnancy progression bump updates weekly so you can “grow” with me along with a bump photo + questions about my pregnancy.

This week we got to see our baby on ultrasound and for the very first time, he was not shy and we got the most beautiful photos of him. We even saw a video of him sticking his tongue out and caught an image of that. We were also told that we had the chance to induce a little early if we wanted so now we decide. I cannot wait to meet him.

How far along? 35 weeks

Baby size: Honeydew melon

Total weight gain: 32lbs – 160lbs total weight

Maternity clothes? Yes! For the most part. Its hard to wear normal jackets now that its winter lol.

Stretch marks? None that I can see but I never got them before.

Sleep: I dont know if I am still adjusting to the time change from Hawaii but I am SO TIRED this week. I feel like I should be nesting but I am just way too sleepy.

Workouts: Going steady and well!

Diet: I have been loving some cereals and oranges this week. Last week it was all abou the Hawaii pancakes.

Best moment this week: Seeing little man on ultrasound sticking his tongue out and looking so cute. We got THE BEST ultrasound images. We were also told that we could be induced early… such a big choice. He is weighing around 6lbs and I think he has dropped because I can finally breathe.

Miss anything? Being comfortable LOL.

Food cravings: Not much at all. Fruits. Baby food puree lol.

Anything making you queasy or sick? No but I have been feeling a tad bit nauseated this week.

Gender: a BOY! 🙂

Labour signs: No!

Symptoms: Lots of heartburn but we saw on ultrasound that baby has SO MUCH hair. Rib pain. I think I can breathe better though. I get full easily.

Belly button in or out? In! It never popped out the last 2 times.

Wedding rings on or off: On

Notes:

I found out I was pregnant at just 3 weeks of pregnancy after we did our frozen embryo transfer. If you haven’t followed my IVF journey, check out my frozen embryo transfer blog and my egg retrieval blog. Long story short, my husband was infertile due to the structure of his reproductive system-his vas deferens were missing so IVF was the only way and it worked the first try!

I have not been pregnant in 8 years almost so it is wild that I am doing it all over again and hope to do it only fourth and final time in another two-three years. Wish us luck and love! I will be doing these pregnancy progression bump updates weekly so you can “grow” with me along with a bump photo + questions about my pregnancy.

X