

Postpartum Workout for the C-Section Mama
Follow my blog with Bloglovin
So you had a cesarean section, now what do you do for exercise? Whether it was planned or an emergency cesarean, it’s time to rehab those core muscles. But first, there are a few things you should know about your C Section.
The external bikini scar is horizontal, but the inside incision of the abdominal wall is vertical. Trust me you wouldn’t want it any other way. The good news is that if you had a diastasis rectus (split of the abdominal wall) or a hernia, it was repaired during the surgery. Just remember that the scar is layers deep. Your internal organs were also moved around and exposed to air. It takes a few weeks for things to find their position again. In the meantime, gas pains and little twinges are normal.
Physiological healing time for any body part is about 6-8 weeks so first give yourself some time to heal. Once you get your doctor’s approval, you may ease into some rehabilitating exercises to help strengthen those cut muscles.
Here are some exercises to avoid until you are completely healed up:
- Crunches, sit-ups, leg raises, and front planks
- Running, jumping, step ups
- Heavy overhead presses
- Heavily weighted exercises
- Anything with direct downward pressure on the pelvic floor, such as a barbell back squat.
Here are some great moves for healing your C-Section tummy:
Diaphragmatic Breathing


Lay on your back with knees bent. Take deep breaths expanding your ribcage. When you breathe out, make sure you exhale completely which will facilitate a light contraction of your abdominal wall. As you improve straighten your legs until you are completely flat on your back. Repeat 10 times. 2 times per day.
Forward Bend
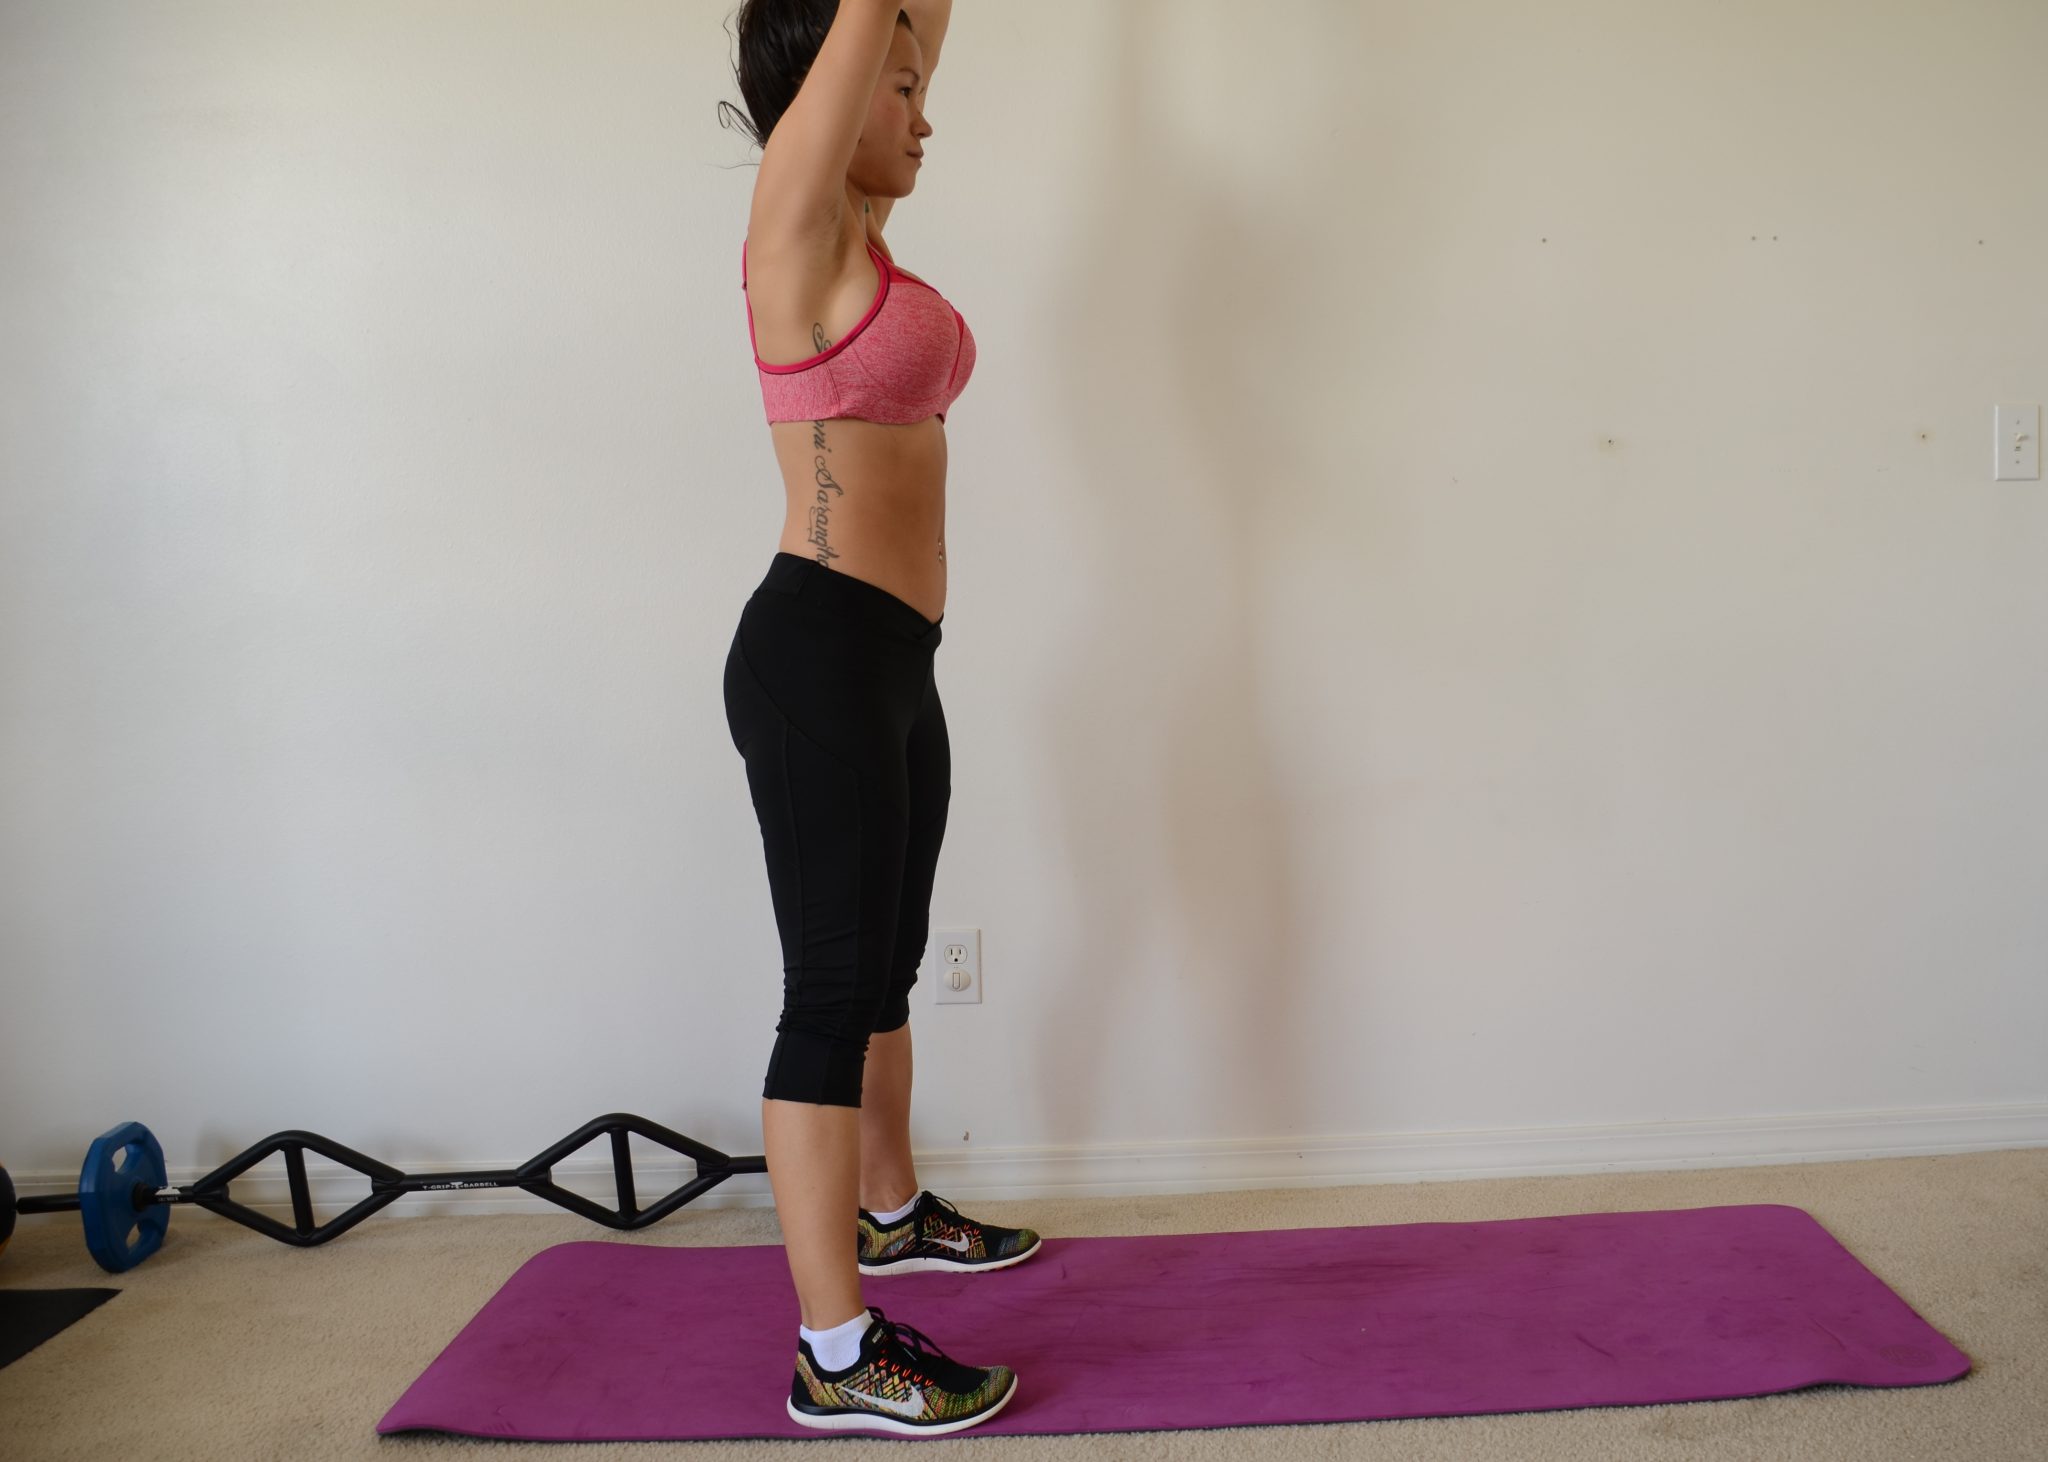

Stand with your feet 3 to 4 feet apart and your hands on your hips. Extend your arms over your head and bend forward at a 90-degree angle, keeping your back flat. Return to starting position. Do 4 to 8 repetitions.
Modified Cobra

Lie on your stomach with your palms flat next to your shoulders. Your elbows should be tucked into your rib cage. Lift your head and neck off the floor, but not so much that it strains your lower back. Suck in your navel as if you were trying to lift your pelvis off the floor. Return to starting position. Do 4 to 8 repetitions.
Pelvic Tilt


Lay on your back with knees bent. Pull your belly button to your spine to tilt your tailbone up while flattening your back. Relax down. Repeat 10 times.
Bird Dog

From hands and knees, activate your core muscles and raise one arm and the opposite leg. You can look down at your baby, maintaining neutral posture while you alternate sides. Repeat 10 times. Add a rattle or toy to your hand and really make your baby giggle while toning at the same time.
Cat/Cow Pose
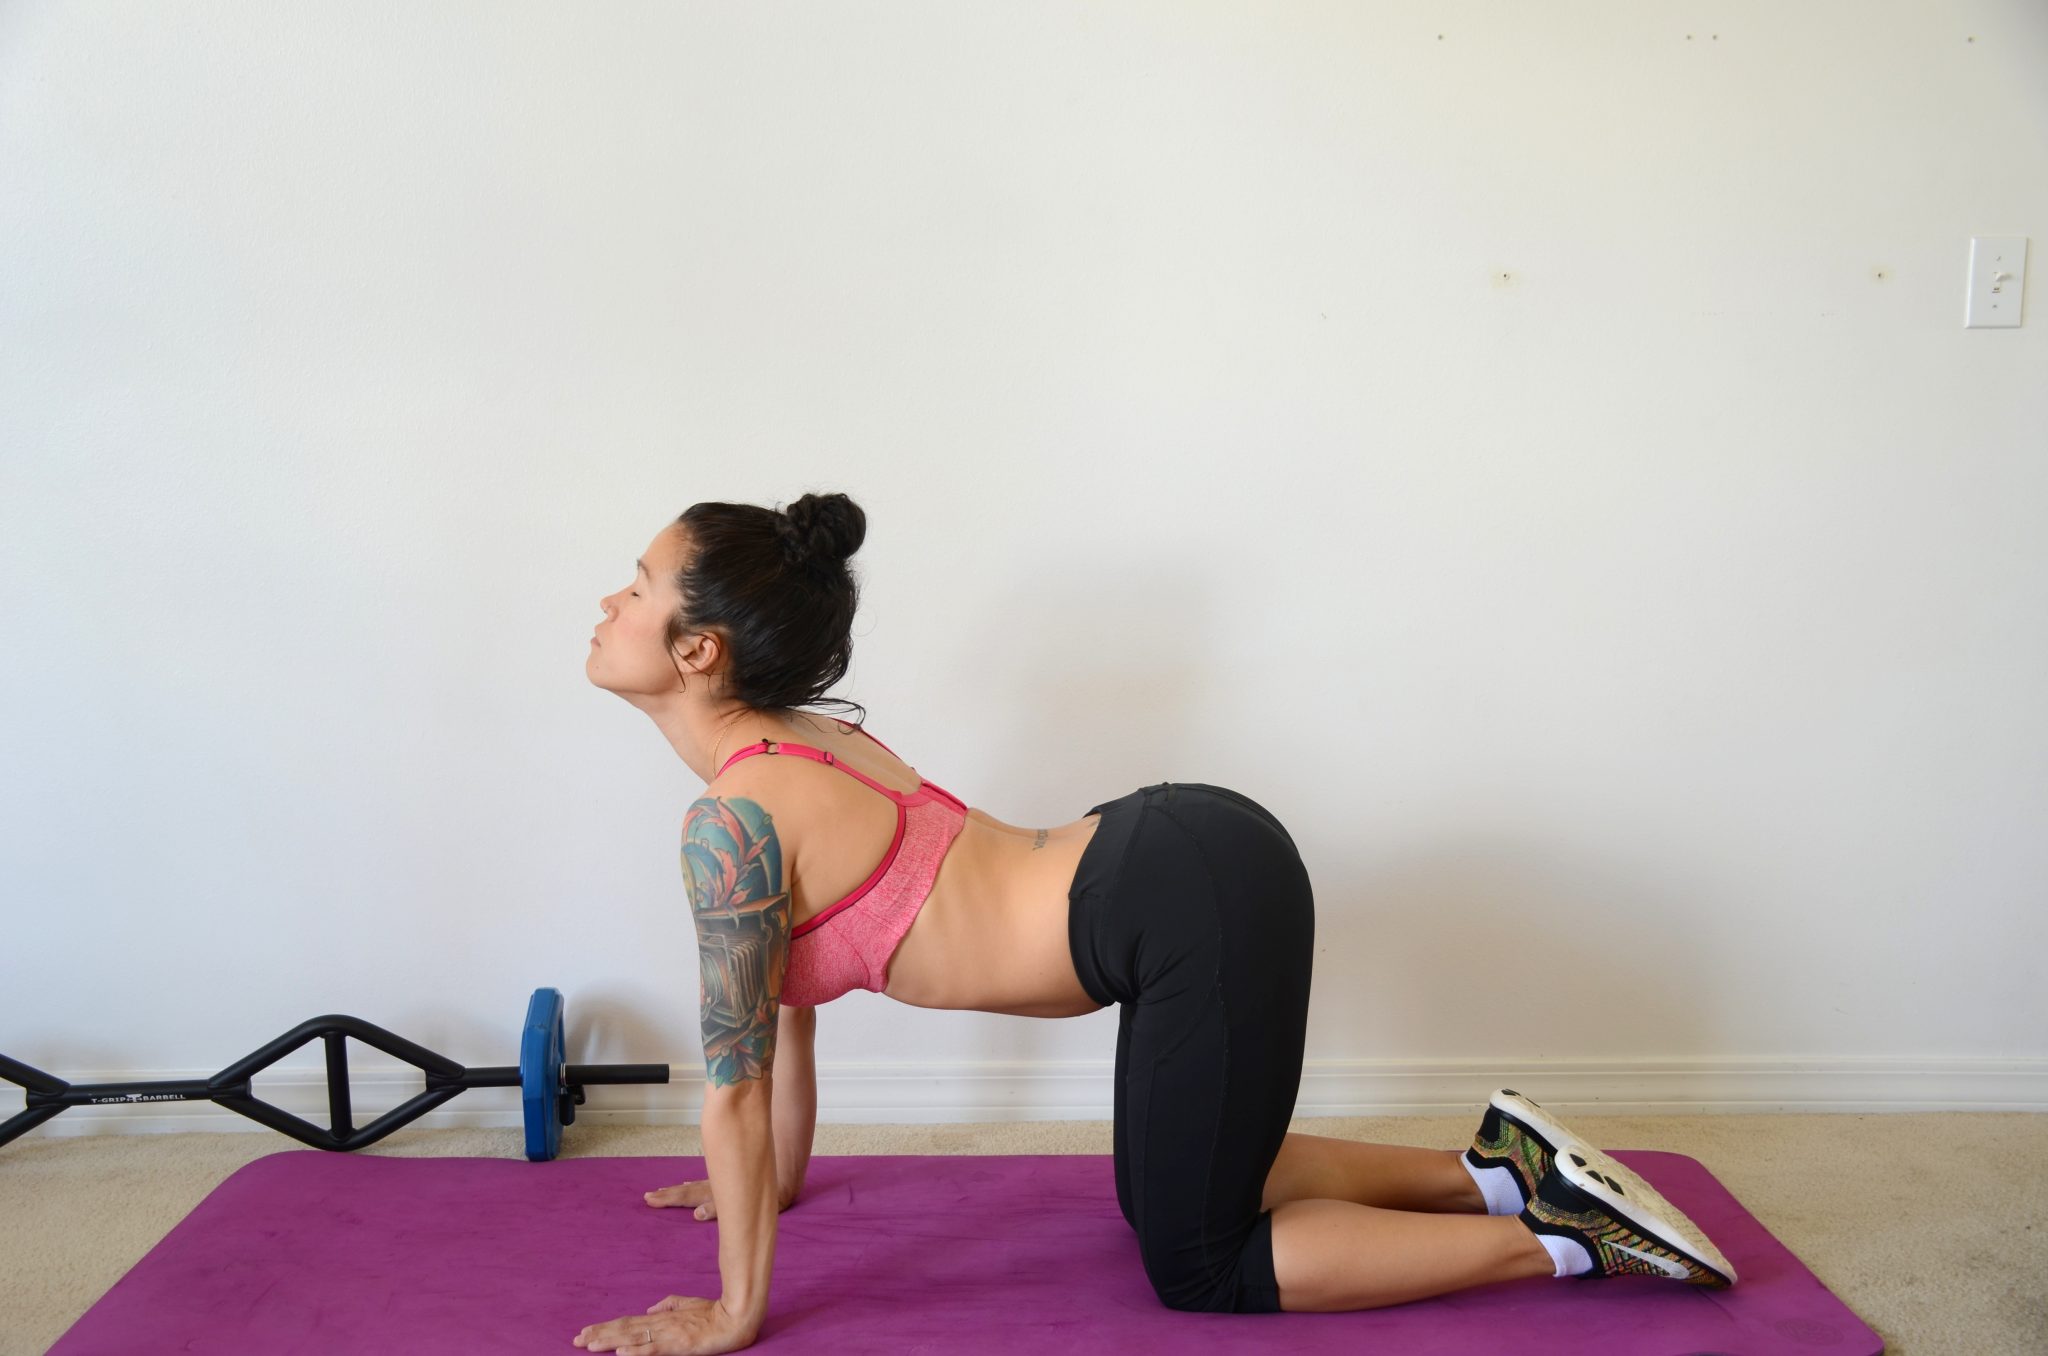
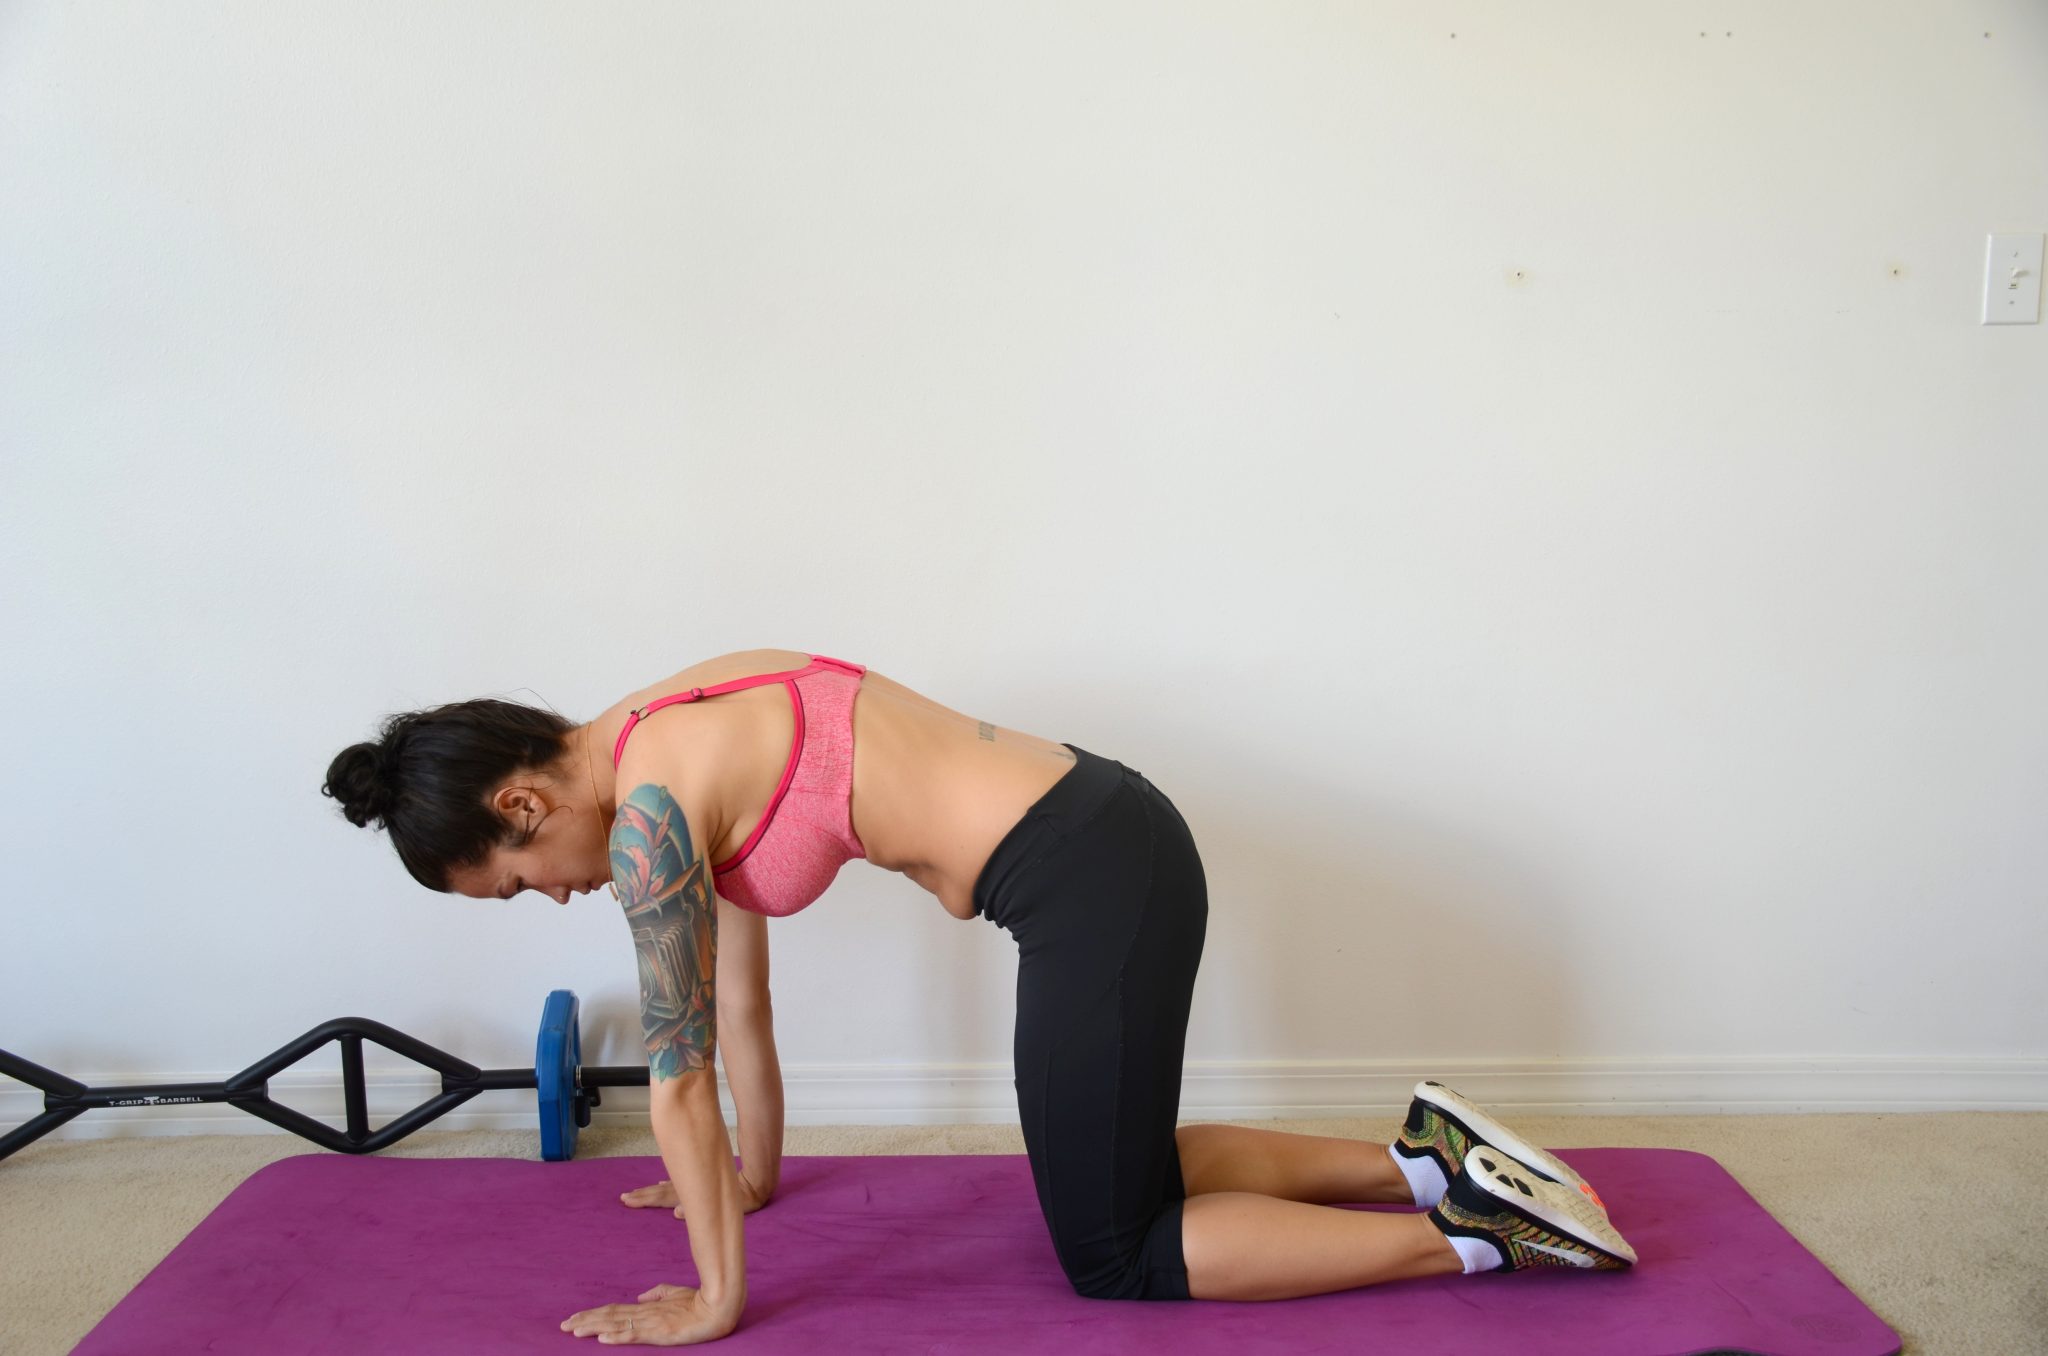
This yoga move is a great way to get your core activated. On your hands and knees, pull your belly button to your spine to round your back while exhaling. Sag your back as you raise your head on inhale. Coordinate the motion with your breath as you repeat 10 times
Heel Slides


Place your finger tips just inside your pelvic bones. Maintain your neutral spine. Activate the muscles under your finger tips by pretending to zip up a tight pair of jeans. Your pelvis should maintain this same position as you straighten one leg, return to start, and repeat on the opposite side. Repeat 10 times maintaining the same position.
Kiss the Baby
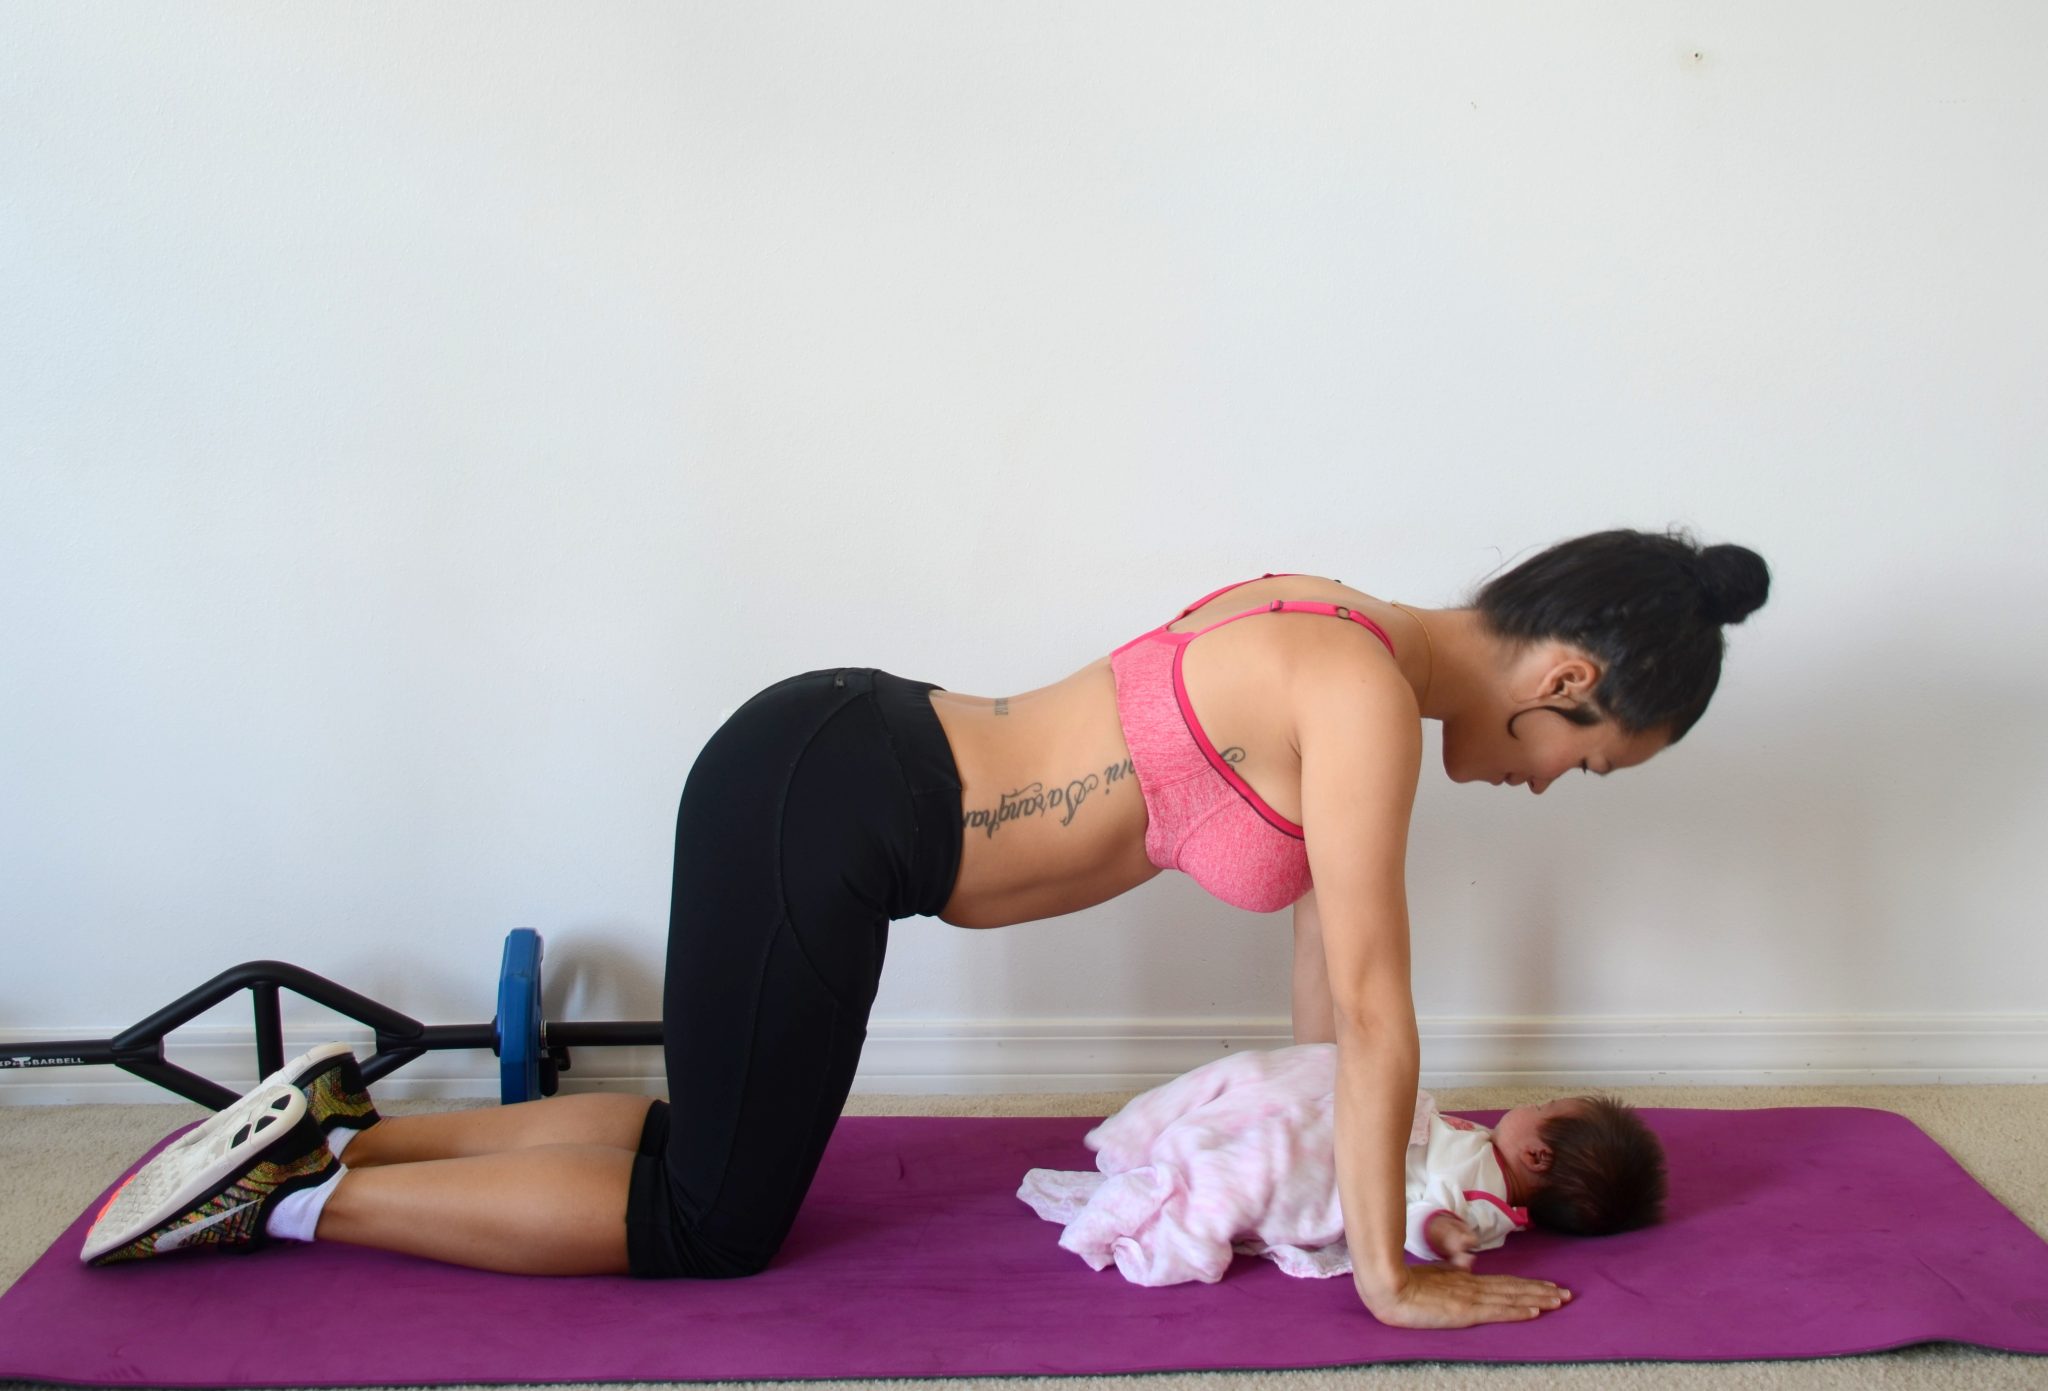

From your hands and knees, bend your elbows to kiss your baby. Babies love to watch you go up and down. Repeat at least 10 times. This exercise progresses to knee push ups or the plank maneuver.
Modified Side Plank

Lie on your side and prop yourself up on your elbow. Extend the forearm straight ahead from the elbow, palm down. Bend the bottom leg about 90 degrees so the foot goes behind you; the top leg extends out. Rest the hip on the mat. (Beginners: Slide a pillow or yoga block underneath the hip to help with range of motion.)
Squeeze the bottom oblique and lift the hip from the floor. Try moving only a few inches up and down instead of returning the hip to the floor. After six to eight reps, tap the floor again. Try not to crunch the supporting shoulder!
Heel Drops


Lie on your back and lift the knees over the hips. It’s very important to make sure the knees do not come any close to the chest. Use those hip flexors to stabilize! Place your hands on your tummy or at your sides, wherever it’s comfortable
Drop on foot down to the floor and tap your toes. Immediately lift the leg up again as the other leg comes down and taps. Use quick exhales to help you. Keep your back to the mat at all times. Modification: Come to your elbows.
If you cannot make it to a gym and need to workout from home, try my new Strong Body Guide that is helping busy women worldwide get into their best shape ever. Little to no equipment needed for most moves!
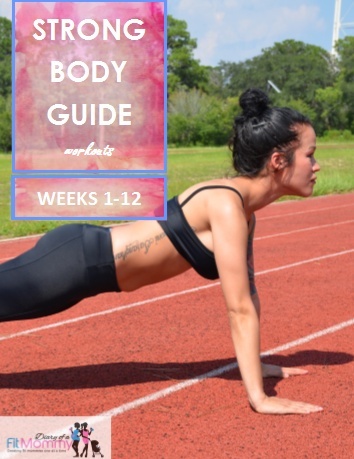
In this guide, you can expect:
– ✅ 12 weeks of workouts that can be done at home with little to no equipment.
– ✅ 225 pages long
– ✅ Each workout takes less than 30 minutes-great for busy schedules.
– ✅ step by step instructional picture examples of every move
– ✅ no gym required
– ✅ exercises focus on hiit, strength training, and plymetrics
– ✅ download on any device
– ✅ build a lean tone stomach, butt, thighs, and arms
– ✅ download instantly from anywhere
– ✅ promote fat loss & boost metabolism
– ✅ contains cardio and stretching routines as well!
– ✅ full exercise glossary with images and instructions for every move
*All guides are digital ebooks available instantly worldwide. Compatible on all devices – Android, iPhone, iPad, Kindle, Nook, Computer, Mac.
Your trainer and friend,


