
Pregnancy
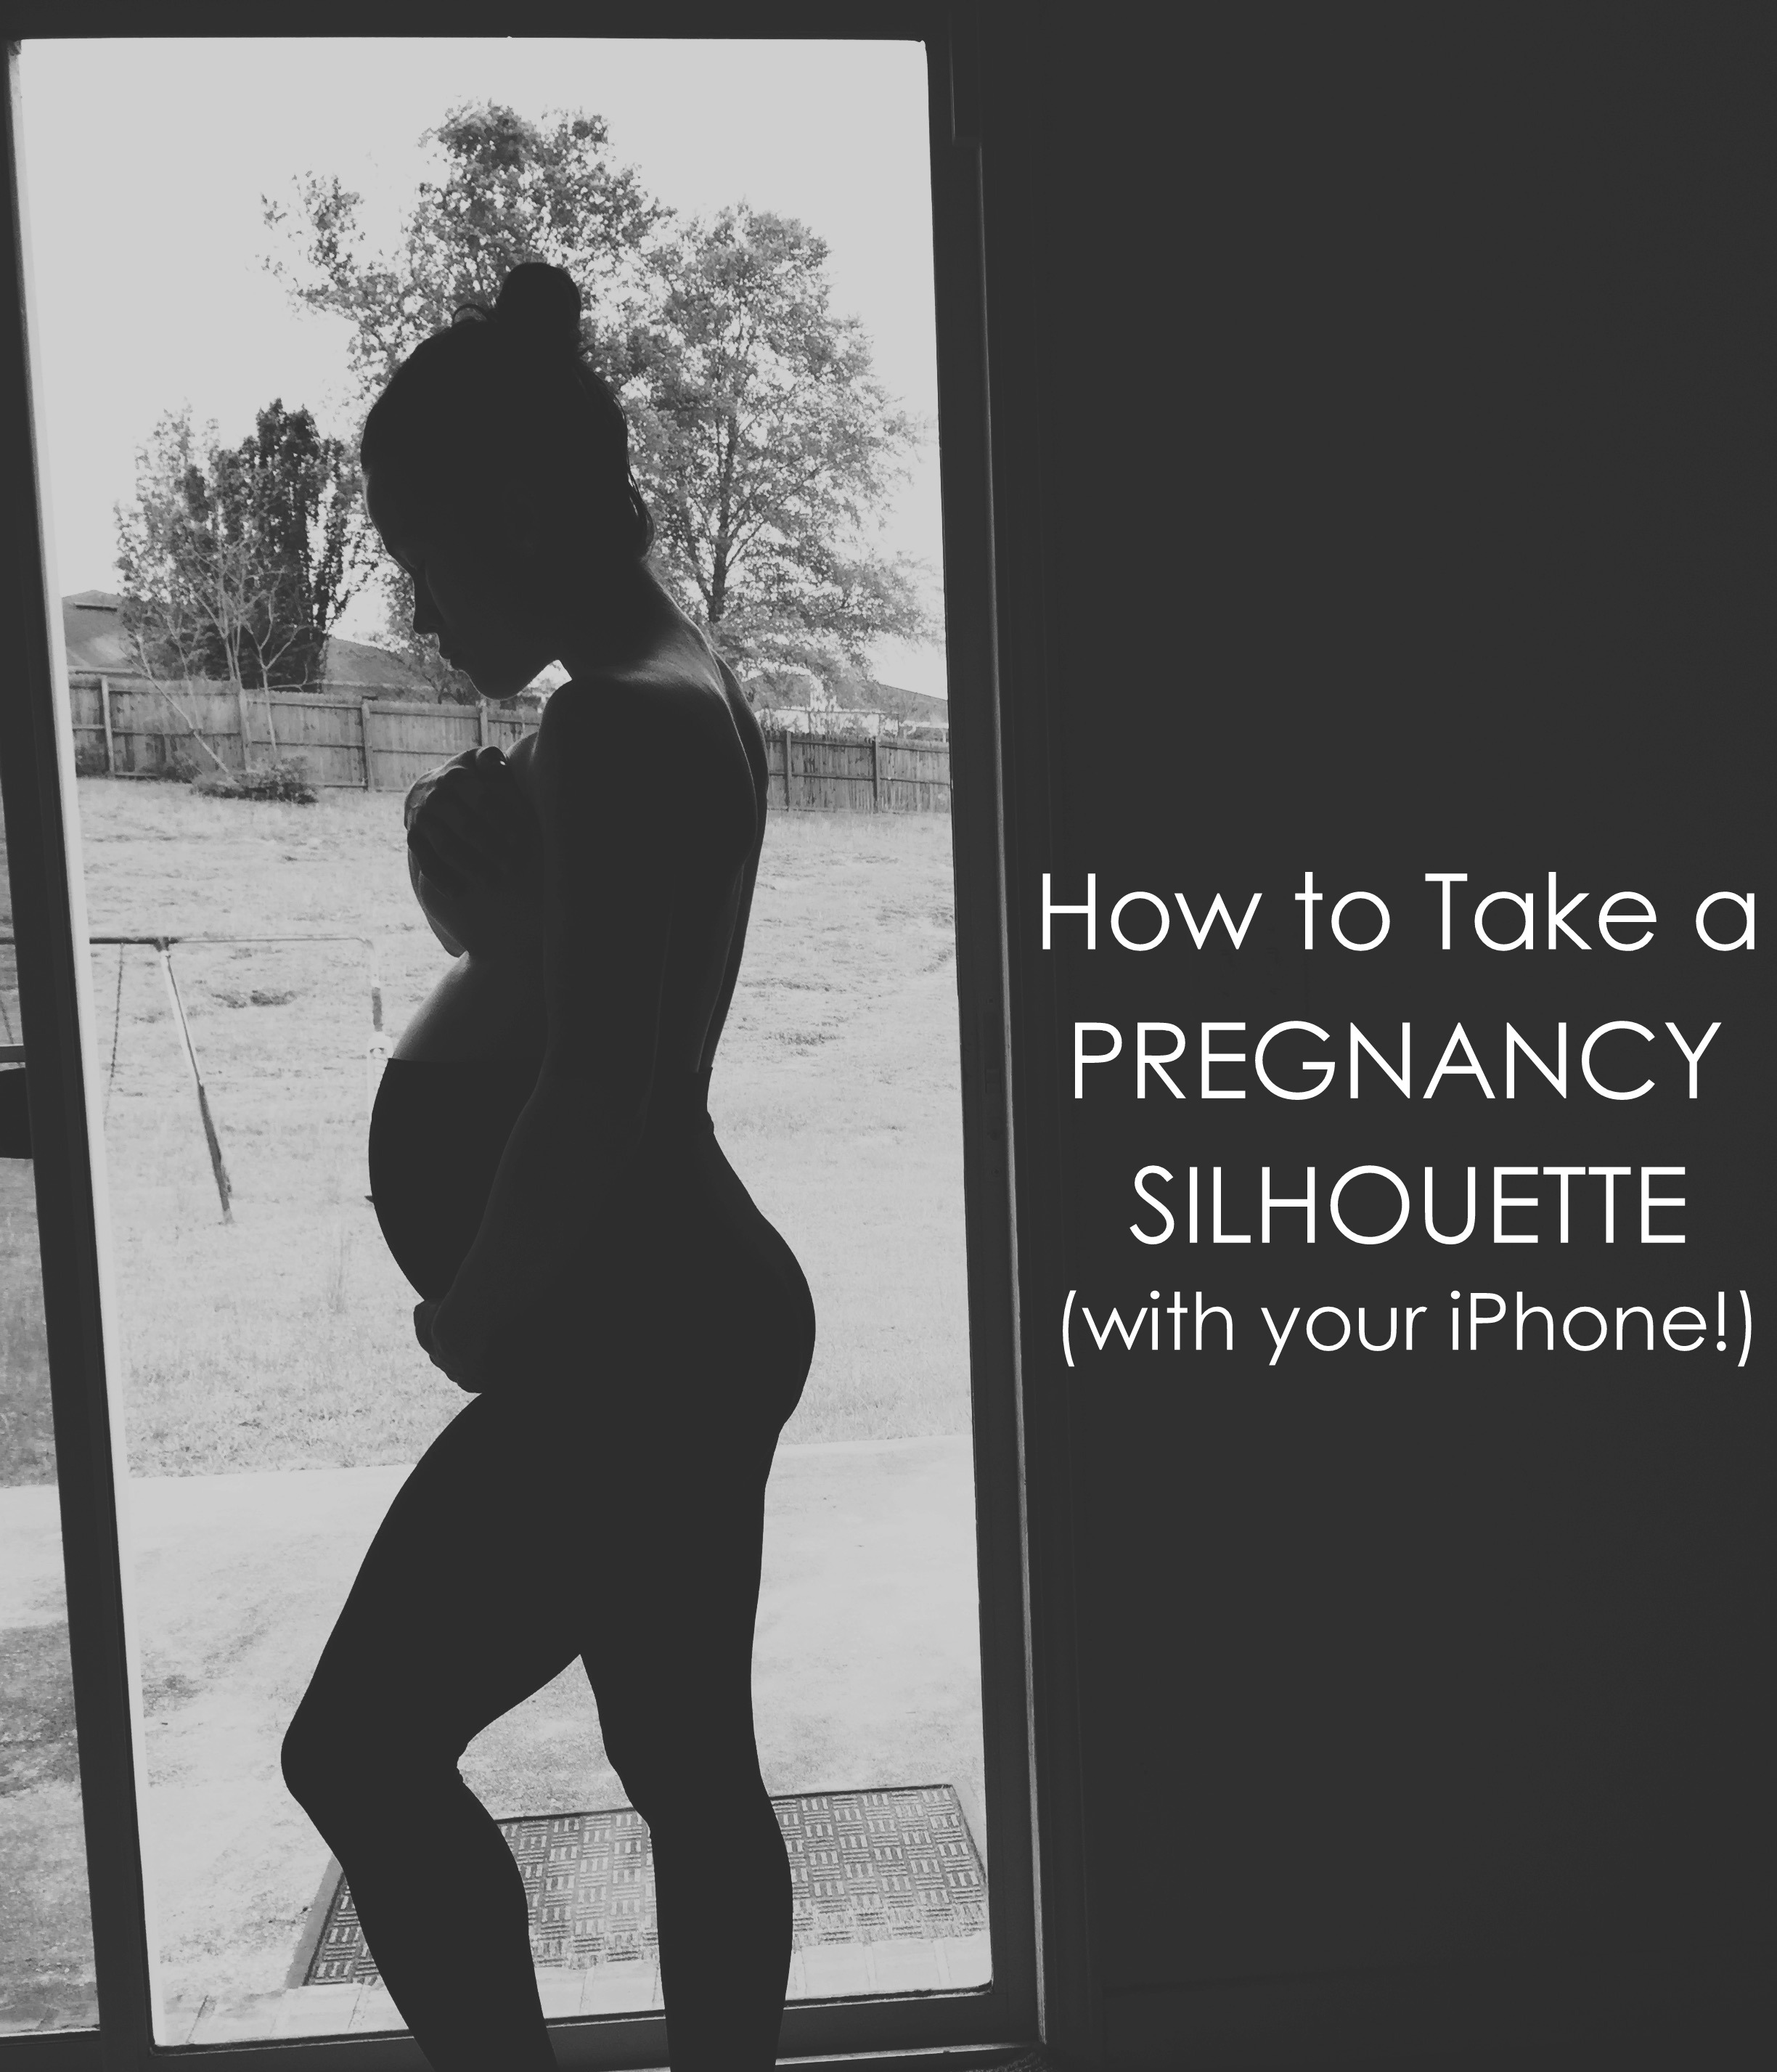
How to Take a Beautiful Pregnancy Silhouette Photo {With Your iPhone!}
There’s something so beautiful about a silhouette photo.. especially when it comes to a big baby bump! Oh, how I love maternity silhouettes! You would think that a lot of work and professionalism went into creating one, but what if I were to tell you that you can take a decent, scrapbook-worthy maternity silhouette photo in a matter of just minutes?
What you need:
- Afterlight iPhone app (it’s only a dollar, but you will use this very often!)
- A large open window/doorway. It can be fancy or not-doesn’t matter.
- Tight, darker clothing such as maternity leggings. I wore these.
- Someone to take your photo. This is actually optional because the Afterlight app has a timer within it, but sometimes it is hard to prop a big iPhone up to the perfect angle.
What to do:
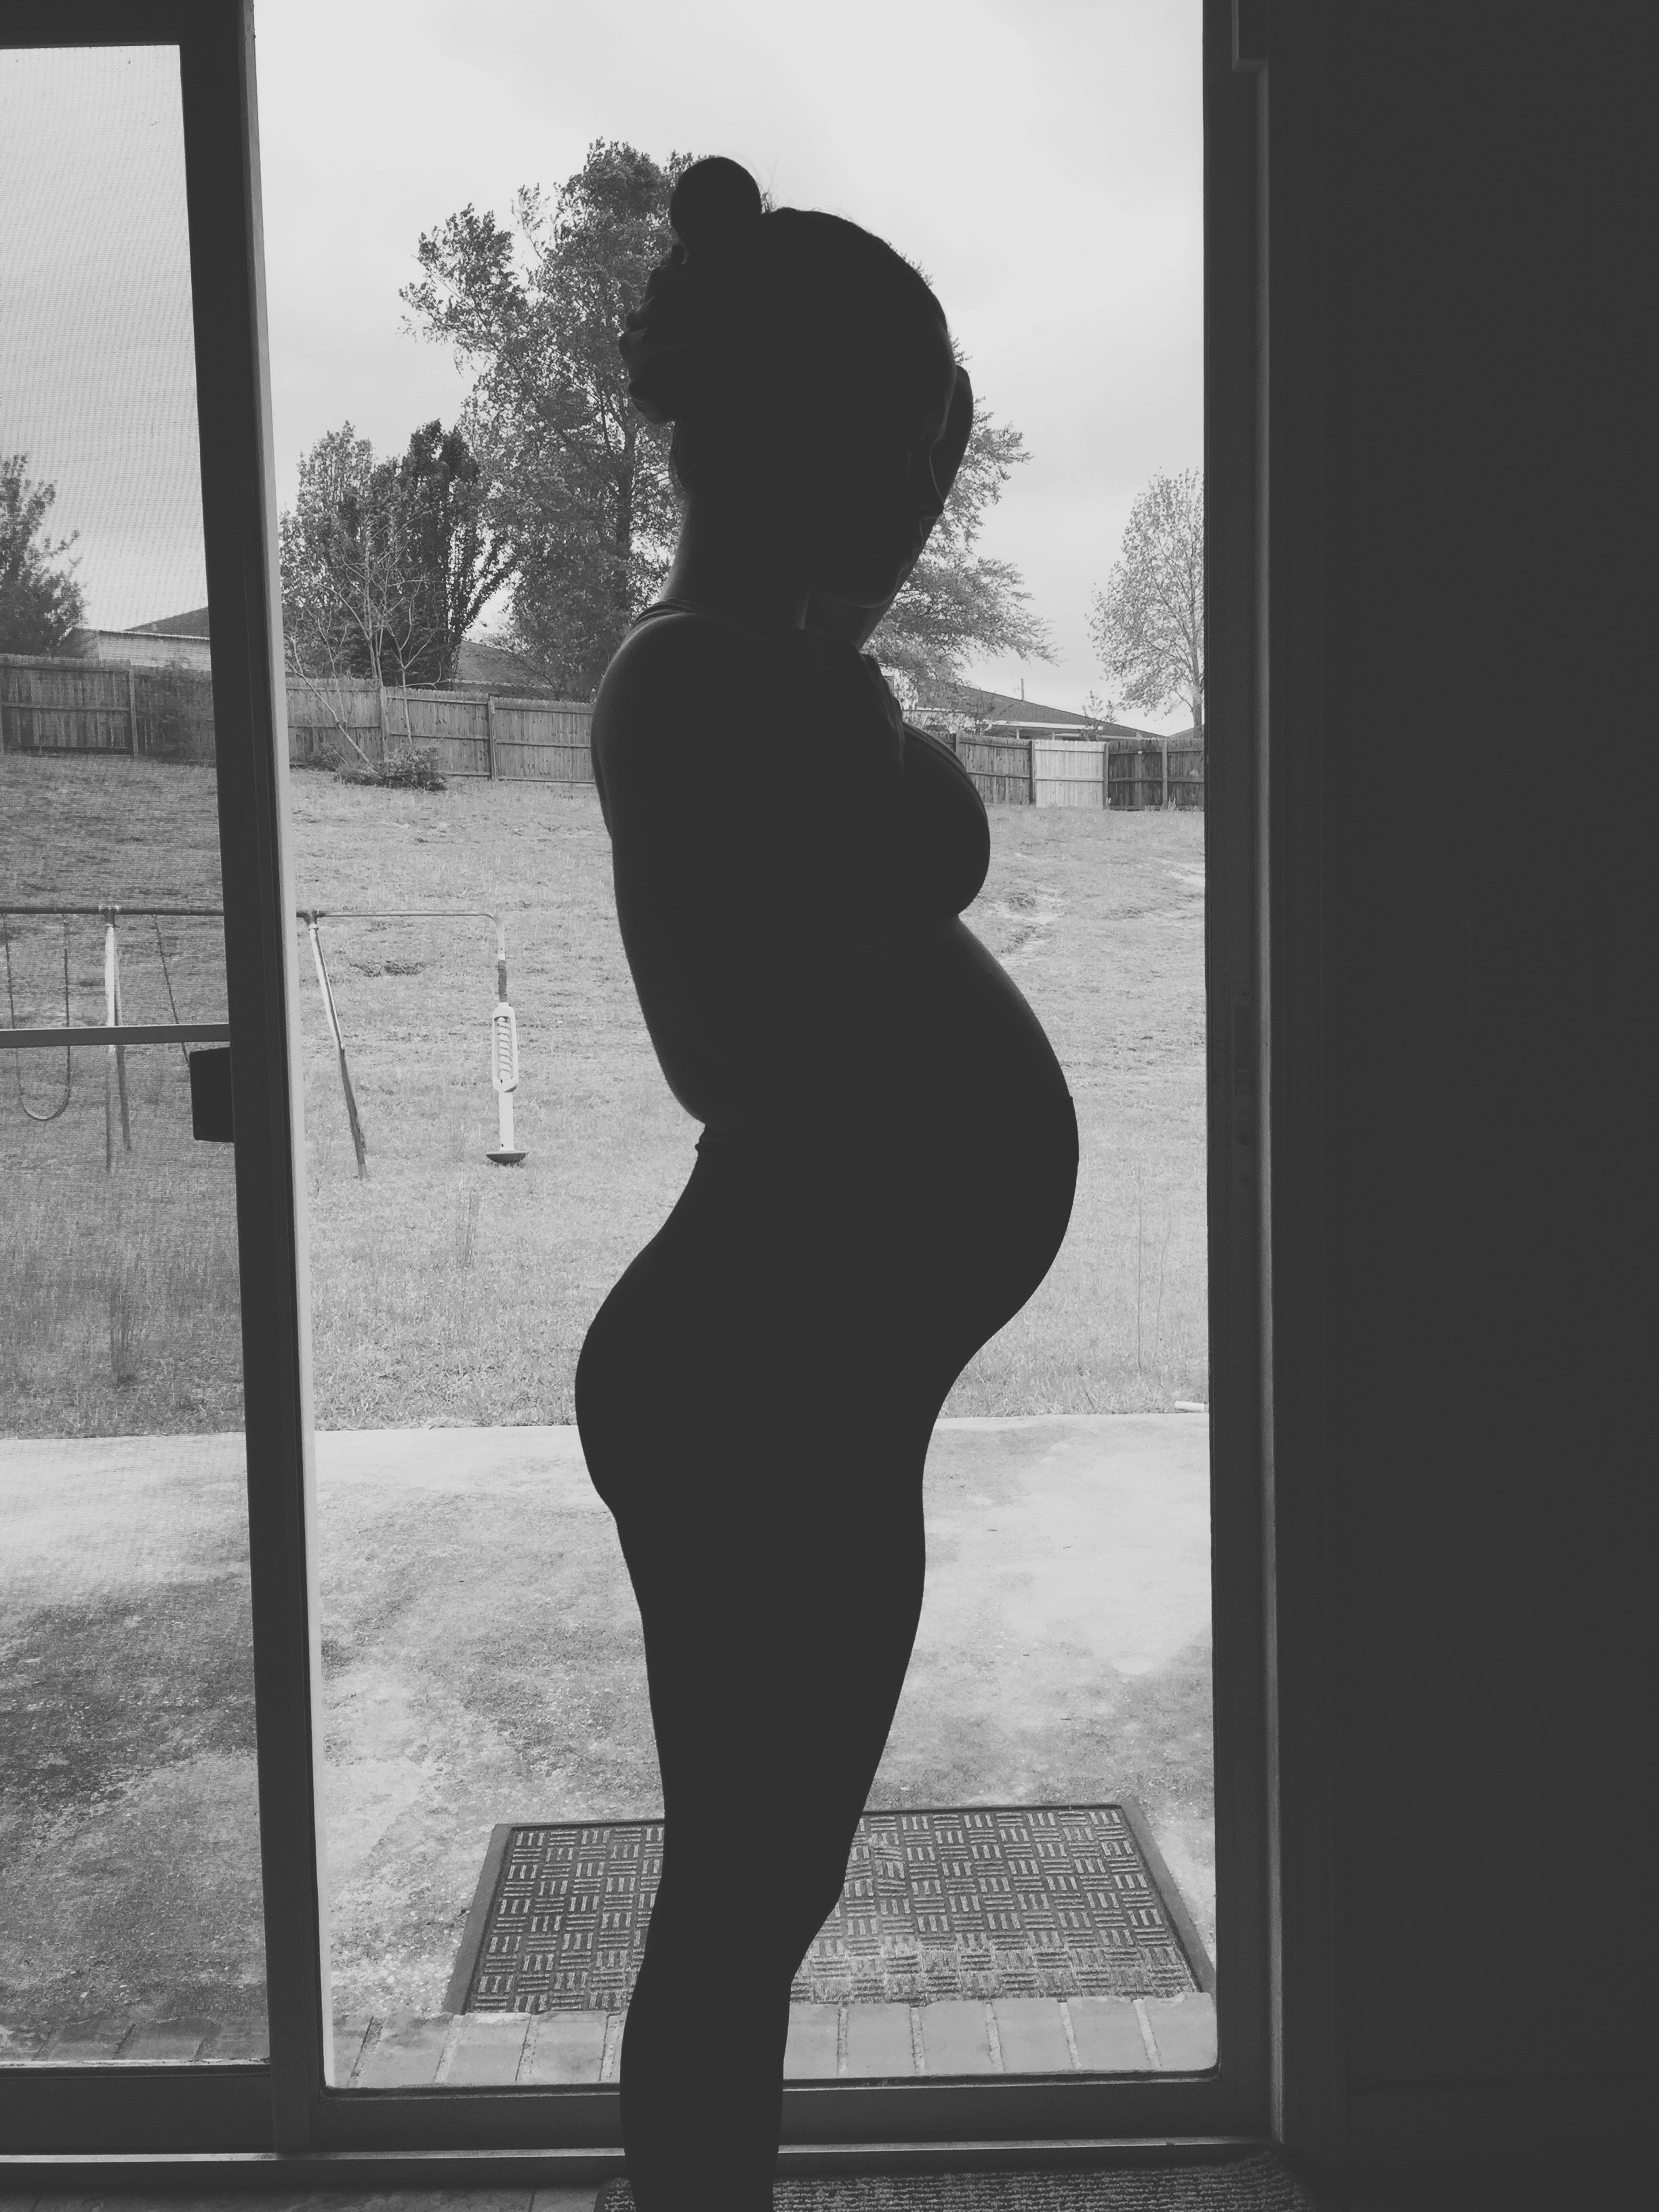
- Have someone take your photo (normally-does not have to be in the app) as you stand in front of a window or door with light coming through.
- When taking the photo, be sure to tell whoever is taking it to tap a corner of the phone and not directly on you: that way it’ll help make you a little darker!
- Next take your basic photo and open it in the Afterlight app.
- Choose a B&W (black and white) filter. I personally chose and love the Raven filter to make it black and white.
- From here you have a few options depending on the look you are wanting for your silhouette. You can increase the exposure to make it a little hazy/dreamy or you can increase the contrast to darken your figure a little more as you can see below:
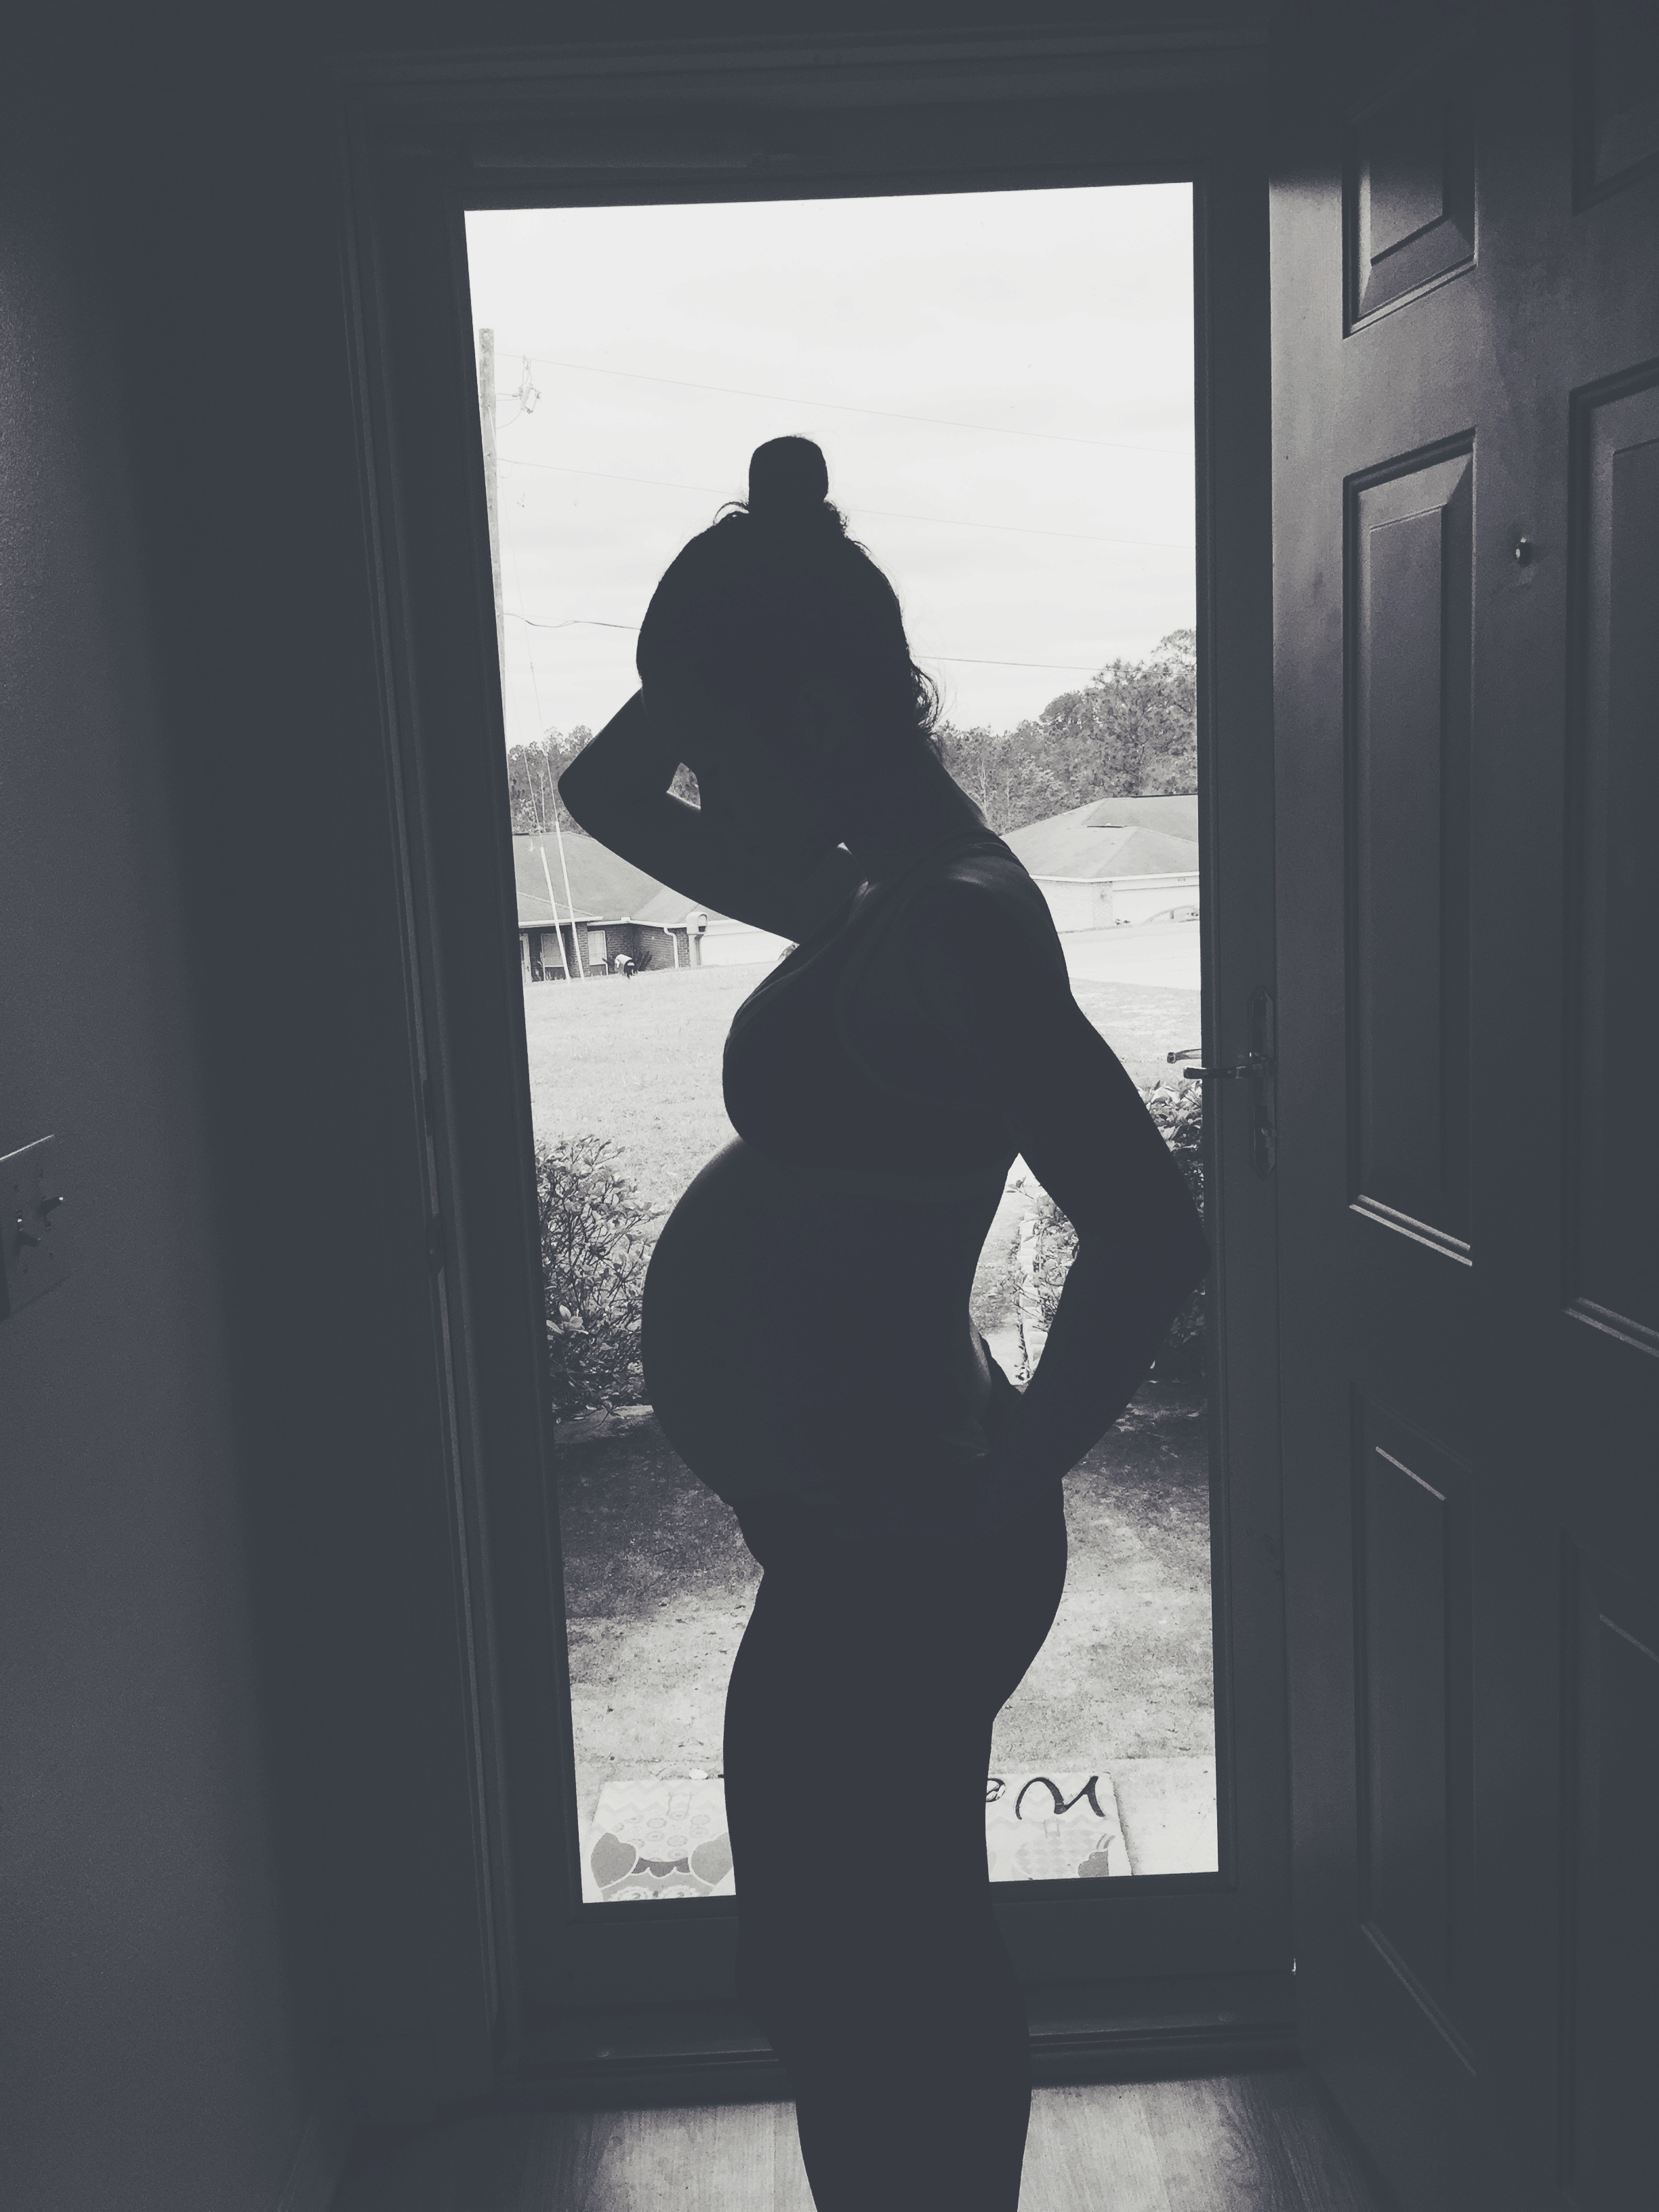
Play around, get creative, and have fun!
Your trainer and friend,

